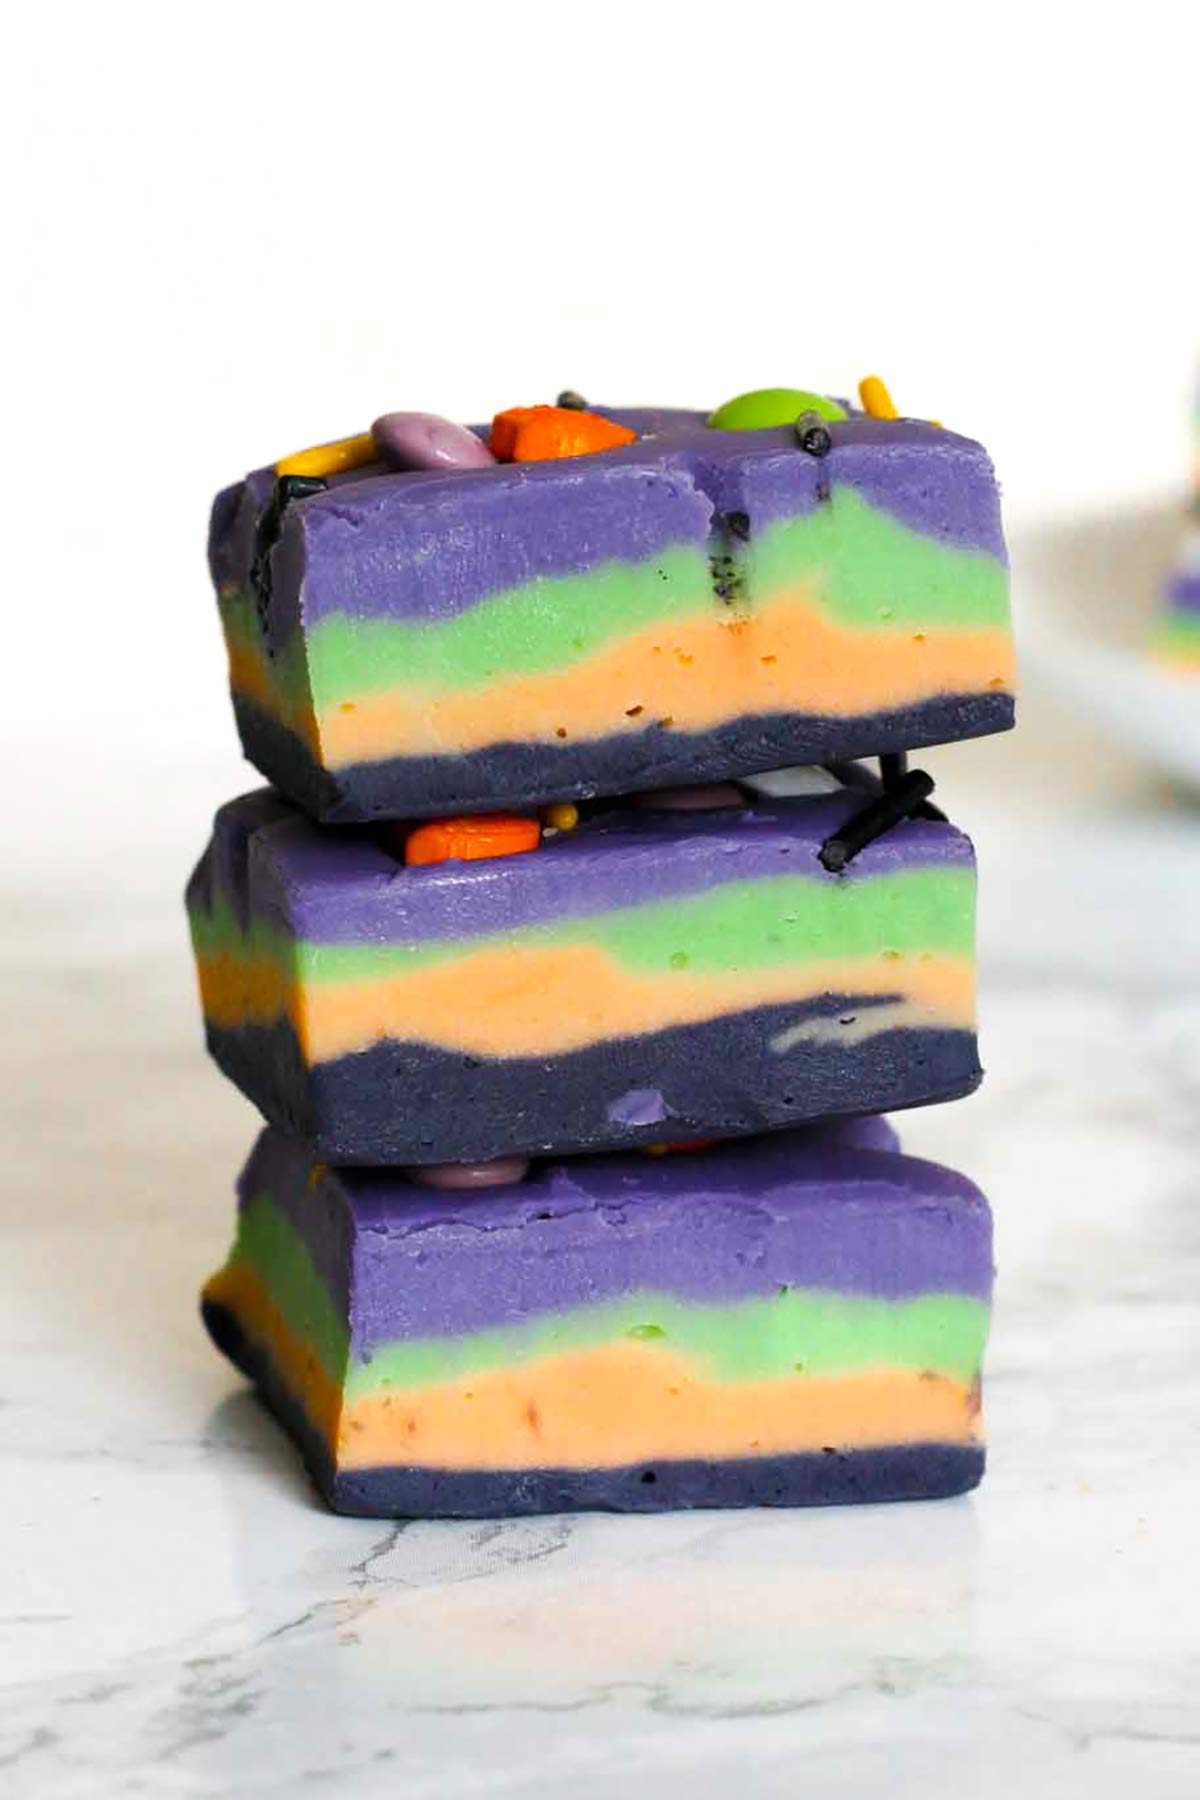
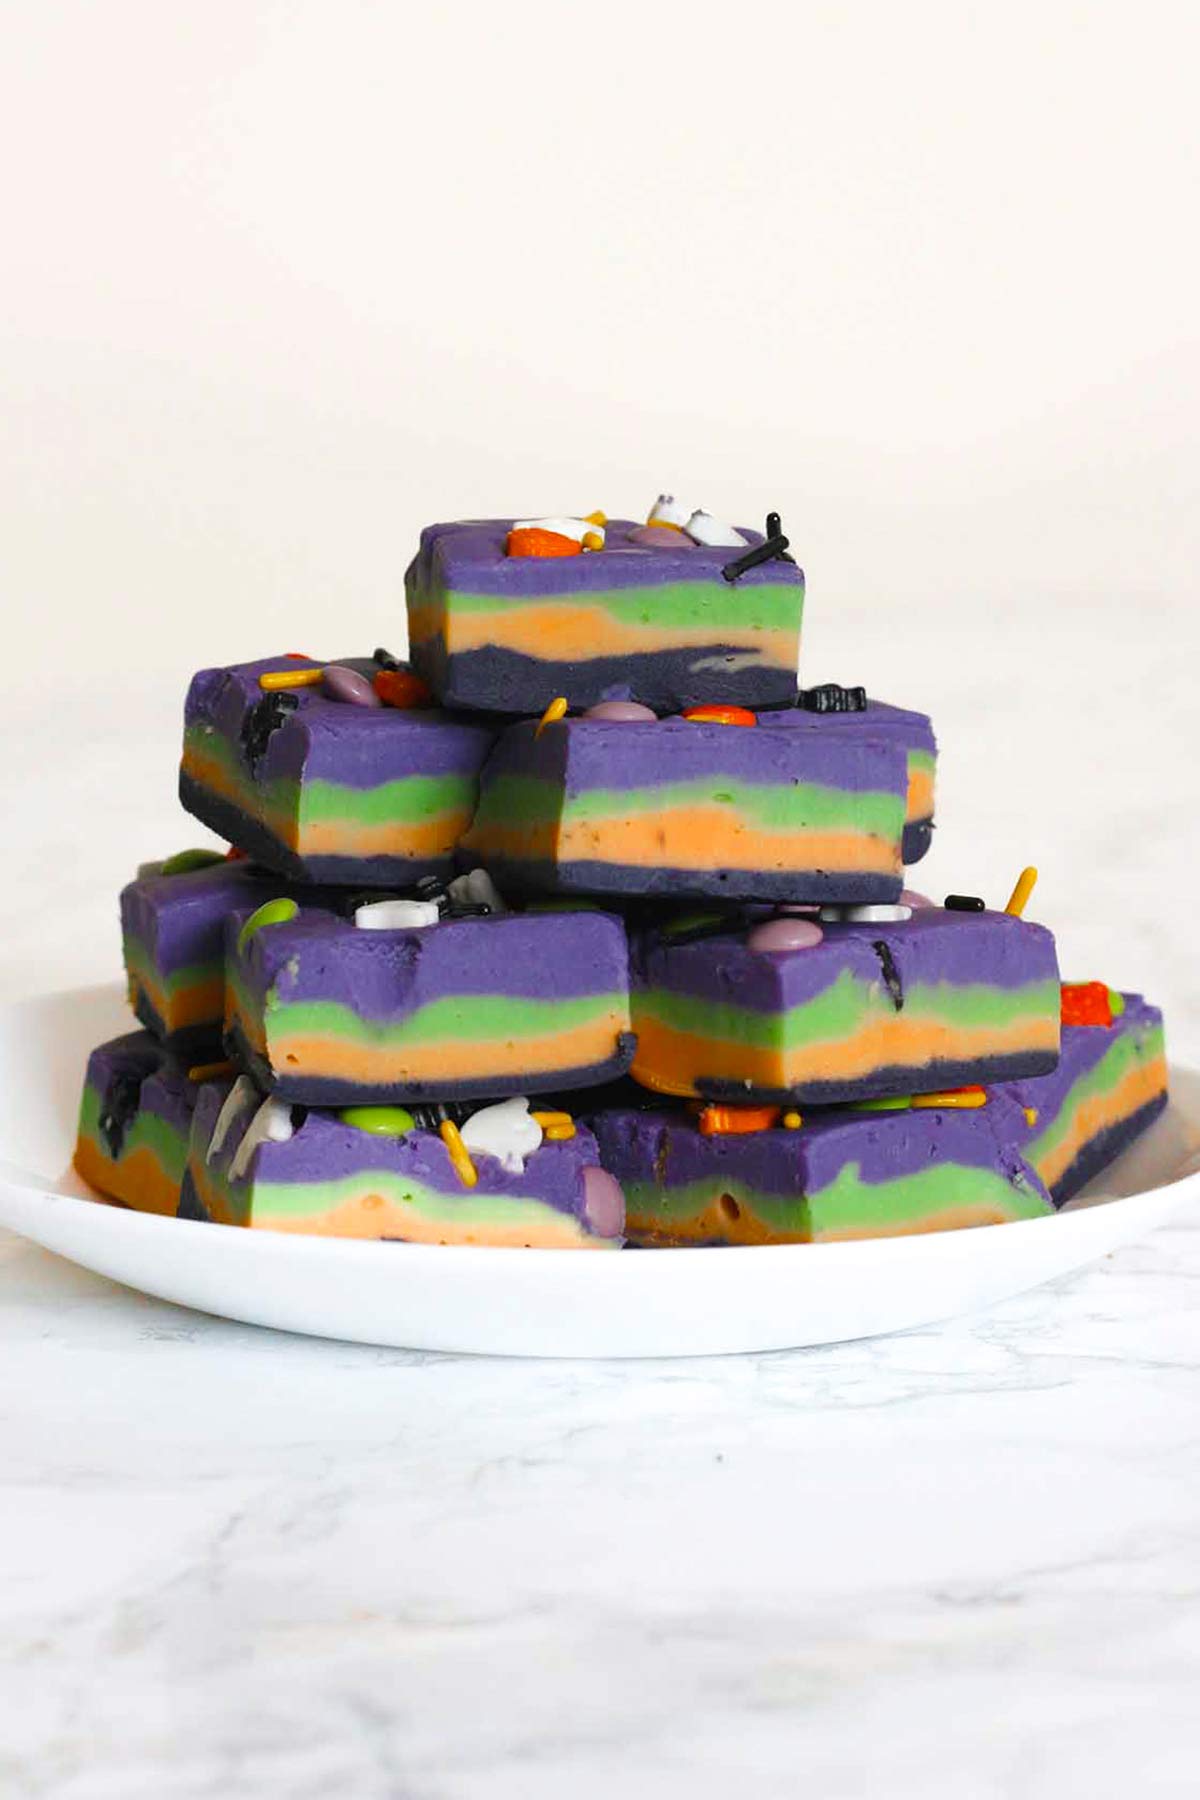
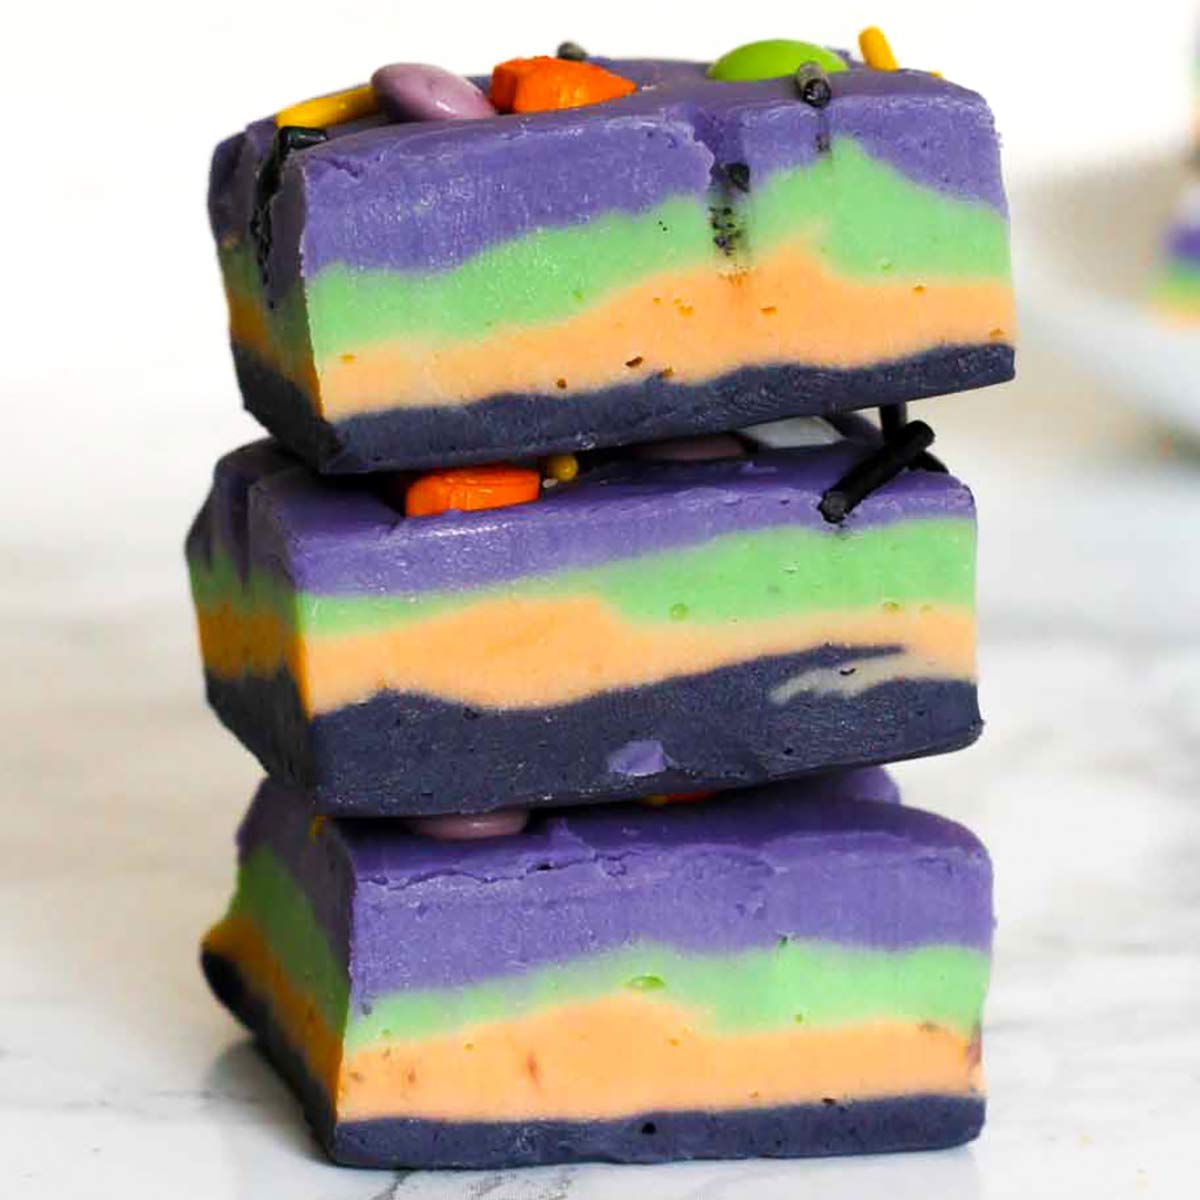
This easy Halloween fudge is perfect for spooky snacking and edible gifting. Layers of black, orange, green and purple fudge are topped with Halloween sprinkles for a delicious treat that's sure to be popular with kids and adults!
Who's excited for Halloween?! When it comes to desserts, there's nothing I love more than a good seasonal theme! October to December are my absolute favourite baking months, starting with Halloween, of course! I have so many spooky treats coming your way, starting with this easy white chocolate Halloween fudge!
This easy fudge recipe is the perfect mix of sweet and spooky. It's made with 4 colourful layers of white chocolate and is topped with festive Halloween sprinkles. I think it'd make an adorable addition to any Halloween party and it's sure to be a hit with kids!
In the post below, I've written detailed equipment and ingredient notes, step-by-step instructions and my top tips to help you get it right on the first try. I hope you find it helpful, but if you'd prefer the bulleted version of the recipe, you can jump straight to the recipe card at the end of the post. Enjoy!
Ingredients
- White chocolate: I recommend using high-quality white chocolate- one that you like the taste of on its own. While cheaper white chocolate will work absolutely fine, I find that the fudge doesn't set quite as firmly, nor does it have a super rich flavour. My favourite white chocolate is Milky Bar.
- Condensed milk: You'll need 1 tin of condensed milk. Don't get this confused with evaporated milk because the two will produce very different results in a fudge recipe!
- Food colouring: I used black, orange, purple and green but feel free to use whichever colours you associate with Halloween. Gel, paste and powder colours will give you a more vibrant colour and a better final texture than liquid colours.
- Vegetable oil: I like to add this alongside my food colouring to prevent the white chocolate from seizing up.
- Halloween sprinkles: Any Halloween sprinkles, cake decorations or candies are ideal for decorating your fudge. I used Cake Decor spooky mix sprinkles.
Equipment
- 8x8-inch tin: This is the best size of tin to use to get nice, thick fudge slices. If you want to use a larger or smaller tin, make sure to adjust the ingredient quantities to fit it.
- Baking paper: To stop the fudge from sticking to the tin. Make sure you cover the edges of the tin fully as it'll be quite tricky to get out if it sticks.
- Saucepan or heatproof bowl: For melting the chocolate and condensed milk together. I recommend using a saucepan over low heat, but if you prefer to do it in the microwave, make sure to use a heatproof bowl and stir the mixture every 20-30 seconds to prevent seizing or burning.
- Utensils: A wooden spoon for mixing the fudge, a toothpick or teaspoon for adding the food colouring, and another teaspoon for the oil. I also find a rubber spatula handy for spreading fudge into the tin because it doesn't stick as much as a wooden spoon does.
How to make Halloween fudge
Ready to get started? Let's get to it!
Step 1: Line an 8x8-inch tin with baking paper. I recommend leaving a bit hanging over each edge so that you can lift the fudge out easily later on.
Step 2: Break 450g of white chocolate into segments and place them into a saucepan along with 1 tin (397g) of condensed milk.
Step 3: Place the saucepan over low heat on the stove and stir gently until the chocolate has fully melted. The mixture should be quite thick and glossy.

Step 4: Remove the pan from the heat and divide the mixture between 4 bowls. You can use a food scale if you want to be super accurate.
Step 5: Add a small amount of vegetable oil and a few drops of food colouring to each bowl. Colour one black, one orange, one green and one purple. It's best to start with a little bit, then add more if you want a more vibrant colour. Adding too much can prevent the fudge from setting properly.
Step 6: Spread the black fudge into your lined tin, followed by the orange, the green, and finally the purple. Top with Halloween sprinkles, then gently press them down into place.


Step 7: Refrigerate your Halloween chocolate fudge for 4 hours or until it's firm to the touch. Then just remove it from the tin, cut it into squares and enjoy!
Top tips
- Keep the heat very low when you're melting the chocolate and condensed milk together. If you want to use the microwave, make sure to take it out every 20 seconds or so and give it a gentle stir.
- Add a small amount of vegetable oil to the fudge at the same time as the food colouring. Some types of food colouring can cause chocolate to seize up, and white chocolate in particular is quite prone to this. Adding around a few drops of oil will help to keep your fudge nice and smooth.
- Instead of layering the different colours of fudge, you can swirl them all together to create a Halloween marble pattern.
- If the fudge starts to set before you've finished layering the colours, just pop the bowl in the microwave for 10-20 seconds to make it smooth again.
FAQs
You can keep this fudge in an airtight container for up to 2 weeks in the fridge. Add small pieces of baking paper in between slices if you want to stack them up without them sticking together.
Yes, for up to 3 months. You can either freeze individual pieces in airtight containers or you can wrap the whole slab up in clingfilm or tinfoil. To defrost, let it sit in the fridge overnight or at room temperature for an hour or two. Do not refreeze.
This can be due to adding too much food colouring (especially if you're using liquids) or not refrigerating it for long enough. For more tips on this, read my full post on Why Condensed Milk Fudge Doesn't Set.
Yes, but you will need to adjust the recipe accordingly, otherwise your fudge will be super thin. You can use my cake pan converter tool to adjust the recipe to fit your tin.

More Halloween desserts
- Mummy puff pastries
- Ghost chocolate strawberries
- Halloween pinwheel cookies
- White chocolate ghosts
- Cookie Monster brownies
- Halloween traybake
- Spooky chocolate bark
I hope you like this easy Halloween fudge recipe! If you make it at home, please let me know what you think by leaving a comment and rating below. Enjoy!
Easy Halloween Fudge
Ingredients
- 450 g White chocolate (16oz)
- 397 g Sweetened condensed milk (14oz)
- Black, orange, green and purple food colouring
- 1 Teaspoon Vegetable oil
- 2-3 Tablespoons Halloween cake sprinkles or candies (I used Cake Decor spooky mix sprinkles)
Instructions
- Line an 8x8-inch tin with baking paper.
- Break the white chocolate into chunks and place it into a saucepan with the condensed milk.
- Place the saucepan over low heat on the stove and stir gently until the chocolate has melted. It should look thick and glossy.
- Divide the fudge mixture equally between 4 bowls. Colour each one with food colouring- one black, one orange, one green and one purple. Add a few drops of the oil to each bowl at the same time to prevent the chocolate from seizing.
- Spread the fudge into your lined tin, one colour at a time. If the fudge starts to thicken as you're working, you can pop it in the microwave for 10-20 seconds to make it smooth again.
- Top with Halloween sprinkles then refrigerate for 4 hours until firm.
- Remove the fudge from the tin, cut it into squares and enjoy!
Video
Notes
- Store in an airtight container in the fridge for up to 2 weeks.


Karen
Tastes good, but I wouldn't call it fudge. Pretty though
Claire Meaddows
Yet to try but fold my go to page
Chloe
Thanks Claire, hope you enjoy 🙂
Jeff
Hi, what kind of white chocolate are we talking about? The ones you find in the candy isle of a grocery store or the bars in the baking isle? And if I use oil based food coloring, do I omit the vegetable oil?
Chloe
Hi Jeff! Either would work, you can make condensed milk fudge with almost any type of chocolate. Yes, you can omit the oil.
Diane
This looks very halloweeny. I am wondering if we could flavor the layers. We are not fans of the taste of white chocolate.
Chloe
Yes, you can add 1/2 a teaspoon of flavour extract to each colour 🙂