These Cookie Monster brownies are rich and fudgy, and make a cute kid's dessert for Halloween. They're surprisingly easy to make and super fun to decorate!

I know it's supposed to be 'spooky season' but who doesn't love a cute monster-themed Halloween treat?! These Cookie Monster brownies are perfect for both kids and adults, and they're sure to impress any Sesame Street fans!
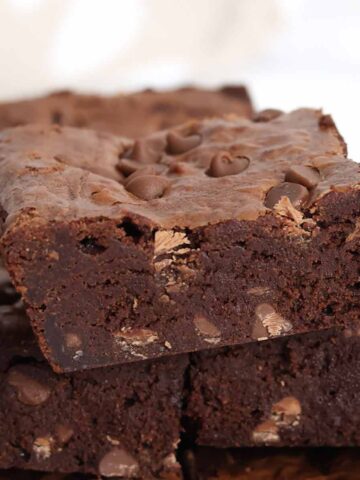
The bottom layer is a rich, fudgy brownie and the top layer is a smooth, creamy white (blue) chocolate fudge. The brownies are also packed full of chocolate chip cookies and Oreos, and topped with some edible eyes to complete the look. They are truly adorable and I can't wait for you to try them!
Below you'll find all the information you need to get this recipe right on the first try, including ingredient notes, top tips and FAQs. I hope you find it useful. And if you like this recipe, don't forget to check out my other cute Halloween treats on your way out: Chocolate-covered strawberry ghosts, Halloween fudge, black and orange pinwheel cookies, and puff pastry Nutella mummies. Enjoy!
Ingredients
Ready to get started? Here's everything you need to make Cookie Monster brownies...
- Dark chocolate: 70% dark chocolate is the best chocolate for brownies. Chocolate with less cocoa tends to have more sugar and will therefore mess with the texture. Believe it or not, it's usually too much sugar, not too much fat, that causes oily brownies.
- Butter: Unsalted or salted, whatever you prefer!
- Eggs: Eggs will act as a binder in this recipe, helping the rest of the ingredients hold together properly.
- Sugar: Caster sugar is best as it'll dissolve into the eggs a lot easier, but regular granulated white sugar will work in a pinch.
- Cocoa powder: This will help to add a deeper chocolate flavour without adding too much extra fat or sugar. Make sure to use unsweetened cocoa powder, not hot chocolate powder- they are not the same thing! (I cover this and more in my brownie tips post.)
- Flour: Plain (all-purpose) flour is the best type to use for this recipe. Self-raising flour contains raising agents which will produce more cakey brownies.
- Chocolate chips: Because you just CAN'T have brownies without chocolate chips! I used milk chocolate chips but you can use semi-sweet or dark if you want to tone down the sweetness a little.
- Condensed milk: This is for the fudge layer. You won't need to use the full tin so you can keep the leftovers to make one of my other condensed milk traybakes.
- White chocolate: Using white chocolate means we can colour it blue to look like Cookie Monster!
- Blue food colouring: I recommend using gel or powder food colouring for best results. Sometimes, liquid colouring can prevent the fudge from setting properly because you need quite a lot of it to get a vibrant colour.
- Candy eyes: Two for each slice. I cut my brownies into 16 slices so I used 32 edible eyes in total.
- Oreos: 14 cookies or 1 pack (154g).
- Chocolate chip cookies: 14 small, crunchy cookies such as Maryland.
Equipment
- 8x8-inch tin: This is the best size to use for thick, ultra-fudgy brownies. You can use my cake pan converter to adjust the recipe if you have a smaller or larger tin.
- Baking paper: To prevent sticking. You can leave a little bit hanging over each edge for easy removal.
- Mixing bowl: A large one, for making the brownie batter.
- Heatproof bowl or saucepan: For melting the butter and chocolate, and also for making the fudge layer.
- Electric whisk: This is a must for whisking the sugar and eggs together! A stand mixer will also do the job.
- Utensils: A wooden spoon, a sharp knife and a tablespoon. A silicone spatula is also super handy to have for spreading the fudge into the tin.

How to make Cookie Monster brownies
Step 1: Preheat your oven to 160°C (140°C for fan ovens) and line an 8x8-inch tin with baking paper.
Step 2: Next, melt 200g of 70% dark chocolate and 180g of butter in a saucepan over low heat. Once it's melted, let it sit for about 10 minutes until it cools down a bit. This will stop the heat from scrambling the eggs later.
Step 3: In a large bowl, mix together 250g caster sugar and 3 eggs using an electric whisk. Keep going for a few minutes until the mixture becomes pale and silky.

Step 4: Pour the cooled chocolate mixture into the bowl and fold it into the eggy mixture. Try to be gentle so you don't knock too much air out.
Step 5: Add 100g of plain flour and 1 tablespoon of cocoa powder and mix well.
Step 6: Crush 7 Oreos and 7 chocolate chip cookies into small chunks. Stir them into the brownie batter along with 100g of milk chocolate chips.

Step 7: Transfer the mixture to your lined tin and spread it evenly all the way to the edges. Bake for 35-40 minutes until a crust has formed all over the top. Then set it aside to cool (in the tin) while you prepare the fudge.

Blue fudge topping
Step 1: Once your brownie has cooled slightly, prepare the fudge topping by melting 250g of white chocolate with 250g of condensed milk over low heat.
Step 2: Remove the fudge from the heat and stir in some blue food colouring. I recommend starting with a little bit and adding more if you need it.

Step 3: Crush 3 chocolate chip cookies and 3 Oreos into chunks and stir them into the fudge.
Step 4: Spread the blue fudge over your brownies. Top with more cookie pieces and some edible eyes. I usually cut my brownies into 16 pieces so I used 32 eyes in total- 2 for each piece.

Step 5: Pop the brownies into the fridge to chill overnight or for at least 6 hours. This will not only allow the fudge layer to set but it'll make the brownies SUPER fudgy and chewy. Once they're set, cut them into squares and enjoy!
Top tips
- Whisk the eggs and sugar together using an electric whisk. The paler and silkier it is, the better the brownies will turn out. This also helps with the shiny crust!
- Chill your brownies overnight for the best fudgy texture. If you cut them too soon, they're likely to fall apart as the fat is what helps to hold them together.
- Use a warm knife to cut the brownies into slices. You can do this by running your knife under boiling water and then drying it thoroughly with a kitchen cloth before cutting. Repeat in between each slice.
- Paste or gel food colouring will give better results than liquid food colouring.
- When adding the edible eyes, try to imagine where you'll be cutting the brownie as you're placing them. This will help ensure you have two on each slice later on.
FAQs
If you keep them in an airtight container, they'll last for up to 3 days in the fridge. After this time, the cookies tend to go a little soft.
Yes, you can freeze these brownies for up to 1 month. You can either freeze the whole brownie slab wrapped in clingfilm or you can put individual slices into airtight containers. If you want to prevent them from sticking together in the freezer, use small pieces of baking paper to separate them. Check out my brownie storing guide for more freezing tips.
I've written a whole post about why condensed milk fudge won't set but it's usually down to using incorrect ingredients or boiling the mixture. You can also learn more about baking with evaporated vs condensed milk here.
If fudge on top of brownies sounds a little too indulgent for you, you can swap it out for blue buttercream or a simple glace icing.

More brownie recipes
- Bounty brownies
- Peanut butter pretzel brownies
- Condensed milk brownies
- Mars Bar brownies
- After Eight brownies
- White chocolate strawberry brownies
I hope you like these Cookie Monster brownies! If you try them at home, please leave a comment and rating below to let me know what you think. Enjoy!

BEST Cookie Monster Brownies
Ingredients
Brownies:
- 200 g 70% Cocoa dark chocolate
- 180 g Butter
- 250 g Caster sugar
- 3 Medium Eggs
- 100 g Plain flour
- 1 Tablespoon Cocoa powder
- 100 g Milk chocolate chips
- 7 Crushed Chocolate chip cookies
- 7 Crushed Oreos
Fudge layer:
- 250 g Condensed milk
- 250 g White chocolate
- Few Drops Blue food colouring (add a little bit at a time until you get the colour you want)
- 3 Crushed Chocolate chip cookies
- 3 Crushed Oreos
Decoration:
- 4 Crushed Chocolate chip cookies
- 4 Crushed Oreos
- 32 Candy eyes
Instructions
Brownies:
- Preheat your oven to 160℃ (140℃ for fan ovens) then line an 8x8-inch tin with baking paper.
- Melt the dark chocolate and the butter together over low heat then set aside to cool to room temperature.
- In a large bowl, whisk together the sugar and eggs using an electric whisk. Keep whisking for a few minutes until the mixture becomes super pale.
- Gently fold the melted chocolate mixture into the egg mixture. Then add the flour and the cocoa powder and mix gently until well combined.
- Fold in the chocolate chips and crushed cookies/Oreos.
- Spread the brownie batter evenly into your lined tin and bake for 35-40 minutes, until they've risen and have a shiny crust on top. Set them aside to cool while you make the fudge.
Fudge layer:
- Prepare the fudge by melting the condensed milk and white chocolate together in a saucepan over low heat.
- Once melted, remove it from the heat and stir in the blue food colouring. Then mix in the crushed cookies/Oreos.
- Spoon the fudge mixture on top of the brownies and spread it out evenly. Top with additional cookie pieces and edible eyes.
- Place the brownies into the fridge overnight to set, then cut them into squares and enjoy!
Video
Notes
- Store in an airtight container in the fridge for up to 3 days. They'll last for up to 1 week if you don't add any cookie pieces on top.


Leave a Reply