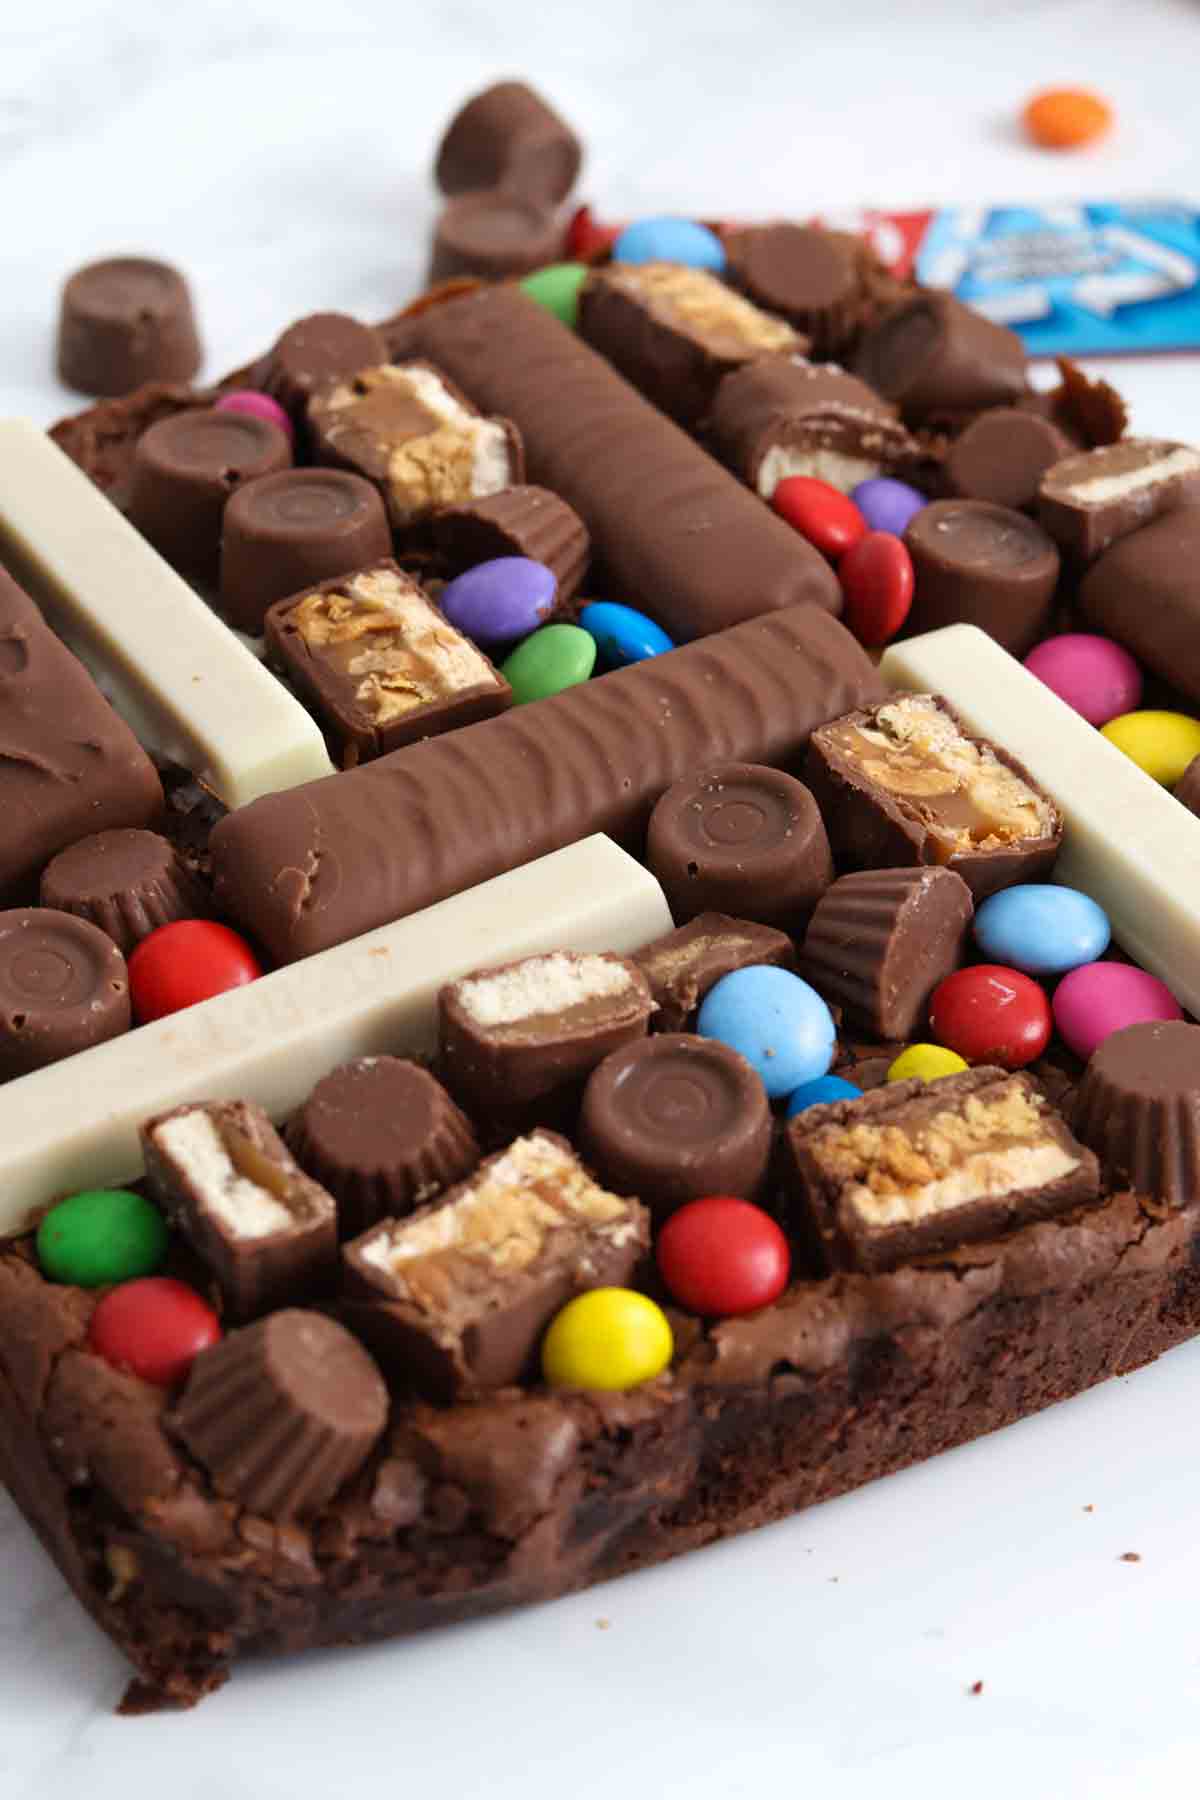
Got loads of trick-or-treating leftovers? Use them up in a batch of my delicious Halloween candy brownies! Rich, fudgy brownies filled and topped with KitKats, peanut butter cups, M&Ms and lots more!

You know how you always end up with way more Halloween candy than you can eat? Rather than letting it sit around, melt, or even worse, *expire*, I encourage you to make a batch of my leftover Halloween candy brownies! (And if you've never made brownies from scratch before, check out my Ultimate Brownie Guide for in-depth tips and tricks.) They will seriously change your life!
Whether you've got full-size bars, mini treats, or bits of candy from trick-or-treaters, let me show you how to turn your stash into something even more delicious and shareable!
Grab these ingredients
Here's everything you'll need to make this recipe:
- Dark chocolate: Use a good quality chocolate with roughly 70% cocoa solids to get the best texture and sweetness level. Check out my post on the best chocolate for brownies if you'd like to read more into this.
- Butter: Salted is my favourite to use for this recipe as it helps balance out the sweetness a little.
- Caster sugar: Also known as superfine sugar. This dissolves better into the eggs which will create a better brownie texture and shinier top.
- Eggs: To bind and give the mixture a slight lift while still keeping them fudgy.
- Flour: Plain flour (all-purpose) is best to use for brownies, unless you're after a cakey texture. Since the amount of flour we use is quite low, this can be swapped for a gluten-free flour blend if you like. One with xanthan gum in it will work best.
- Cocoa powder: To intensify the chocolate flavour.
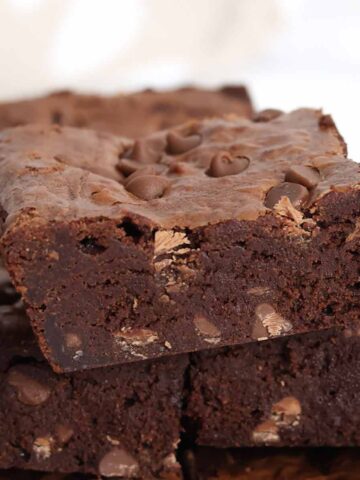
- White chocolate chips: Or milk chocolate chips, for extra fudginess in the brownie batter.
- Halloween candy: This is where you can get creative. I used peanut butter cups and chopped Snickers in my brownie batter, then a variety of other candies on top: White KitKats, M&Ms, Rolos, Twix, and more peanut butter cups and Snickers. Feel free to use whatever you fancy or have leftover. The different textures and flavours of each candy taste so delicious together!
Kitchen gear
- 8x8-inch tin: This size is what I tested my recipe with, so use this to ensure the correct baking time and temperature. If you want to use a larger tin, set your temperature to 180°C (350°F) and use my cake pan converter to increase the ingredient quantities accordingly.
- Baking paper: To prevent sticking. Check out my post on how to line a brownie tin if you'd like a tutorial.
- Electric whisk: To whisk the sugar and eggs together quickly without effort. A stand mixer is also fine to use.
- Saucepan: Or a heatproof bowl, to melt the chocolate and butter together.
- Utensils: You'll need a wooden spoon for mixing, a tablespoon for measuring, a sharp knife for slicing the brownies, and scissors to cut your baking paper.
How to make Halloween candy brownies step-by-step
Step 1: Line an 8x8-inch tin with baking paper, leaving a bit hanging over the edges for easy removal later. Then preheat your oven to 160°C/320°F (or 140°C/285°F for fan and convection ovens).
Step 2: Now, melt your butter and chocolate together (you'll need 180g of butter and 200g of 70% dark chocolate). You can either melt it gently over low heat on the stove in a saucepan or use a heatproof bowl in the microwave. If you're using the microwave, make sure to stop and stir the mixture every 30 seconds to prevent burning or splitting.
Step 3: Add 3 medium eggs and 250g of caster sugar to a large bowl. Use an electric hand whisk to whisk them together. Keep going for a couple of minutes, until the mixture becomes pale and voluminous. Don't skip this step, as it helps to prevent oily brownies!

Step 4: Pour the melted chocolate/butter mixture into the bowl with the eggs and sugar. Fold them together gently, then stir in 100g of plain flour and 1 tablespoon of cocoa powder. You should have a smooth, glossy batter.
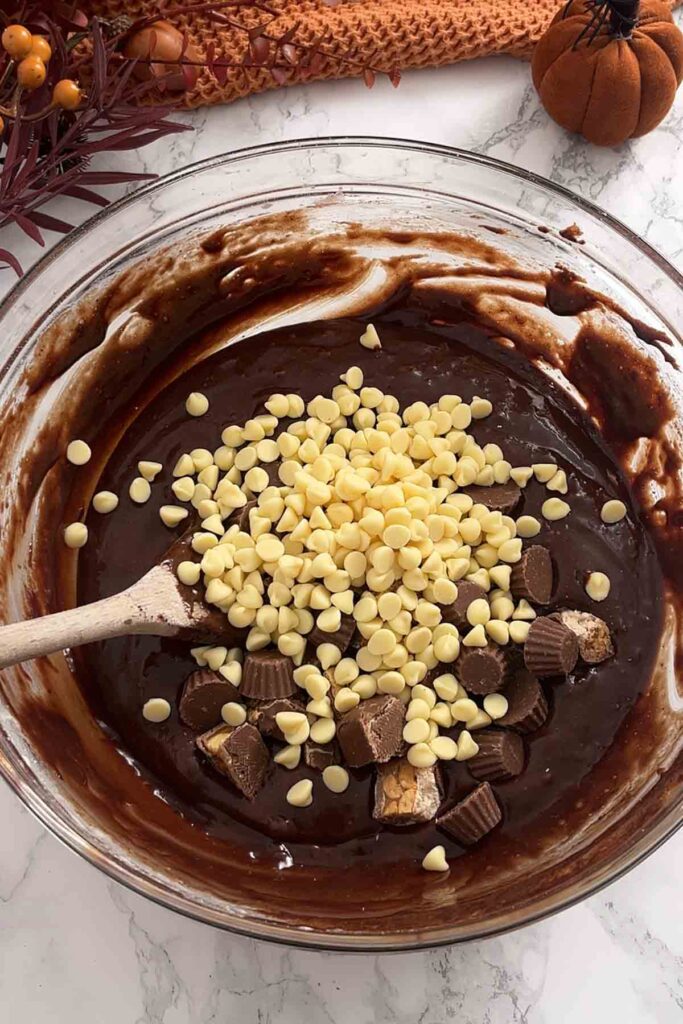
Step 5: Add 100g of white chocolate chips and a handful of chopped Halloween candy of choice, then stir them into the batter. Transfer it to your lined tin and spread it out evenly.

Step 6: Bake for 30-35 minutes, until the brownie has risen and has a shiny crust on top.

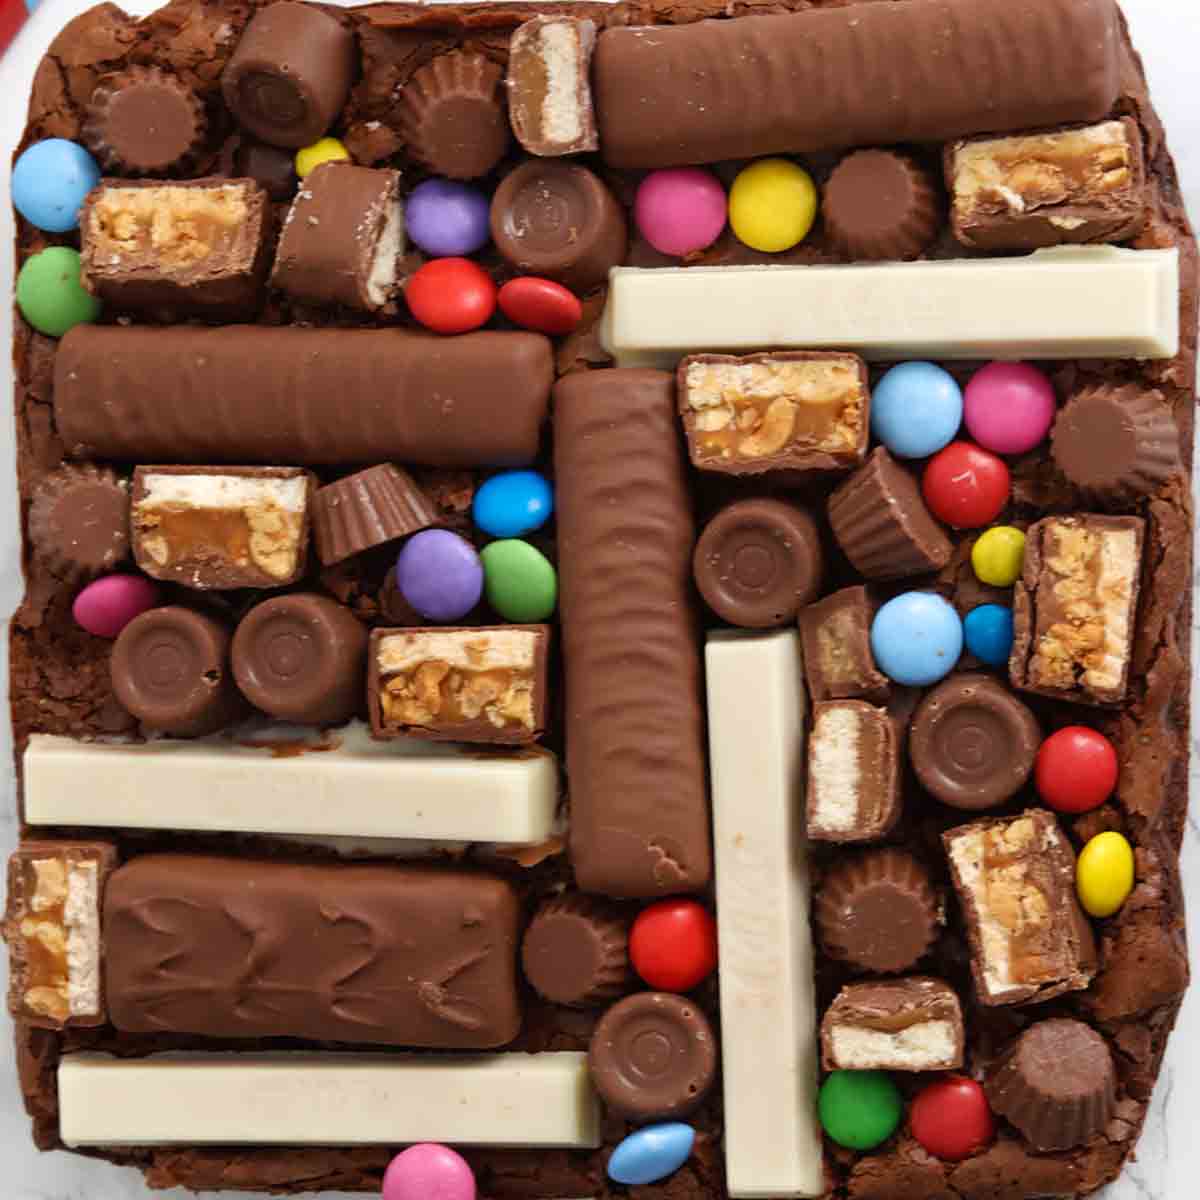
Step 7: Let the brownie sit at room temperature for 20 minutes to cool slightly, or leave it until it's warm (not hot) to the touch. Then start gently pressing your leftover Halloween candy on top, cutting pieces as needed to cover the entire brownie. The residual heat will melt the chocolate slightly, helping it to stick once cool.

Step 8: Let the brownie cool to room temperature, lightly cover it then place it in the fridge overnight to set. This will make the centre super firm and fudgy.
Step 9: Once set, remove the brownie from the tin and cut it into squares. I usually cut mine into 16 slices as these are quite rich (especially with all the candy), but you can make your slices bigger if you prefer.
My top tips
- Place M&Ms close to or on top of the other chocolates to help them stick. Because they have a hard shell, they won't stick as well to the brownie with heat alone.
- These brownies are quite firm when they first come out of the fridge but a warm knife can help you make neater slices. To warm your knife, run it under boiling water and wipe it dry before each cut.
- If you're short on time, you can set the brownies in the freezer for about 3-4 hours instead of overnight in the fridge. Whatever you do, don't skip chilling completely, as this will prevent the brownies from cutting cleanly.
- Check out my top brownie baking tips post for perfect results every time!
FAQs
Yes but you will need to cover the slab with melted chocolate first, otherwise they won't stick properly. This is a bit more time-consuming but can turn out neater as the chocolates won't melt at all.
These will keep well in an airtight container in the fridge for up to 1 week. In my experience as a fudgy brownie lover, the texture gets even better the longer they stay in the fridge! Check out my brownie storing guide for more info.
Yes, you can freeze these brownies for up to 3 months. I'd recommend setting and cutting them into squares first, then placing them in an airtight container. To defrost, just transfer them to the fridge overnight or let them sit out at room temperature for an hour or two. Do not refreeze.

More leftover Halloween candy desserts:
- Twix blondies
- Reese's Peanut Butter Cup brownies
- M&M fudge
- Rolo rocky road
- No-bake Snickers tray bake
- Skittles cookies
I hope you like my leftover Halloween candy brownies! Make sure to leave a rating and comment below to let me know if you try them at home. Enjoy!
Halloween Candy Brownies
Ingredients
- 200 g 70% Dark chocolate (7oz)
- 180 g Butter (¾ cup)
- 250 g Caster sugar (1+¼ cup)
- 3 Medium Eggs
- 100 g Plain flour (11 tablespoons)
- 1 Tablespoon Cocoa powder
- 100 g White chocolate chips (~⅔ cup)
- 2 Handfuls Halloween candy (I used peanut butter cups and chopped Snickers bars)
Topping
- Assorted leftover Halloween candy (M&Ms, Twix, KitKats, Snickers, peanut butter cups, Rolos etc)
Instructions
- Preheat your oven to 160°C/320°F (or 140°C/285°F for fan and convection ovens). Line an 8x8-inch tin with baking paper.
- Melt the dark chocolate and the butter together over low heat on the stove then set aside to cool for around 5 minutes.
- To a large bowl, add the sugar, eggs and vanilla extract. Use an electric whisk to mix it up until it becomes pale and frothy.
- Add the melted chocolate mixture into the bowl with the sugar and eggs. Gently fold them together with a wooden spoon or spatula.
- Stir in the flour and cocoa powder to make a glossy batter, then add the chocolate chips and your handfuls of Halloween candy.
- Transfer the mixture to your lined tin and bake for around 25-30 minutes, until the brownie has risen and is pulling away from the tin slightly.
- Let the brownie cool for around 20 minutes (or until it's warm to the touch, not hot) then gently press in your Halloween candy. The residual heat will melt the chocolate slightly and help it stick once cool.
- Let your brownie cool to room temperature then transfer it to the fridge overnight to set.
- Once set, remove from the tin, cut into squares and enjoy!
Video
Notes
- Store leftovers in an airtight container in the fridge for up to 1 week.
- Design inspired by Sarah's Day Off.


Leave a Reply