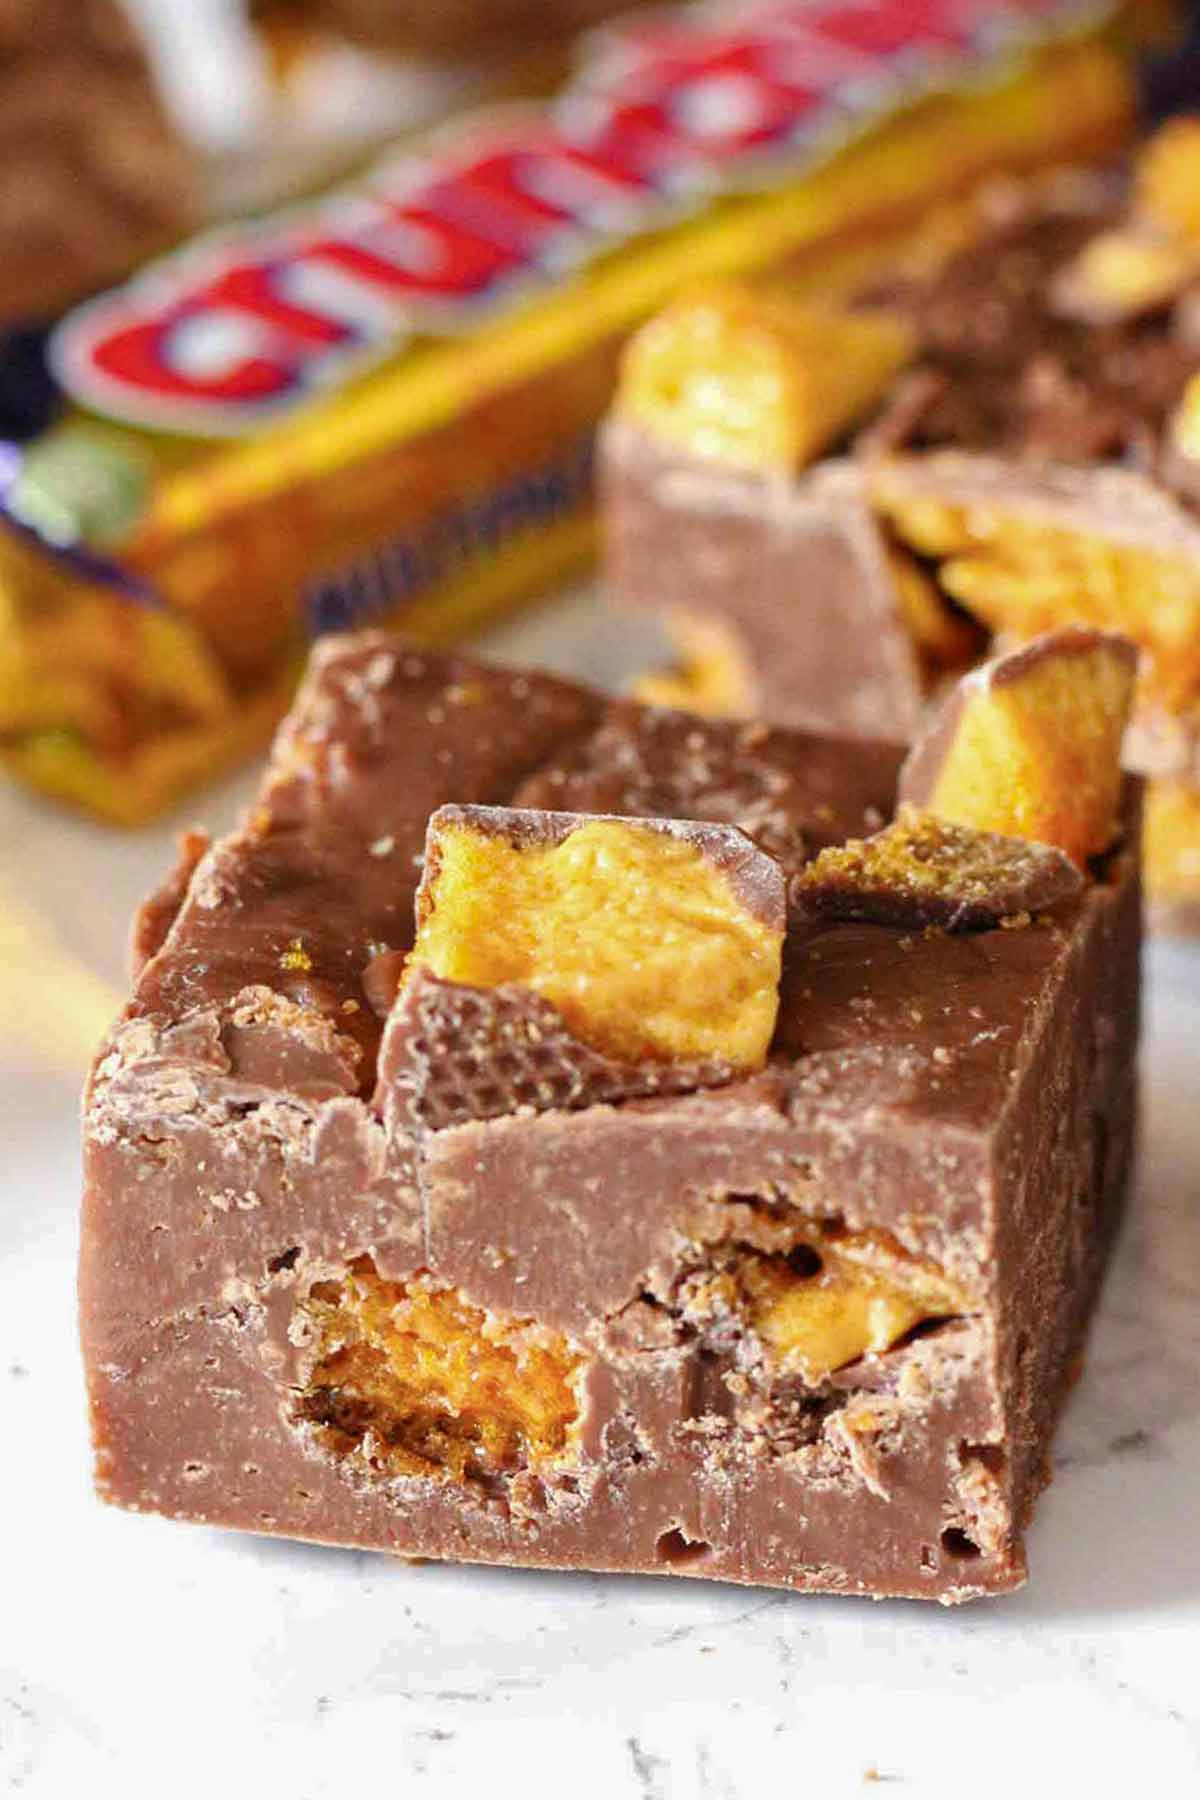
This Cadbury Crunchie fudge is a chocolate lover's dream! Made with just 3 simple ingredients, you can make it in the microwave, over the stove or even in the slow cooker. This fudge is soft, indulgent and packed full of chocolate honeycomb pieces!
If you like chocolate then you're going to absolutely love this Cadbury Crunchie fudge! I've been slowly adding to my collection of condensed milk fudge recipes recently, making treats such as M&M fudge, Lotus Biscoff fudge, Smarties fudge and funfetti fudge. Since Crunchies are often overlooked in the baking world, I thought I'd show them some love and add them to this fudge!
This recipe is quick to make with only 3 ingredients and if you've never made it before, you won't believe how easy it is! It's rich and fudgy, and it has pieces of sweet honeycomb in every bite.
Whether you're looking for a quick dessert to share with work colleagues, an easy sweet to take to a party, or you simply want to treat yourself to some fudge, this is the recipe for you! Let me show you how to make it...
Ingredients
Here's everything you'll need for this recipe:
- Milk chocolate: I always use milk chocolate for my fudge because it pairs nicely with the milk chocolate on the Crunchies, but you can use semi-sweet chocolate if you prefer. Any chocolate will work fine, even the super cheap kind, as long as you melt it gently enough.
- Condensed milk: Condensed milk is the other main ingredient for chocolate fudge. You'll need 397g of it (a standard-sized tin) or 14oz if you're in the US. Before you begin, learn about the difference between evaporated milk and condensed milk.
- Cadbury Crunchie bars: The star of this recipe, Cadbury Crunchies! I used a total of 4 bars, putting half of them inside the fudge mixture and half on top once it was in the tin.
Equipment
- 8x8-inch tin: I like using this tin for my fudge recipes and find it to be the perfect size. It makes the fudge just the right height, and you can cut it into around 30 small pieces or 12 very large ones. You can use a larger tin to make more pieces, using my cake pan converter to adjust the ingredient quantities.
- Baking paper: If you don't want your fudge to stick to the tin, make sure to use baking or parchment paper. Otherwise, you'll have quite a hard time trying to cut it out and you may cause damage to the tin (if you can't tell, I'm speaking from experience).
- Heatproof bowl: Make sure you use a heatproof bowl when melting the ingredients. You don't want your bowls melting or cracking in the middle of fudge-making! Avoid plastic and instead aim to use bowls made from glass or stainless steel that are marked as microwave-safe.
- Saucepan: You'll need a saucepan to sit your bowl on if you're using the double boiler option to heat the chocolate and condensed milk. The bowl should fit snugly on top of the saucepan without touching the water, but with enough space in there for the steam to rise and heat the mixture.
- Wooden spoon: A wooden spoon is the perfect utensil for mixing the honeycomb pieces into the fudge mixture.
- Rubber spatula: I used to find it very difficult to spread fudge around in the tin until I discovered how well a rubber spatula works. Using a rubber/silicone spatula allows you to simply pat the fudge down into place without the sticking or dragging that you get with wooden or metal spoons.
- Sharp knife: Last but not least, you will need a knife that's sharp enough to cut into your fudge once it's set. You can cut it into cubes or slices- whatever suits you best.

How to make Cadbury Crunchie fudge
Step 1: Line an 8-inch square tin with baking paper. I recommend doing this in advance because the fudge can start setting quite quickly once it's removed from the heat.
Step 2: Chop 4 multipack-size Cadbury Crunchie bars into rough chunks (128g total weight). Set aside for now.
Step 3: Add 450g of milk chocolate and one 397g tin of sweetened condensed milk to a heatproof bowl.
Step 4: Place the bowl over a saucepan of gently simmering water on the stove to create a double boiler. Keep the heat on low.
Step 5: Gently stir the mixture until the chocolate has melted fully. It should look thick and glossy.
Step 6: Remove the fudge from the heat and stir in half of the chopped Crunchie bars.

Step 7: Transfer the honeycomb fudge mixture to your lined tin and press it neatly into place using a rubber spatula. Top with the remaining Crunchie pieces.

Step 8: Refrigerate your Crunchie fudge for 2 hours until firm to the touch. If it's not setting, check out my fudge troubleshooting post.
Step 9: Remove it from the tin using the baking paper, cut it into squares and enjoy!
Top tips
- You can swap milk chocolate for semi-sweet or dark chocolate in equal amounts. Use whatever you prefer!
- Use a double boiler to heat the ingredients for best results and to minimise the risk of burning.
- If you struggle to cut into the fudge after it's set, use a warm knife. You can warm your knife up by running it under boiling water- make sure to dry it thoroughly before slicing.
FAQs
Yes, Cadbury Crunchies are simply milk chocolate-covered honeycomb bars. Whether you want to call this chocolate honeycomb fudge or Crunchie fudge, it's technically the same thing!
It should last for up to 2 weeks if you keep it in an airtight container in the fridge. It can also be stored at room temperature but it won't last quite as long this way.
Yes, for up to 2 months. You can either freeze the whole slab wrapped in clingfilm or you can put slices into freezer bags or airtight containers. When you're ready to defrost it, let it sit out at room temperature for an hour or so. Do not refreeze.

More Crunchie desserts
I hope you like my honeycomb Crunchie fudge recipe! If you make it at home, please let me know how it goes by leaving a comment below. Enjoy!

Cadbury Crunchie Fudge (Honeycomb Fudge)
Ingredients
- 450 g Milk chocolate (16oz)
- 397 g Sweetened condensed milk (14oz)
- 4 Crunchie bars, roughly chopped (multipack-sized, 128g/4.5oz total)
Instructions
- Line an 8x8-inch tin with baking paper, leaving a little bit hanging over the edges for easy removal later.
- Melt the chocolate and condensed milk together. You can do this over low heat on the stove, in a double boiler, or in short bursts in the microwave in a heatproof bowl. The mixture should be thick and glossy.
- Remove from the heat and quickly stir in half of the Crunchie bar pieces. Transfer the fudge mixture to your lined tin and press it evenly into place.
- Add the rest of the Crunchie pieces on top of the fudge and gently press them down to help them stick.
- Refrigerate your Crunchie fudge for 1-2 hours until firm, then cut into squares and enjoy.
Video
Notes
- Store in an airtight container for up to 2 weeks.


Leave a Reply