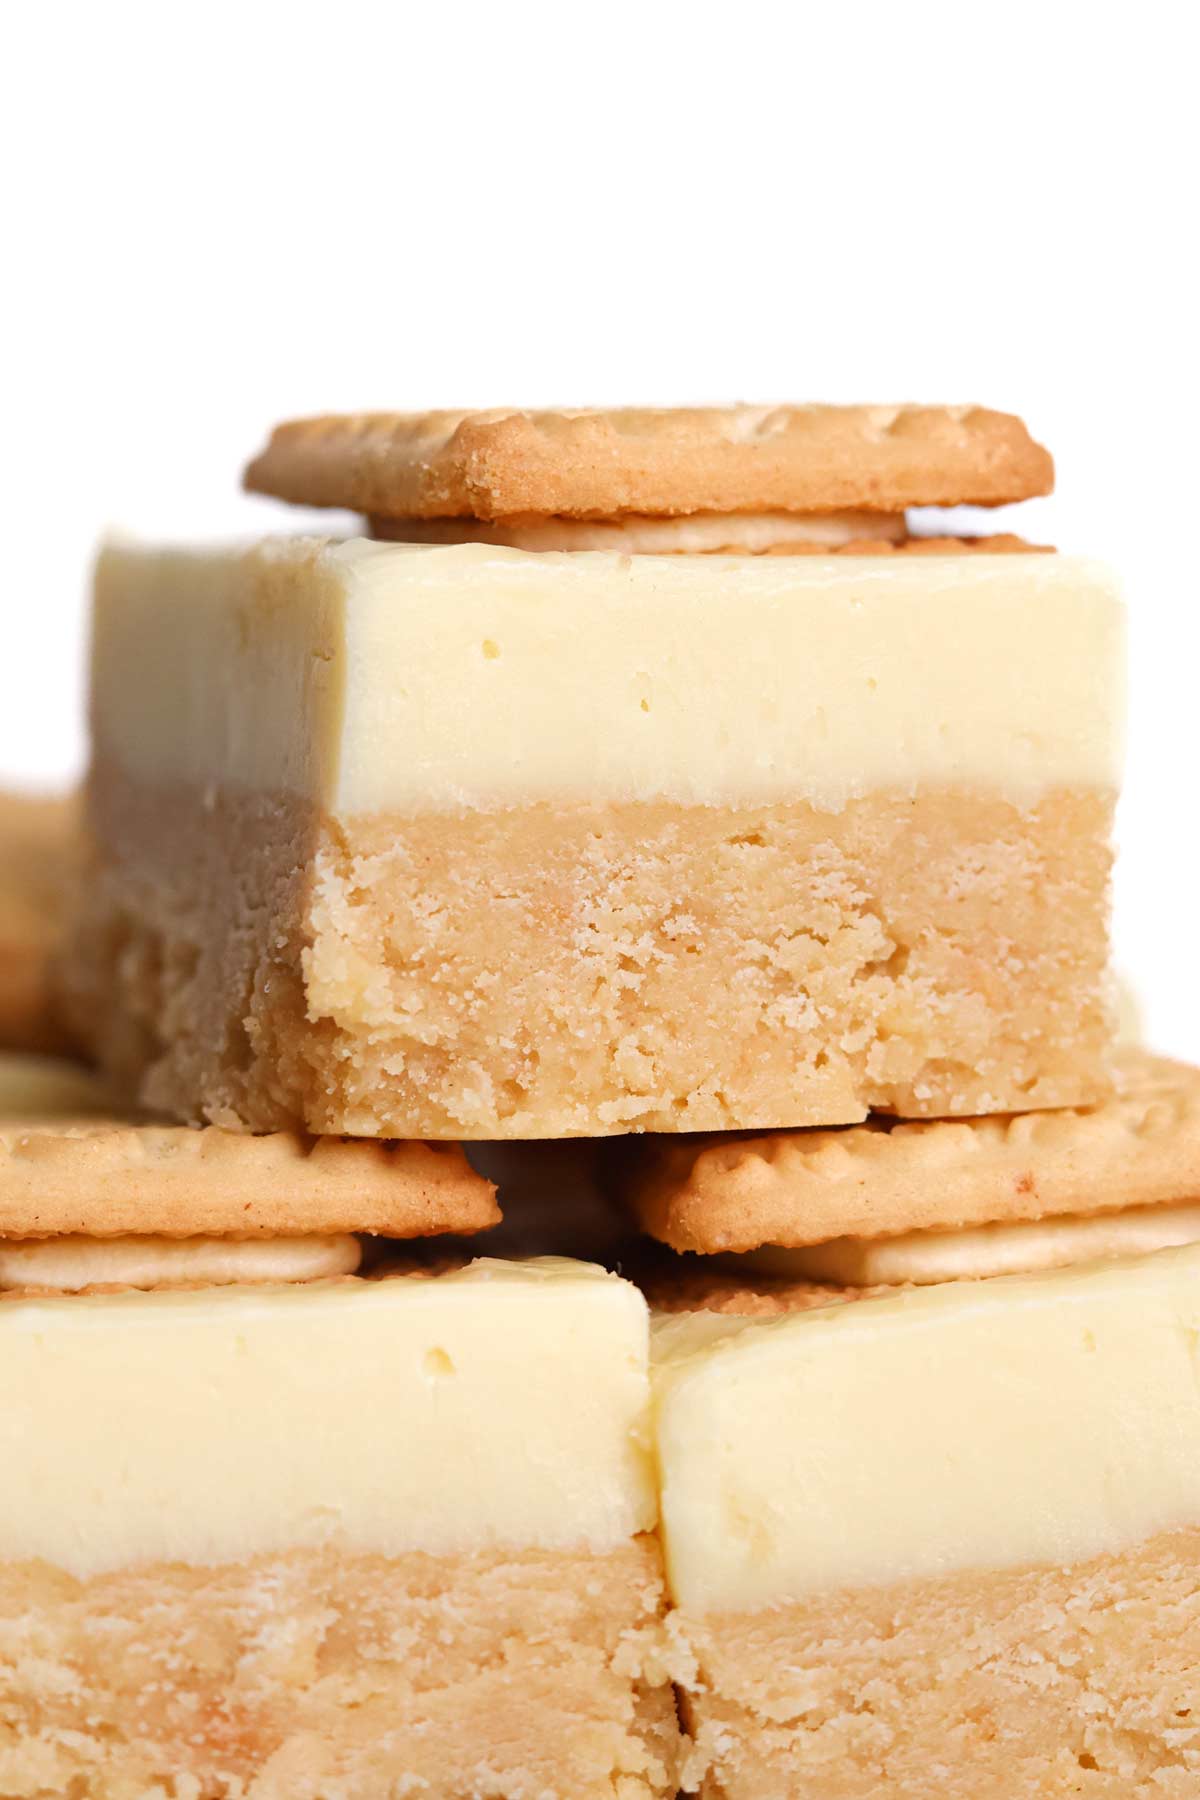
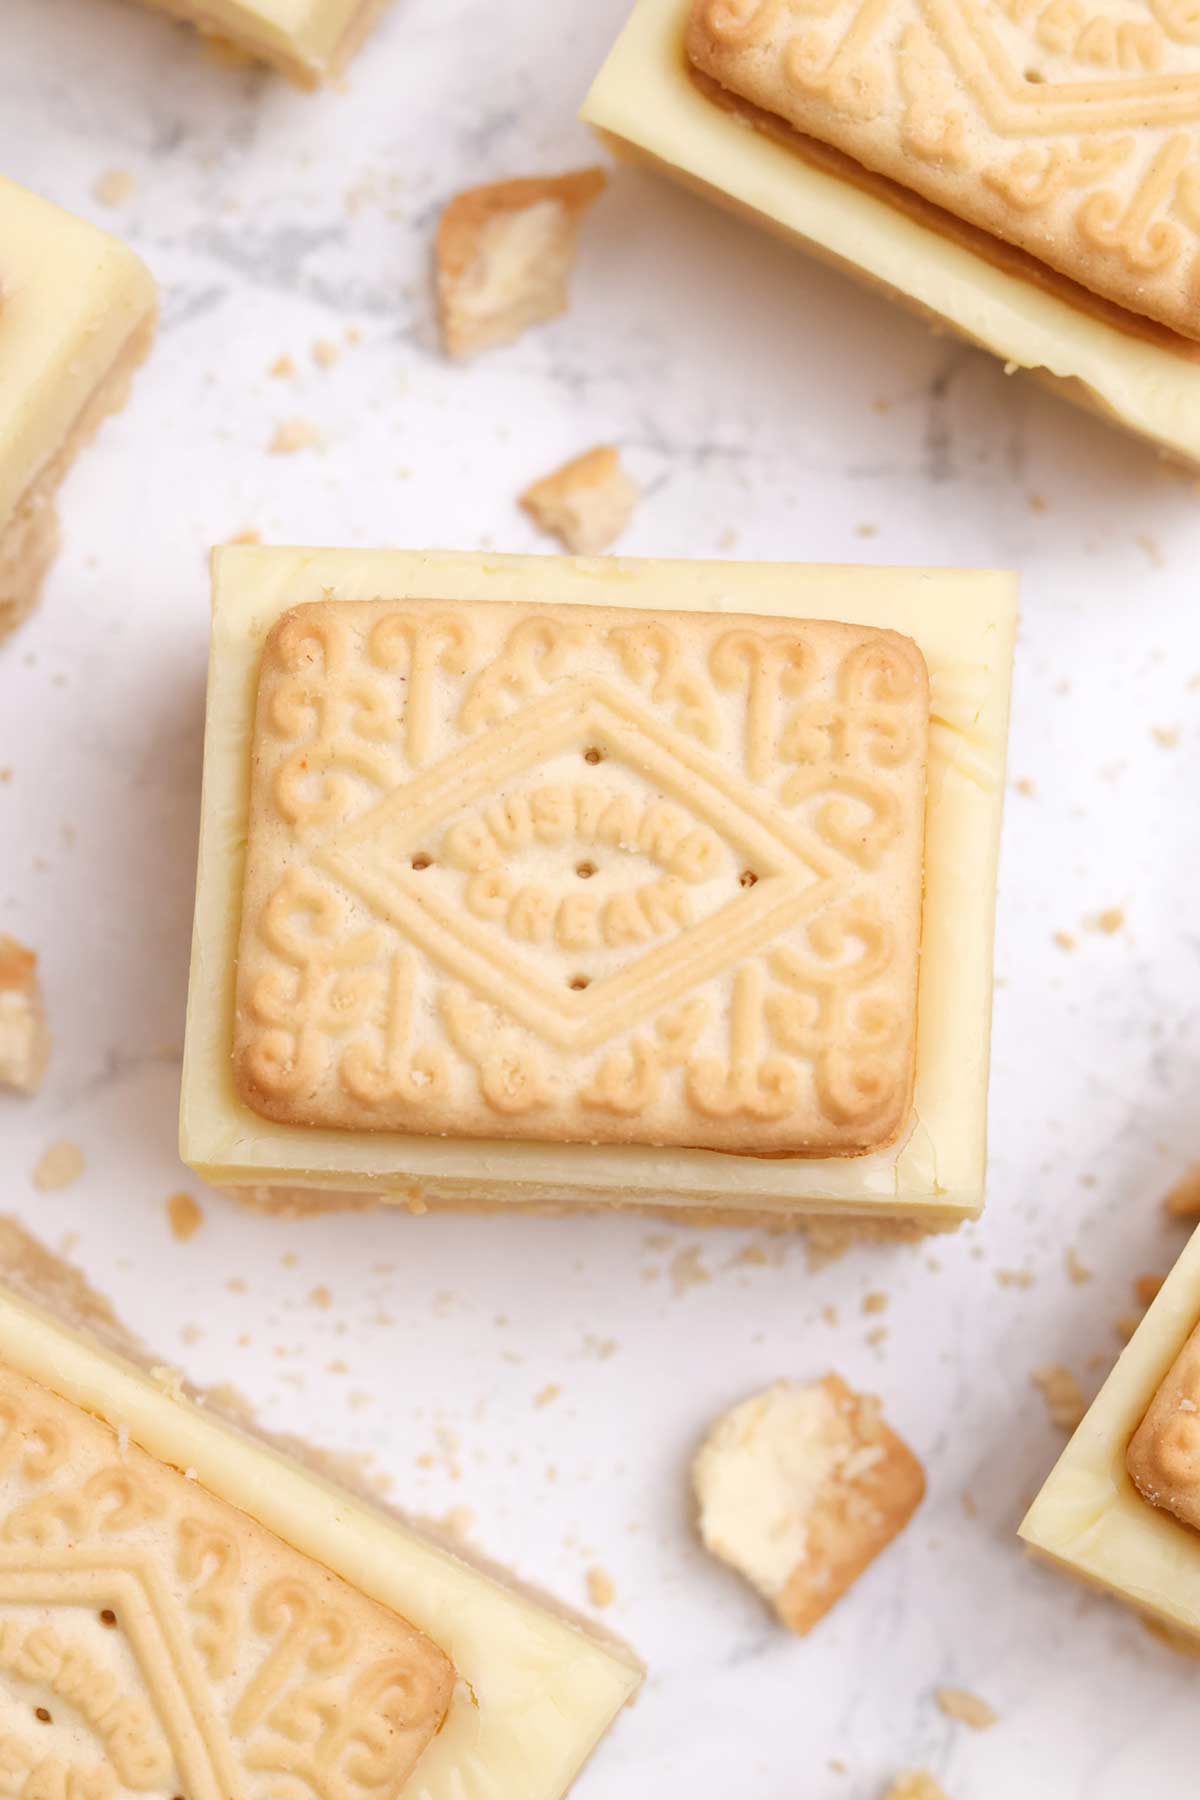
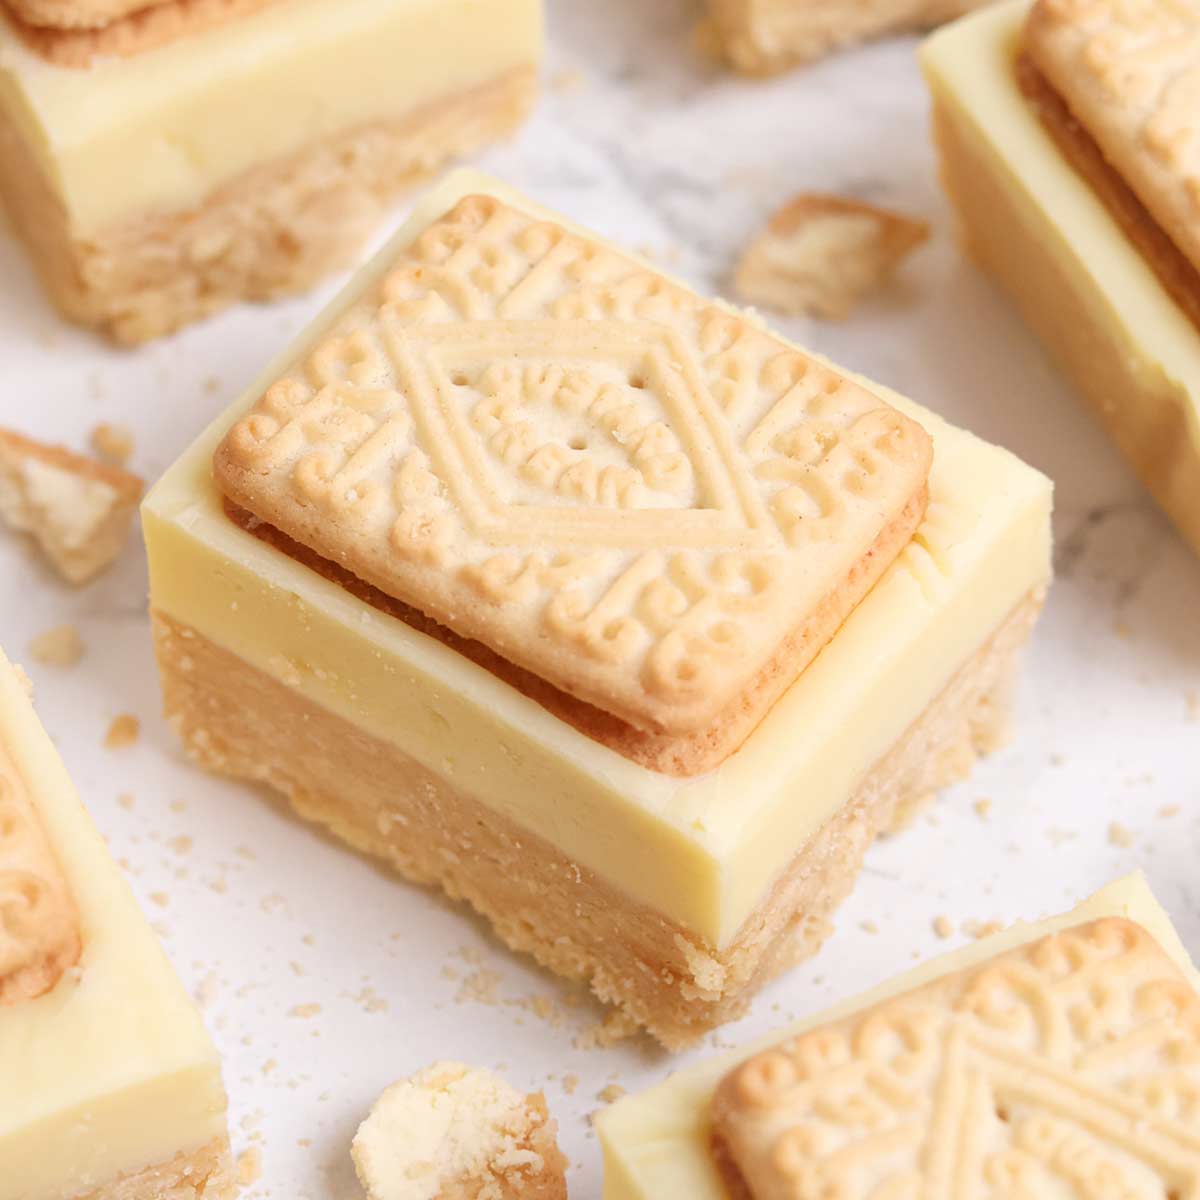
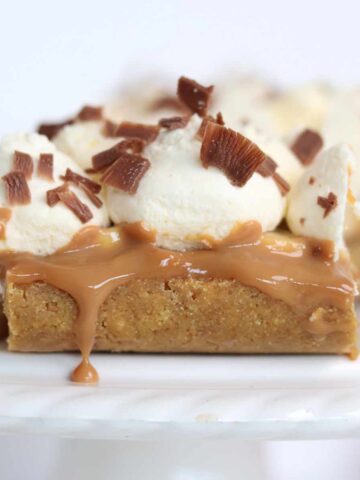
If you grew up British then you're going to absolutely love this easy Custard Cream traybake! It consists of a no-bake condensed milk biscuit base, a creamy white chocolate fudge layer and plenty of extra Custard Cream biscuits on top!
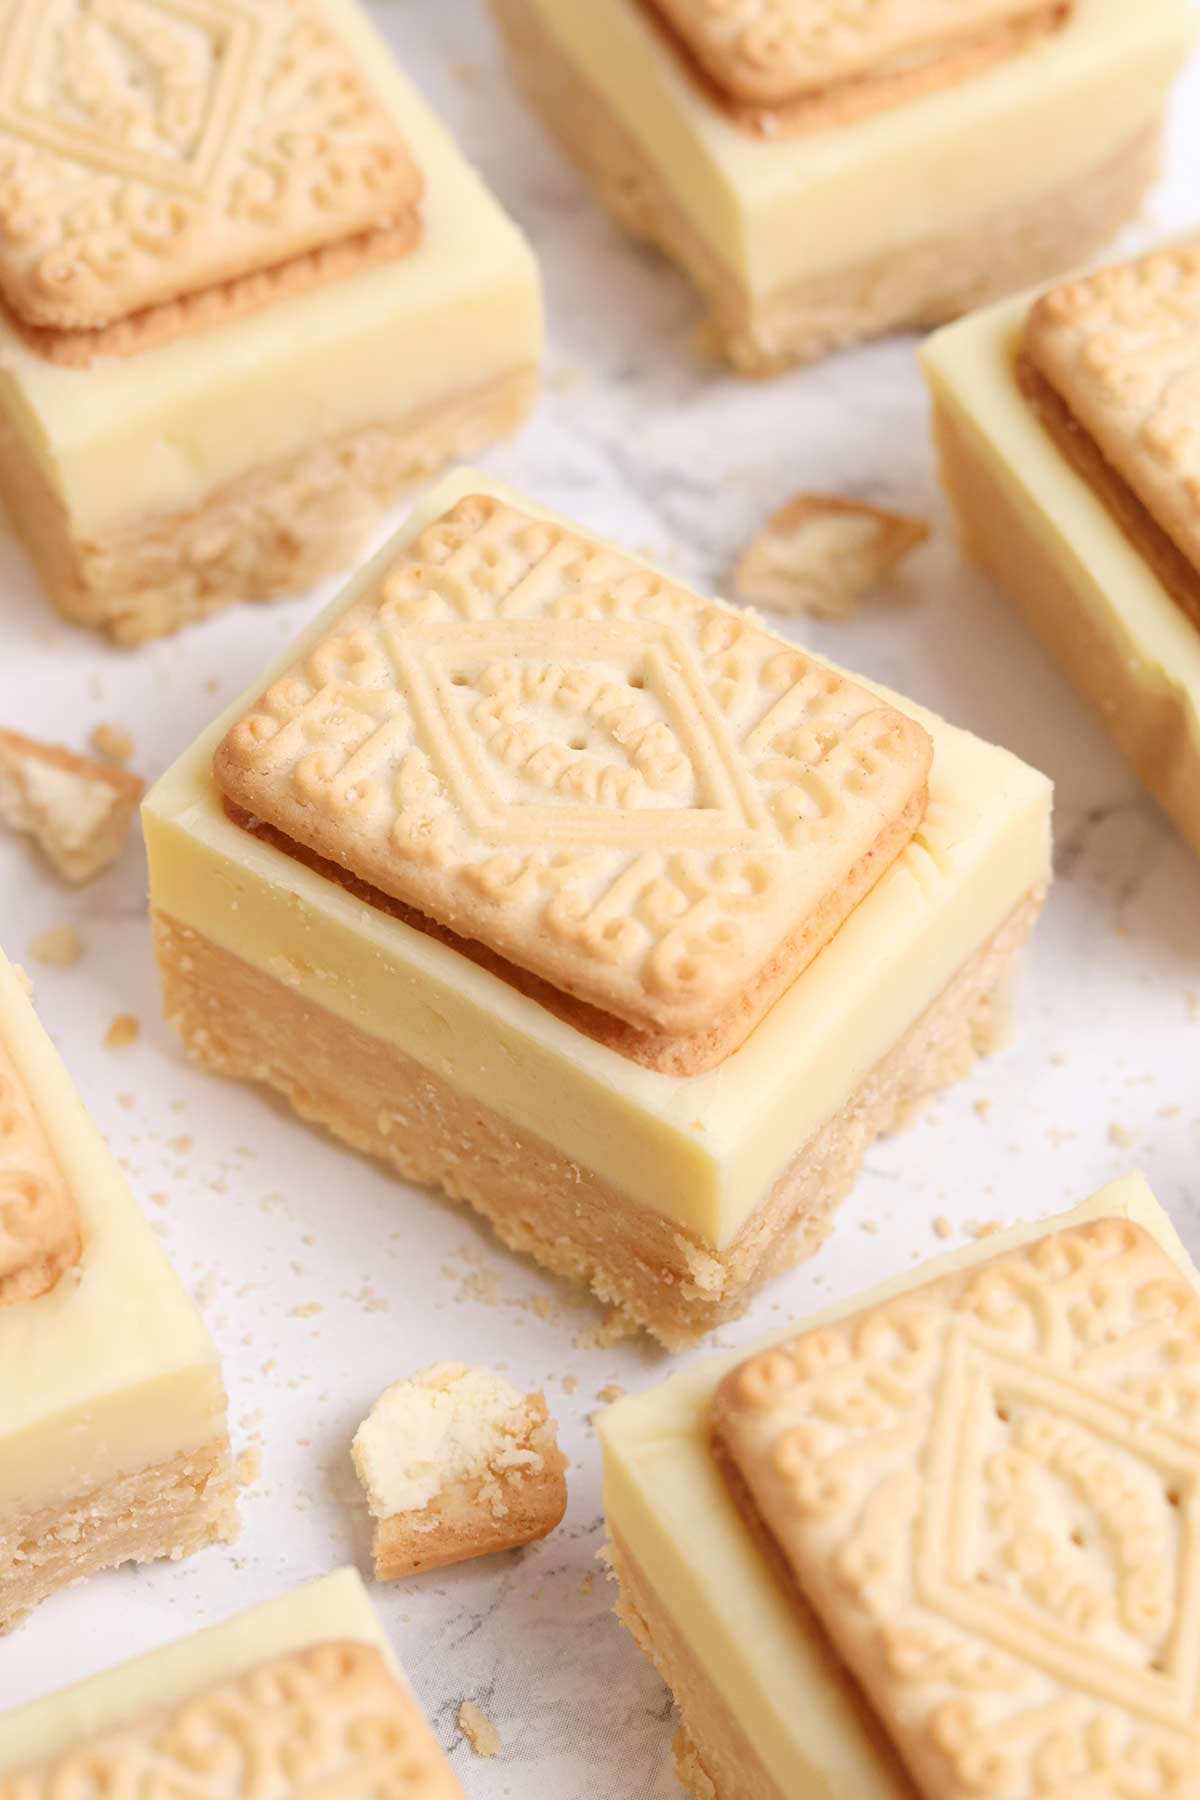
Custard Creams are a nostalgic treat for many of us in the UK, as are no-bake tray bakes, so I just HAD to combine the two! This easy Custard Cream traybake has a smooth Custard Cream biscuit base, with a layer of white fudge and crunchy biscuits on top.
I first shared this recipe on my blog in 2024, after numerous tests to get it just *perfect*. It went on to become one of my most popular recipes and has since inspired many similar versions online. So if you're looking for the original recipe, you're in the right place!
This is perfect for afternoon tea, tea parties, birthday bashes or a simple sweet snack, and it's always a hit at bake sales! I can't wait for you to try it for yourself.
The post below contains everything you need to know to get this recipe right on the first go, including my top tips, step-by-step instructions and lots more. If you'd prefer the short and sweet version, jump right to the recipe card at the end of the page. Enjoy!
What are Custard Creams?
Custard Creams are British sandwich biscuits, made with two small squares of shortbread-style biscuits and a smooth vanilla custard 'buttercream' filling. The biscuits have been around since the 1900s, and they're still rocking their old-school swirly pattern today!
Let me show you how to make this tasty sweet treat with them...
Ingredients
There are only 4 ingredients in this easy no-bake biscuit slice. Can you believe that?! Here's what you'll need to grab:
- Custard Cream biscuits: The star of the show! We'll be blending them up to make the soft biscuit base. McVities are the most well-known brand but any kind of Custard Creams will do. I usually just use whichever kind is cheapest in my local supermarket at the time. Do not substitute for another type of biscuit because this is where most of the Custard Cream flavour will come from.
- Butter: This adds richness and helps the bars set firmly so I don't recommend swapping it for margarine or baking spread.
- Condensed milk: We'll be making both layers of this tray bake with condensed milk so you'll need one whole tin (397g) for this recipe. You'll need to divide it into two parts so I recommend measuring it out beforehand to avoid mistakes.
- White chocolate: When combined with the sweetened condensed milk, the white chocolate will create a thick, fudgy topping for this tray bake. Again, the type of white chocolate you use doesn't particularly matter. As long as you melt it slowly enough, you'll be fine!
Kitchen stuff
You'll need a few more things to make my Custard Cream slice:
- Food processor: Or a high-power blender. This makes it easier to break the biscuits up into superfine crumbs. It can be done by hand, by bashing the biscuits with a rolling pin, but it'll take quite a long time to get them fine enough, which is why I usually use a food processor.
- Saucepan: To melt the white chocolate fudge in. You can do this in the microwave if you prefer but the stove will give you the most consistent heat, preventing burning or seizing.
- Mixing bowl and wooden spoon: To mix all of the ingredients together. You can use another mixing utensil, such as a rubber spatula, if you prefer.
- Baking tin: An 8x8-inch tin is the perfect size for this Custard Cream slice. I wouldn't recommend using a tin that's any larger because this will make the slices too thin. If you must use a different-sized tin, use my cake pan converter to adjust the recipe accordingly.
- Baking paper: To line the tin and prevent the tray bake from sticking to it. Check out my post on how to line a traybake tin if you're unsure!
How to make Custard Cream traybake step-by-step
Here are the step-by-step instructions to make this delicious biscuit slice...
Step 1: Line an 8x8-inch tin with baking paper, leaving a bit hanging over the edges for easy removal. Set it aside for now.
Step 2: Weigh out 450g of Custard Cream biscuits. Transfer them to a food processor or high-power blender and pulse until you have very fine crumbs.
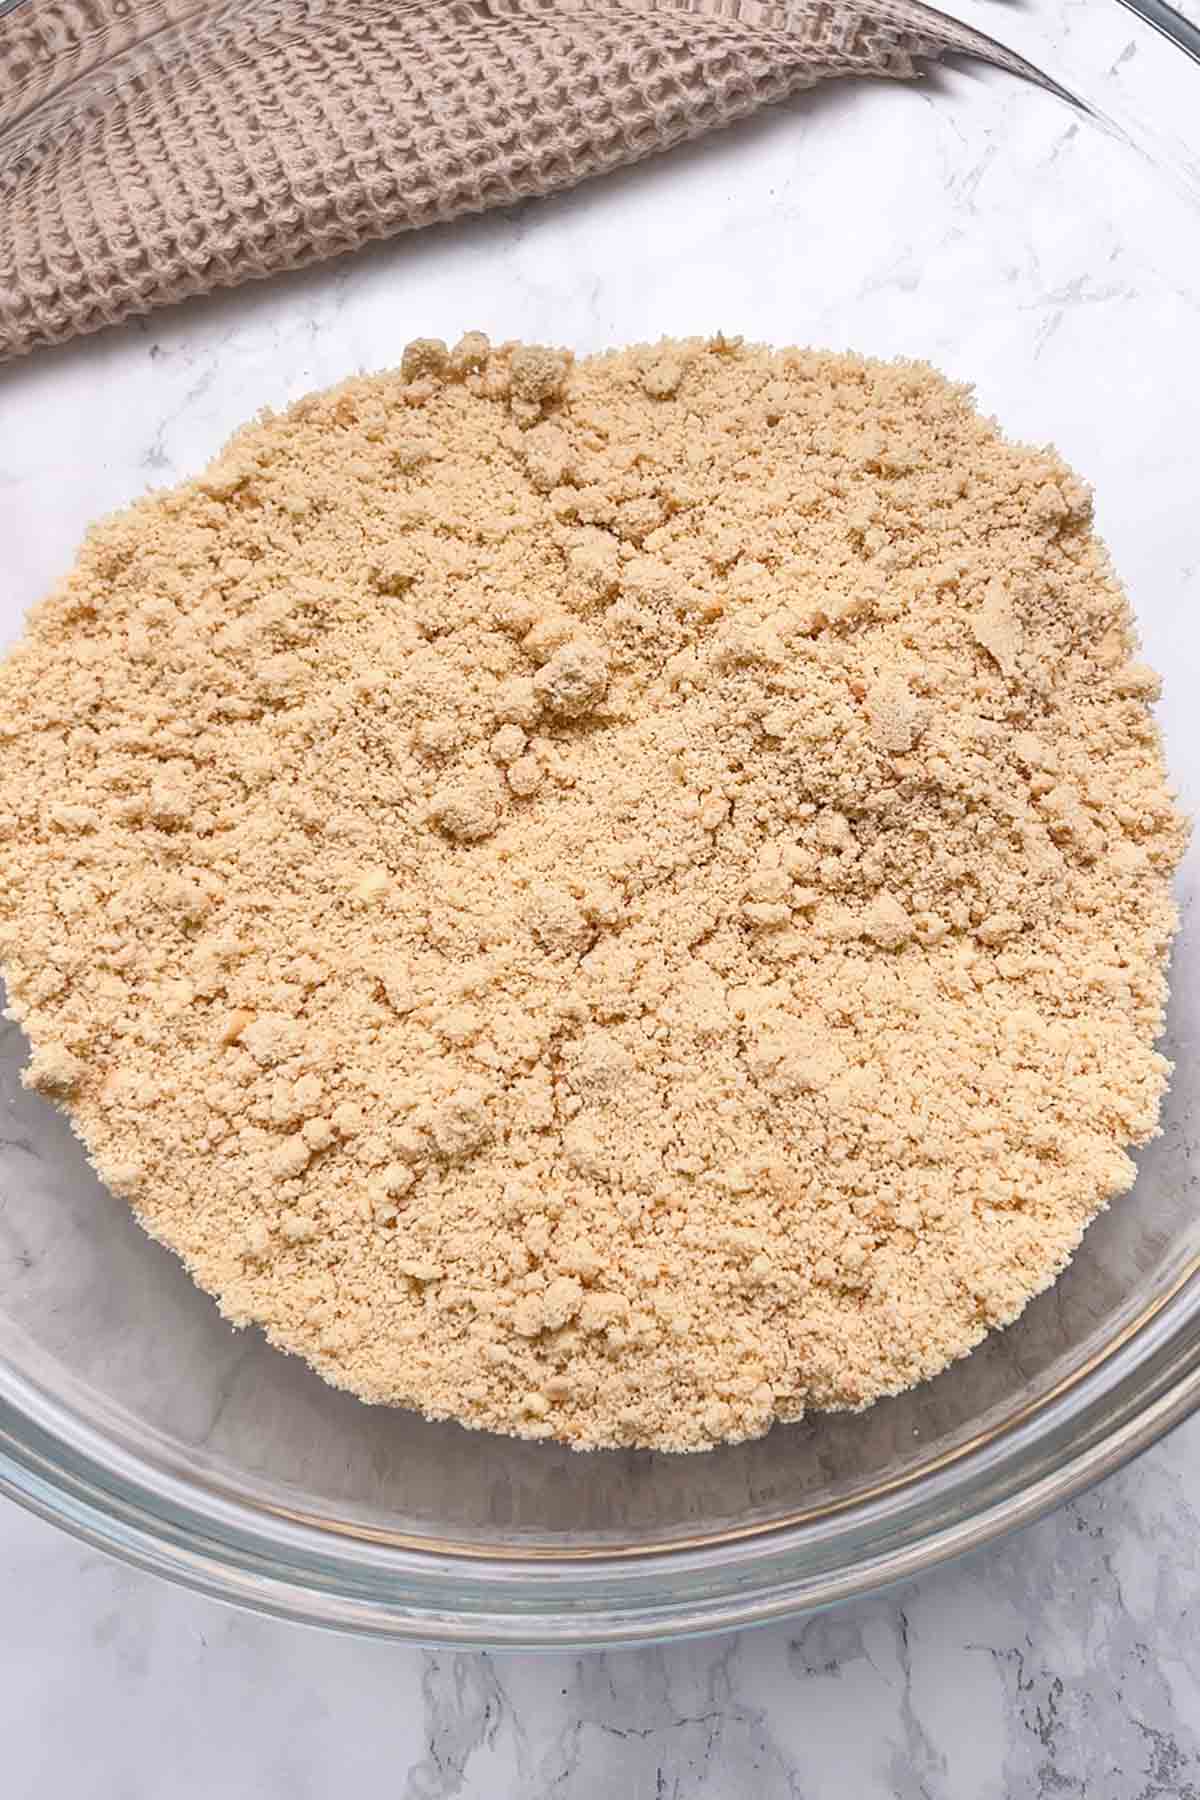
Step 3: Add the biscuit crumbs to a large bowl along with 150g melted butter and 120ml (not grams) from a 397g can of sweetened condensed milk. Mix well to create a wet dough/paste.
Step 4: Press the mixture into your lined tin. Try to make it as even as you can, which will help your slices come out neater later.
Step 5: To a saucepan, add 250g of white chocolate (broken into segments) and the rest of the can of sweetened condensed milk (~277ml). This is for your white fudge topping.
Step 6: Melt the fudge mixture over low heat on the stove, stirring every so often until the white chocolate has melted. It should look thick and glossy. Once you remove it from the heat, you'll need to work quite quickly because it'll begin setting almost straight away.
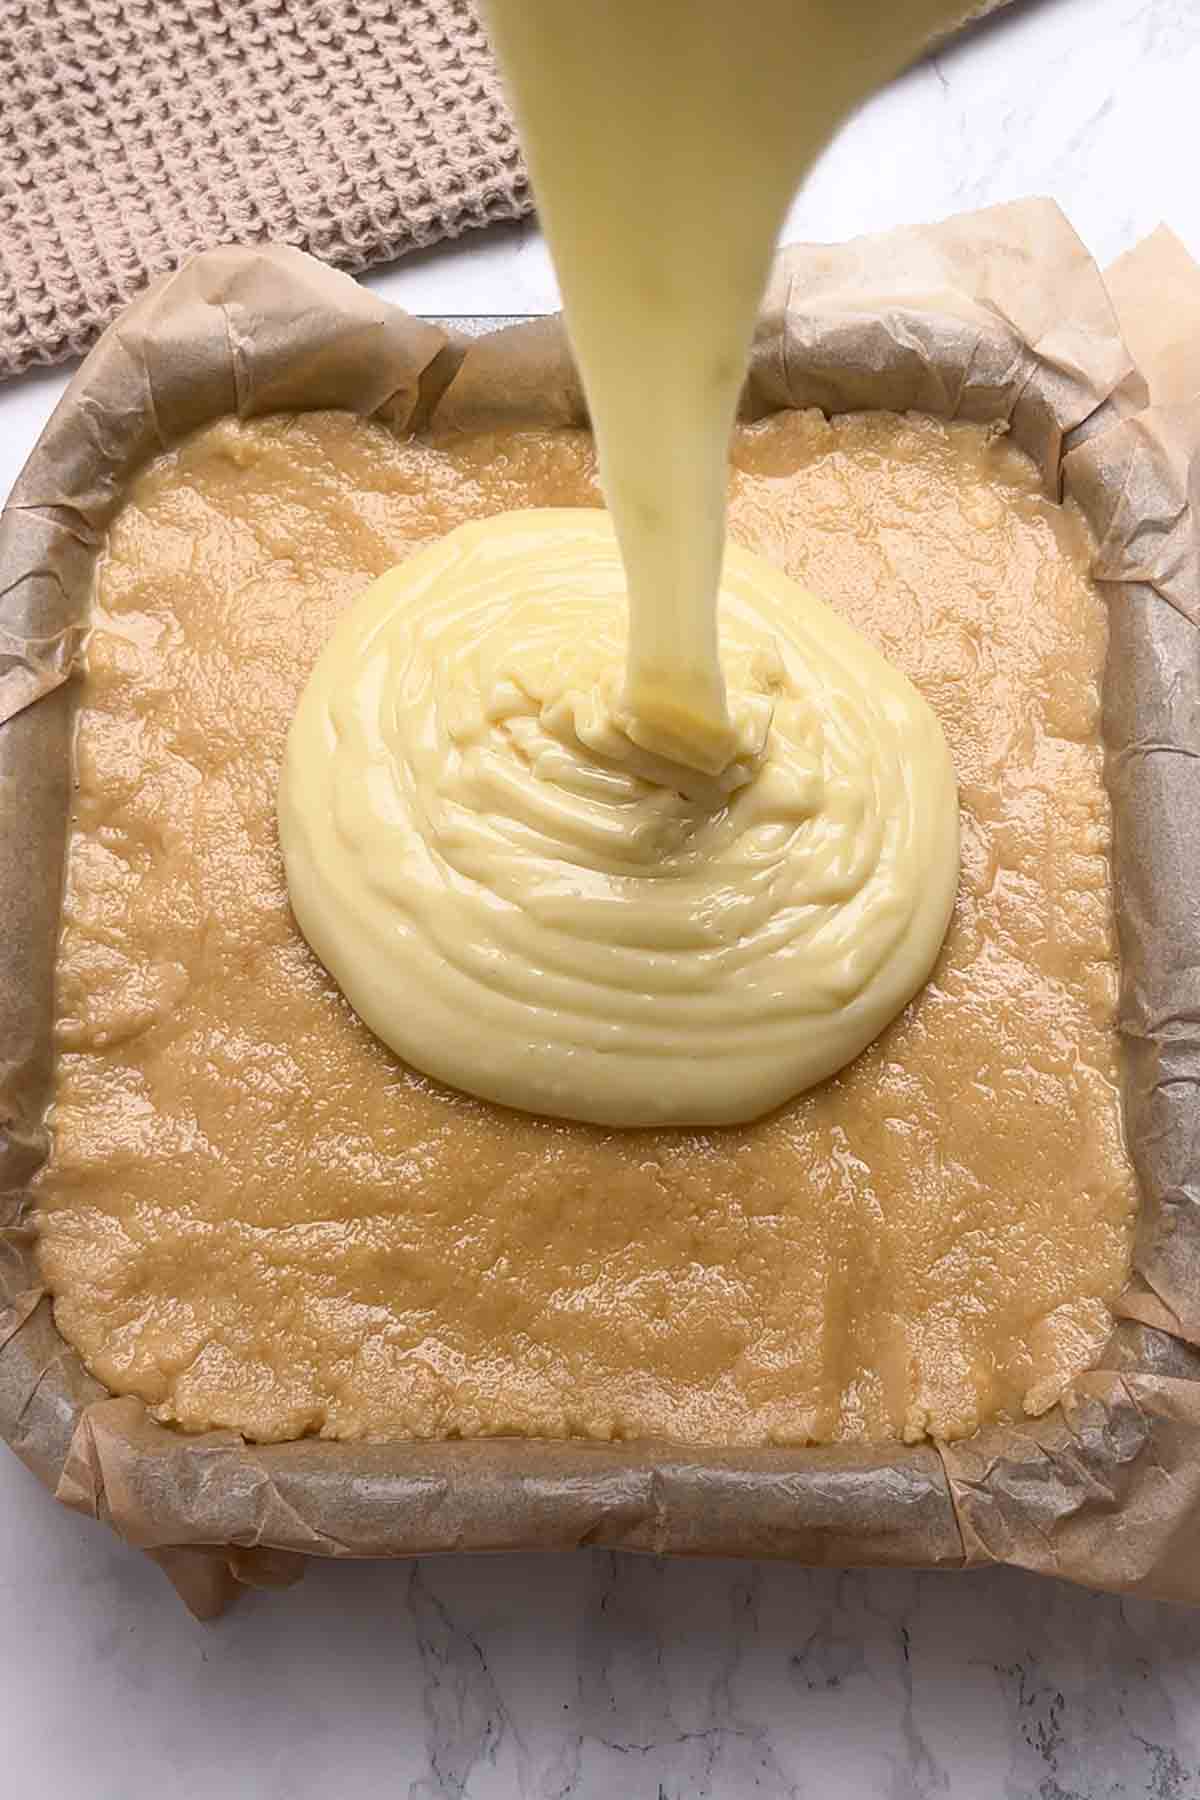
Step 7: Pour the fudge mixture on top of the biscuit base. A rubber spatula is great for spreading it into place.
Step 8: Top with additional Custard Cream biscuits, either whole or crushed into crumbs. I personally like the way they look placed on whole!
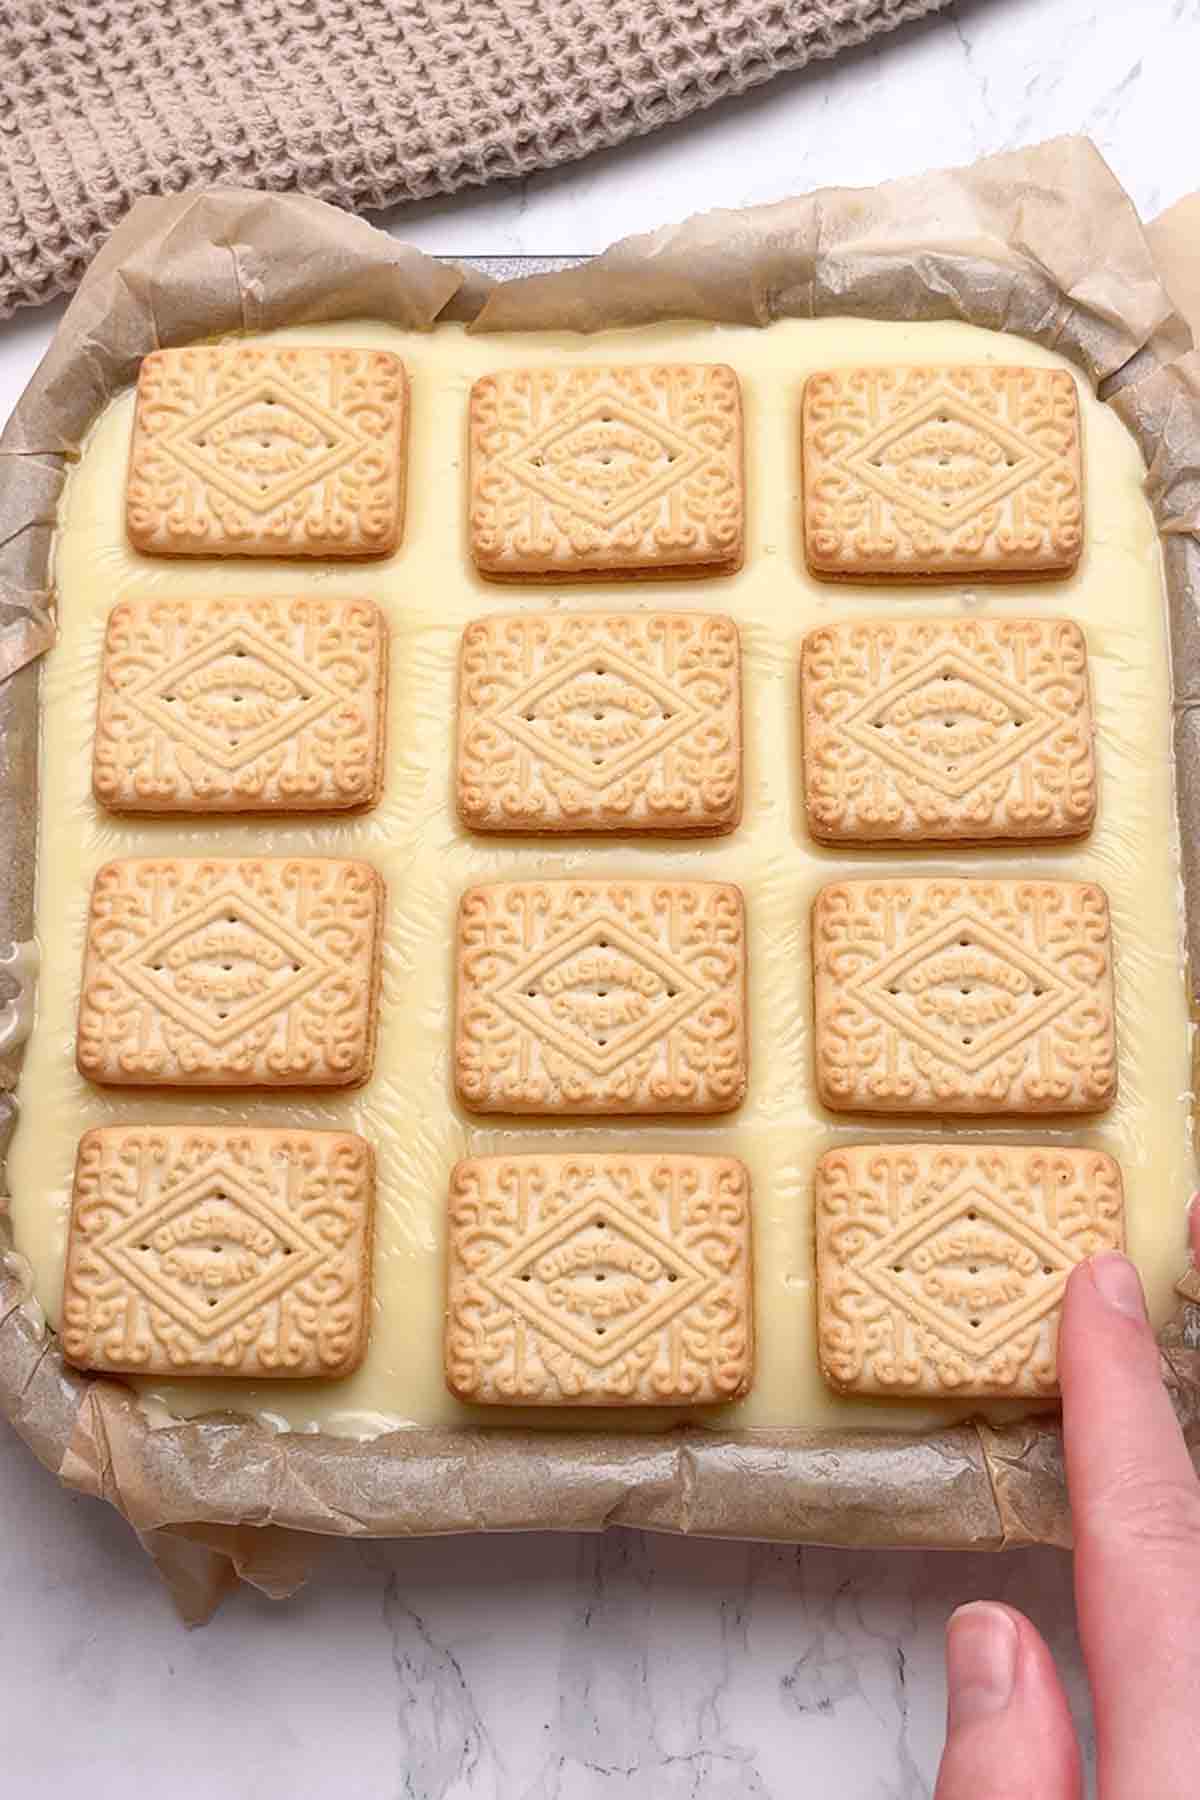
Step 9: Place your traybake in the fridge for4 4 hours, or until the topping is firm to the touch. Then just use the baking paper to remove it from the tin, cut it into squares and enjoy!
Tips for the perfect Custard Cream slice
- Use a food processor or blender to get superfine crumbs. The base won't hold together as well if there are too many large pieces in there.
- Measure out the base portion of condensed milk before beginning to avoid accidentally adding more than you need to.
- Work quickly once you take the fudge topping off the heat as it will begin setting almost immediately.
- Try adding 1 tablespoon of custard powder to the bowl with the topping ingredients for a stronger custard flavour.
FAQs
This will keep well in the fridge for up to 1 week. It's best kept in an airtight container.
Yes, this condensed milk slice freezes beautifully and can be kept in the freezer for up to 3 months. You can either pop the slices into airtight containers, using pieces of baking paper in between to stop them from sticking together, or you can freeze them solid on a baking tray then transfer them to freezer bags. When you're ready to defrost them, let them sit out at room temperature on a wire rack or plate until fully thawed. Do not refreeze.
I cut mine into 12 slices for the photos but in reality, this is a pretty hefty serving size for how rich it is, so I recommend cutting it into 24.
This can happen for a number of reasons but most commonly, this is down to incorrect measuring, using evaporated milk instead of condensed milk, or simply not letting it set for long enough. Check out my post for more on this: Why Didn't My Condensed Milk Fudge Set?
More no-bake tray bakes:
- Bourbon biscuit tray bake
- Jammie Dodger tray bake
- Party Ring tray bake
- Mars Bar tray bake
- Raspberry ruffle tray bake
- Mint Aero tray bake
I hope you like my Custard Cream traybake. If you make it at home, please leave a rating and comment to let me know how it goes. Enjoy!
Custard Cream Traybake Slice (No-Bake)
Ingredients
- 450 g Custard Cream biscuits
- 150 g Butter (melted after weighing)
- 120 ml Condensed milk (from a 397g tin)
Topping
- 250 g White chocolate
- Remainder of the tin of condensed milk (approx 277ml)
- 9-12 Custard Cream biscuits
Instructions
- Line an 8x8-inch tin with baking paper.
- Add the Custard Cream biscuits to a food processor or high power blender and blitz until you have fine crumbs.
- Add the Custard Cream crumbs to a large bowl with the melted butter and 120ml condensed milk. Mix it all together until you have a wet dough.
- Press the mixture into your lined tin.
- Break the white chocolate into pieces and place it into a saucepan with the rest of the tin of condensed milk.
- Place the pan over low heat and melt gently until the mixture becomes smooth and glossy.
- Pour the fudge over your biscuit base and top with more Custard Cream biscuits.
- Refrigerate the whole thing for 4 hours until the topping is firm to the touch. Then just cut into slices and enjoy!
Video
Notes
- Store in an airtight container in the fridge for up to 1 week.

Angela Davie
So easy to make tried this out last week, making some for staff Christmas lunch
Chloe
So glad to hear! Thanks so much 🙂
Janet
Can I freeze this?
Chloe
Yes, for 3 months 🙂
Kelsey
The base is still wet and squidgy after chilling... help
Chloe
Hi, did you change anything in the recipe at all? If not, it might just be down to not enough chill time or too much condensed milk/butter.
Lorna Liw
Just made this custard cream traybake, along with the mars bar crispy and crunchie rocky road.
But the base of the custard cream bake hasn’t set, it’s still very wet after being in the fridge for a few hours. I measured everything out and unsure what I’ve done?! Help!
Alice
Made these last weekend, big hit! Really easy to make and so yummy!
Chloe
Thank you so much Alice!