
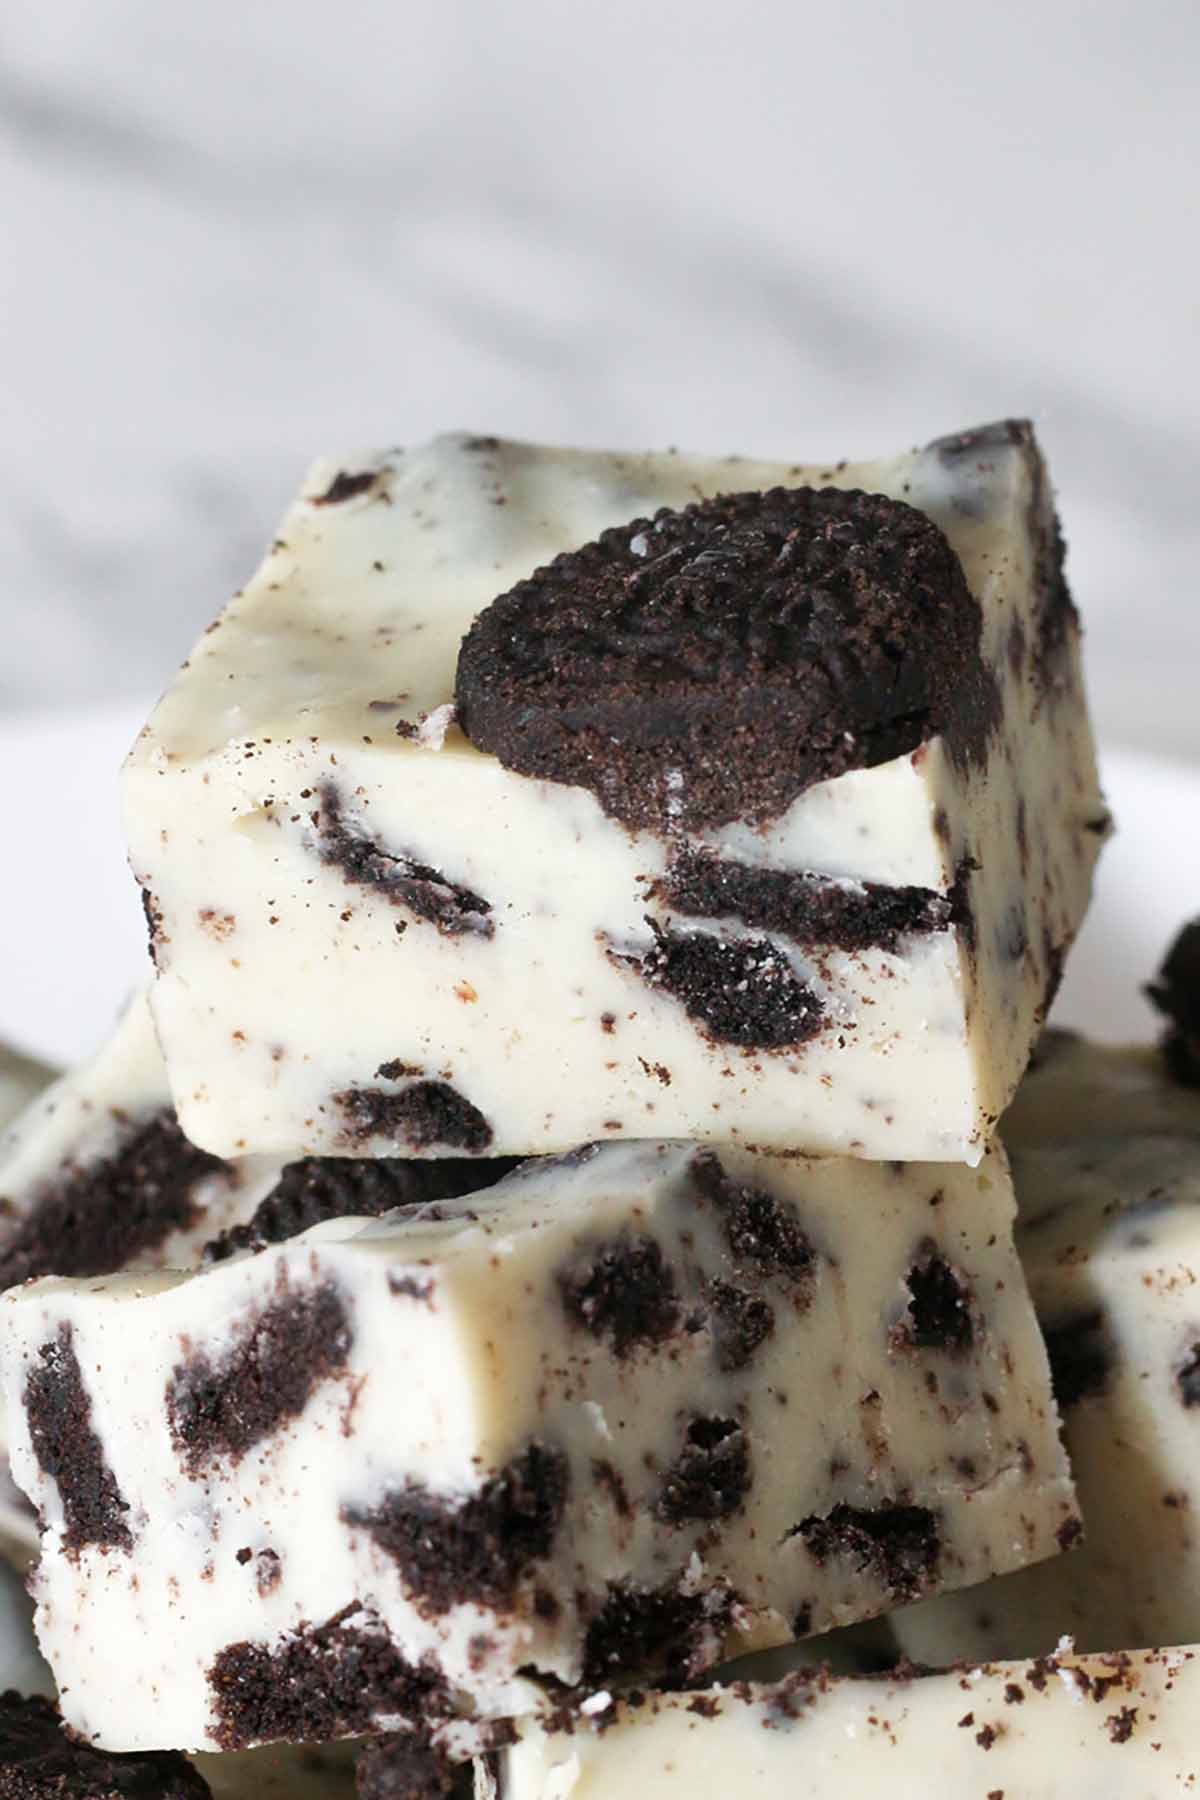
This white chocolate Oreo fudge is so easy that you can even make it in the microwave! It has just 3 basic ingredients plus an optional topping, and there's no baking required.

Calling all Oreo lovers, this recipe is for you! Following the success of my brownie Oreo fudge (and by success, I mean my fiance and I ate it all in less than 24 hours, LOL), I thought it was time to make a white chocolate version. Because who doesn't love the Oreo and white chocolate combo?!
Condensed milk fudge is the perfect dessert for beginners because there's really not much to it at all. You don't even need to do any baking! You can whip this up with just 10 minutes of prep time and leave your friends and family seriously impressed.
If you'd like to read my step-by-step instructions, tips and ingredient notes, you can find them just below. If you prefer the more condensed, straight-to-the-point version, you can find it in the recipe card at the end of the post. And if you like this fudge, make sure to check out my other fudge recipes. Enjoy!
Ingredients
Here are the 3 ingredients you'll need to make fudge:
- White chocolate: You can use any kind of white chocolate you like in this recipe, although I would advise steering clear of white chocolate chips because they don't melt very well. I typically just use whichever white chocolate bars are cheapest at the time!
- Condensed milk: You'll need 1 tin (397g) of sweetened condensed milk. This is what will transform a solid block of chocolate into a smooth, creamy fudge.
- Oreos: I used a whole pack of crushed Oreos in the fudge mixture plus 12 mini Oreos on top. Technically, the Mini Oreos make this a 4-ingredient recipe but feel free to use whatever combo you prefer.
Equipment
Aside from the ingredients, you'll also need the following:
- 8x8-inch tin: This is the perfect size to get a thick slice of fudge, and it can yield up to 40 squares. If you're using a larger tin, I recommend increasing the ingredients too so you don't end up with thin fudge. You can do this by using the servings number slider in the recipe card at the end of the post.
- Baking paper: This will stop the fudge from solidifying against the tin.
- Utensils: You'll need a wooden spoon for mixing and a sharp knife for cutting into the fudge. I also like to use a rubber spatula for pressing the mixture into the tin.
- Saucepan or heatproof bowl: You can either make this fudge in a saucepan over the stove or in a bowl in the microwave.
How to make white chocolate Oreo fudge
Step 1: Break 450g of white chocolate up into pieces and add it to a medium saucepan along with 1 tin (397g) of sweetened condensed milk.
Step 2: Place the saucepan over medium heat and stir gently until all of the chocolate has melted. Remove the saucepan from the heat.
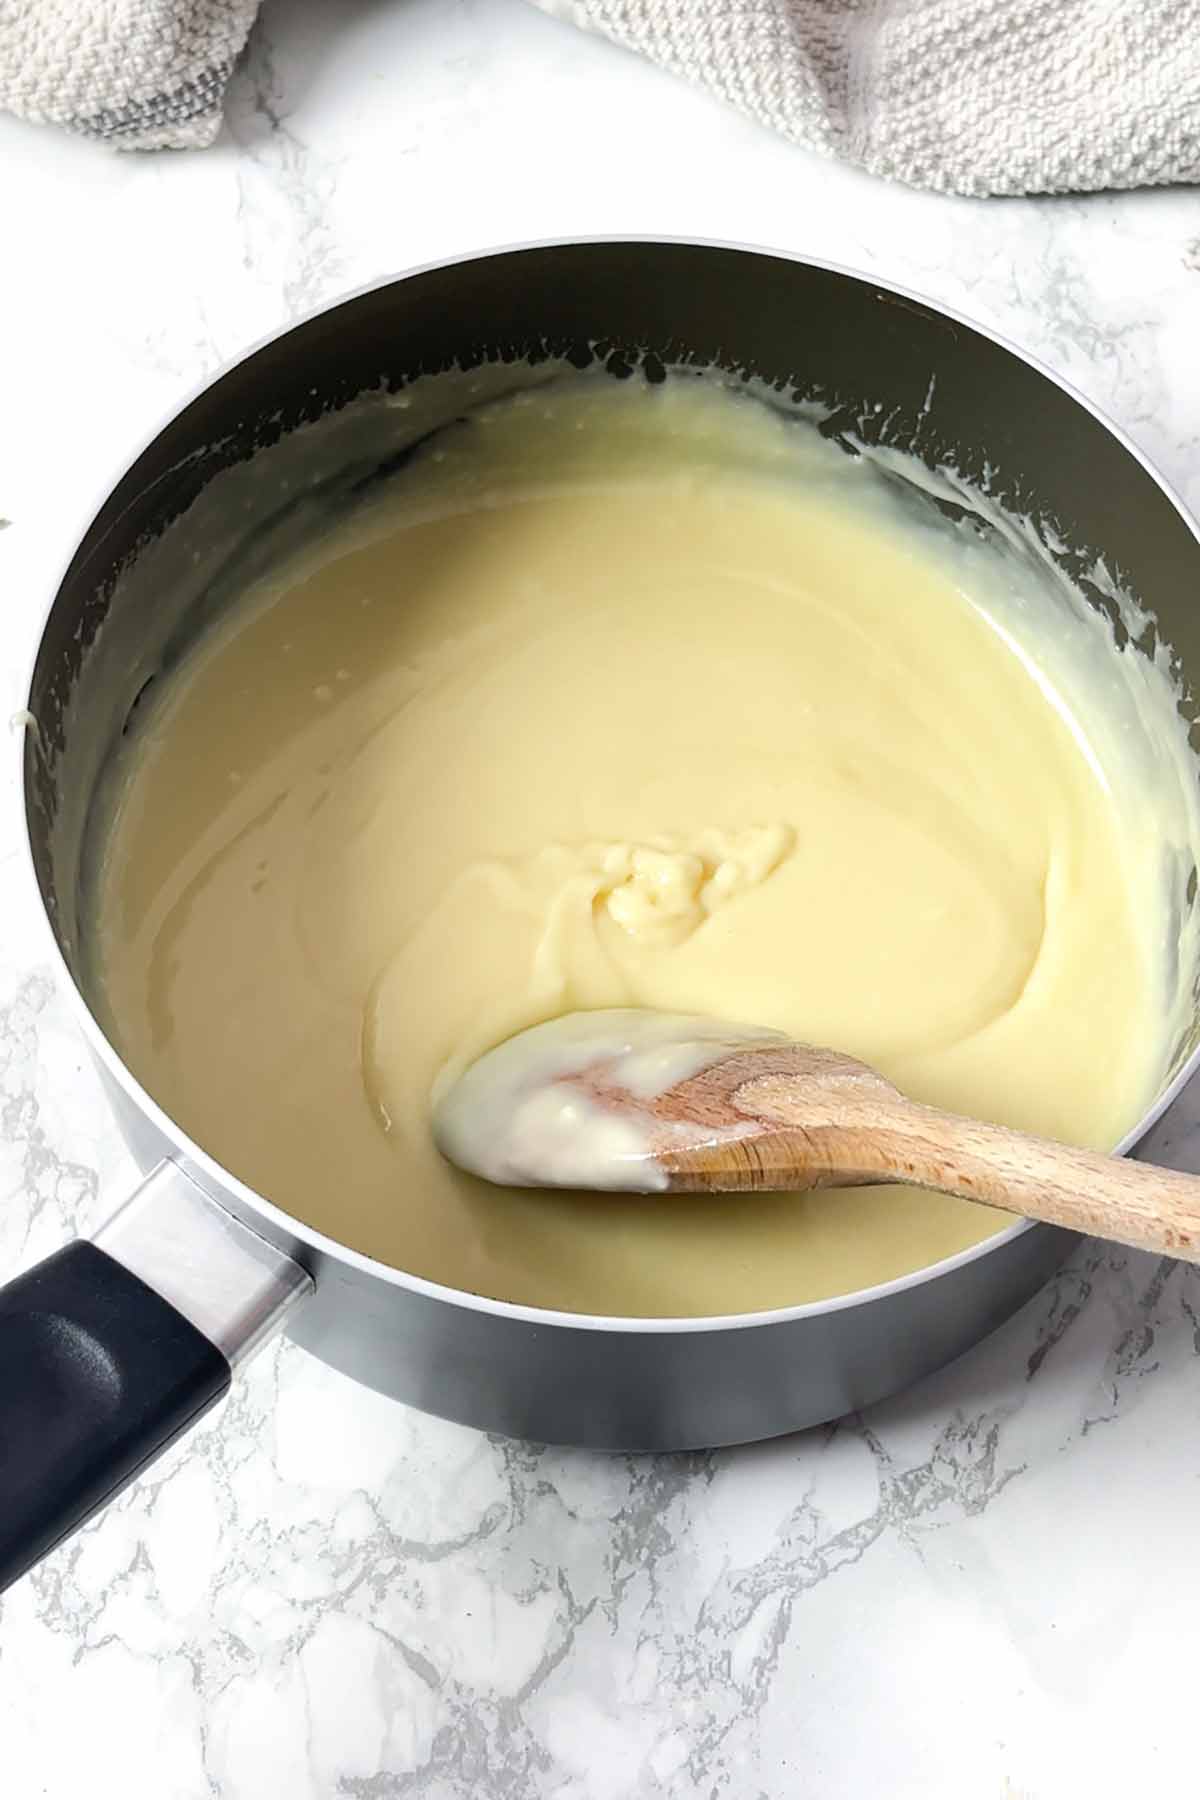
Step 3: Crush 1 pack of Oreos (154g) into medium-sized chunks and add them to the fudge mixture. Use a wooden spoon to gently stir them in.
Step 4: Transfer the fudge to your lined tin and spread it all the way to the edges. Top with a handful of Mini Oreos or more crushed Oreos.

Step 5: Refrigerate your white chocolate Oreo fudge for 4 hours, until it's firm to the touch. If it won't set, check out this post: Why Isn't My Condensed Milk Fudge Setting?
Step 6: Then remove it from the tin, cut it into squares and enjoy! One slab of fudge will serve 12-40, depending on how big or small you want your slices.
Microwave option
If you prefer to make your Oreo and white chocolate fudge in the microwave, add the chocolate and condensed milk to a heatproof bowl and microwave it in short bursts until fully melted. Then just stir in the Oreos, transfer it to your lined tin and refrigerate for 4 hours.
Top tips
Here are my top tips for making no-bake fudge...
- White chocolate will seize easier than milk chocolate so make sure to heat the mixture gently. If you're using the microwave, you'll need to stir it every 20-30 seconds or so.
- Leave a little bit of baking paper hanging over the edges of the tin. This will make it super easy to just lift the fudge out of the tin once it's set.
- Use a hot knife for a super clean cut. You can heat your knife by dipping it into boiling water and then drying it thoroughly immediately before cutting. Repeat before each cut.
FAQ
It'll last for at least 1 week if you keep it in an airtight container in the fridge. It'll hold up OK at room temperature too but will be a lot softer than if you keep it refrigerated.
Yes. Sweetened condensed milk and white chocolate are typically gluten-free already so you can just replace the Oreos with gluten-free Oreos. If you can't find the branded gluten-free Oreos, many supermarkets sell free-from 'cookies and cream sandwich biscuits' which are very similar.
Yes, Oreo and white chocolate fudge can be frozen for up to 1 month. Just pop the pieces into airtight containers first. You can divide layers with pieces of baking paper to stop them from sticking together in the freezer, meaning you can fit more pieces into one container too.
Alternatively, you can put the fudge onto a baking tray and freeze it until solid, then either wrap it up tightly in clingfilm or it into freezer bags before returning it to the freezer.
To defrost the fudge, just transfer it to the fridge and leave it in there overnight. Do not refreeze.

More fudge recipes
Like this recipe? Try some of my other fudge flavours:
I hope you like this white chocolate and Oreo fudge recipe. If you make it at home, please let me know how you get on by leaving a comment or rating below. Enjoy!

Easy White Chocolate Oreo Fudge (Only 3 Ingredients)
Ingredients
- 450 g White chocolate (16oz)
- 397 g Sweetened condensed milk (14oz)
- 154 g Oreos (5.5oz)
Topping (optional)
- Handful Mini Oreos
Instructions
- Line an 8x8-inch tin with baking paper and set aside.
- Break up the white chocolate and add it to a saucepan (or heatproof bowl for microwave option) along with the condensed milk.
- Place the saucepan over medium heat and stir gently until the chocolate has melted and the mixture becomes glossy. Alternatively, melt it in the heatproof bowl in the microwave, stirring every 20-30 seconds to prevent burning.
- Break the Oreos into rough chunks and mix them into the fudge.
- Transfer the fudge mixture into your lined tin and spread it evenly into place. A rubber spatula is great for this part if the mixture starts setting and getting thick.
- Add the mini Oreos on top and gently press them in to help them stick.
- Refrigerate the fudge for 4 hours until firm. Then remove from the tin, cut into squares and enjoy!
Video
Notes
- Store in an airtight container at room temperature for up to 1 week.

Leave a Reply