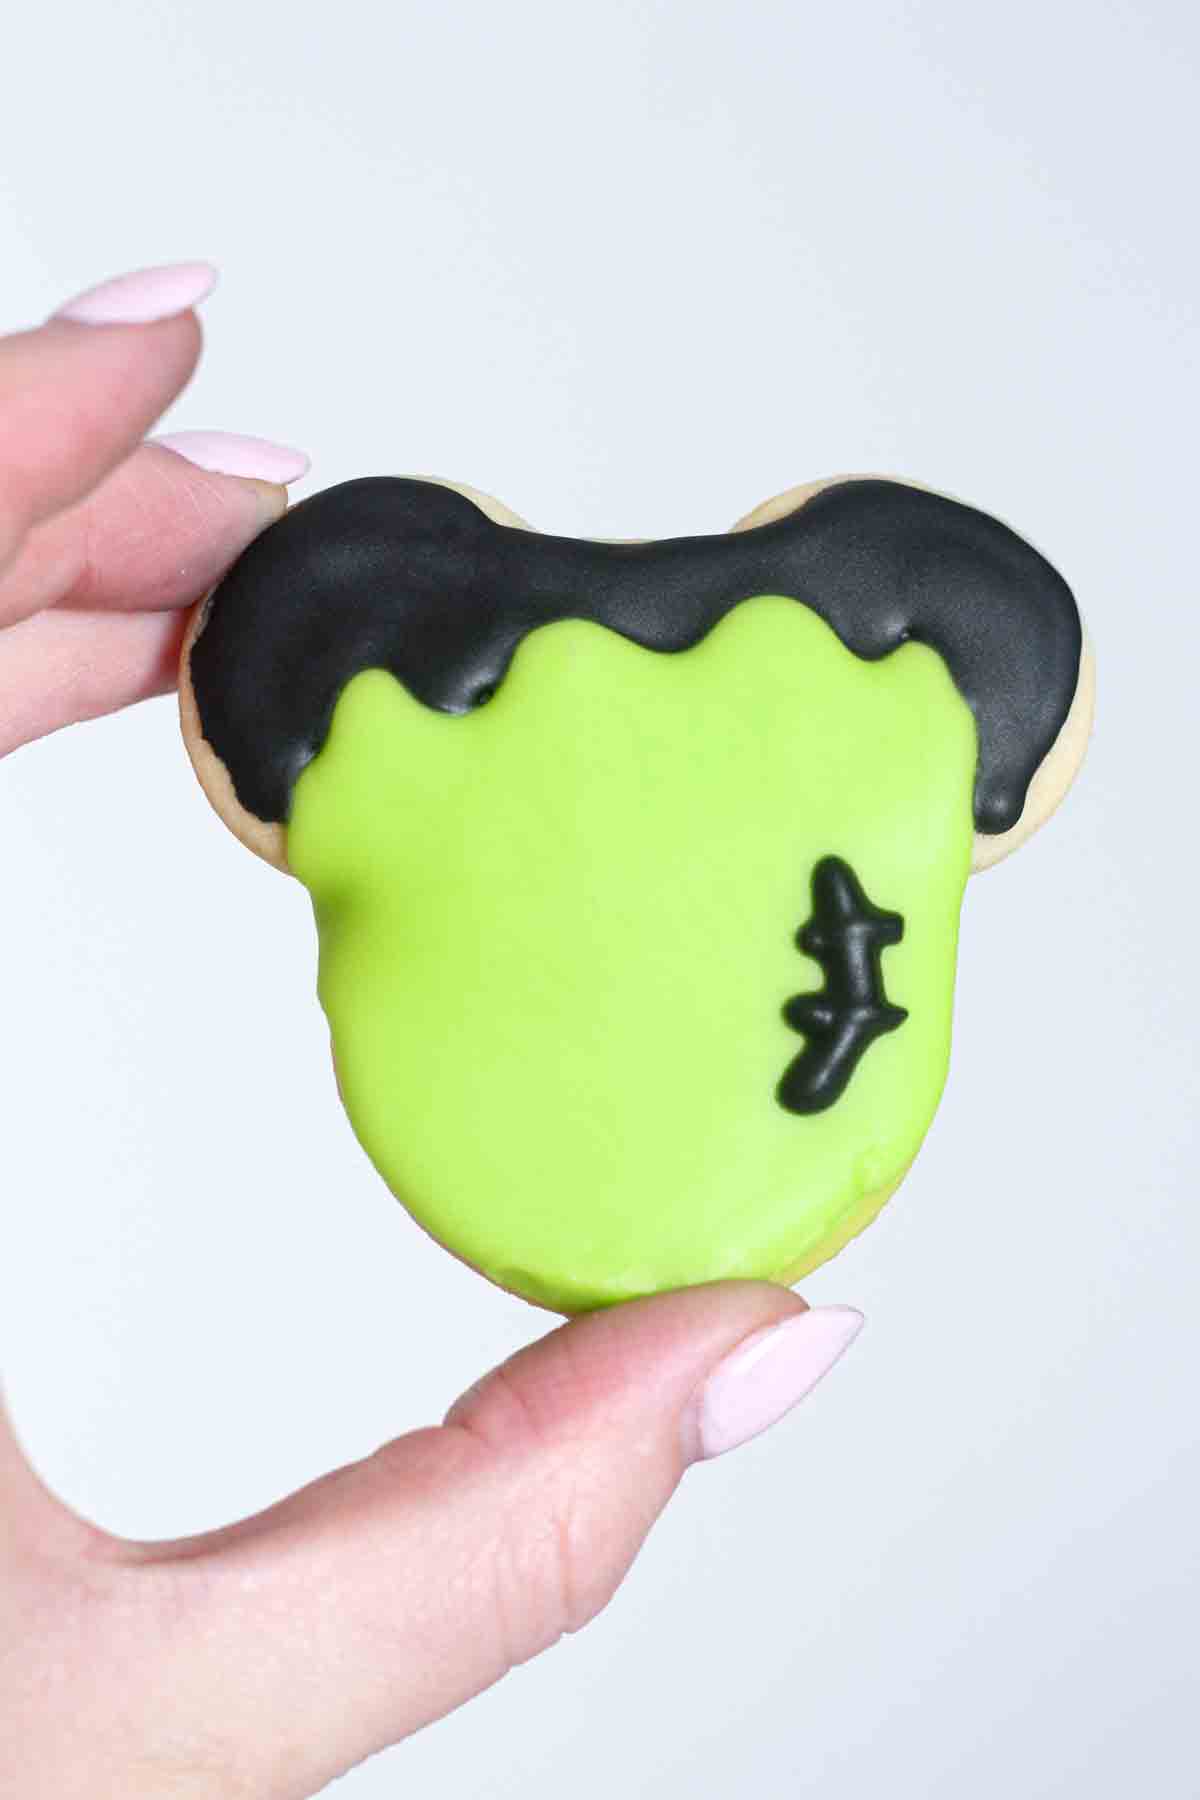
These Disney Halloween Mickey cookies are the perfect mix of cute and spooky. Made with classic sugar cookie dough and decorated with a simple glacé icing to look like Frankenstein, these are super fun to make and kids will love them!

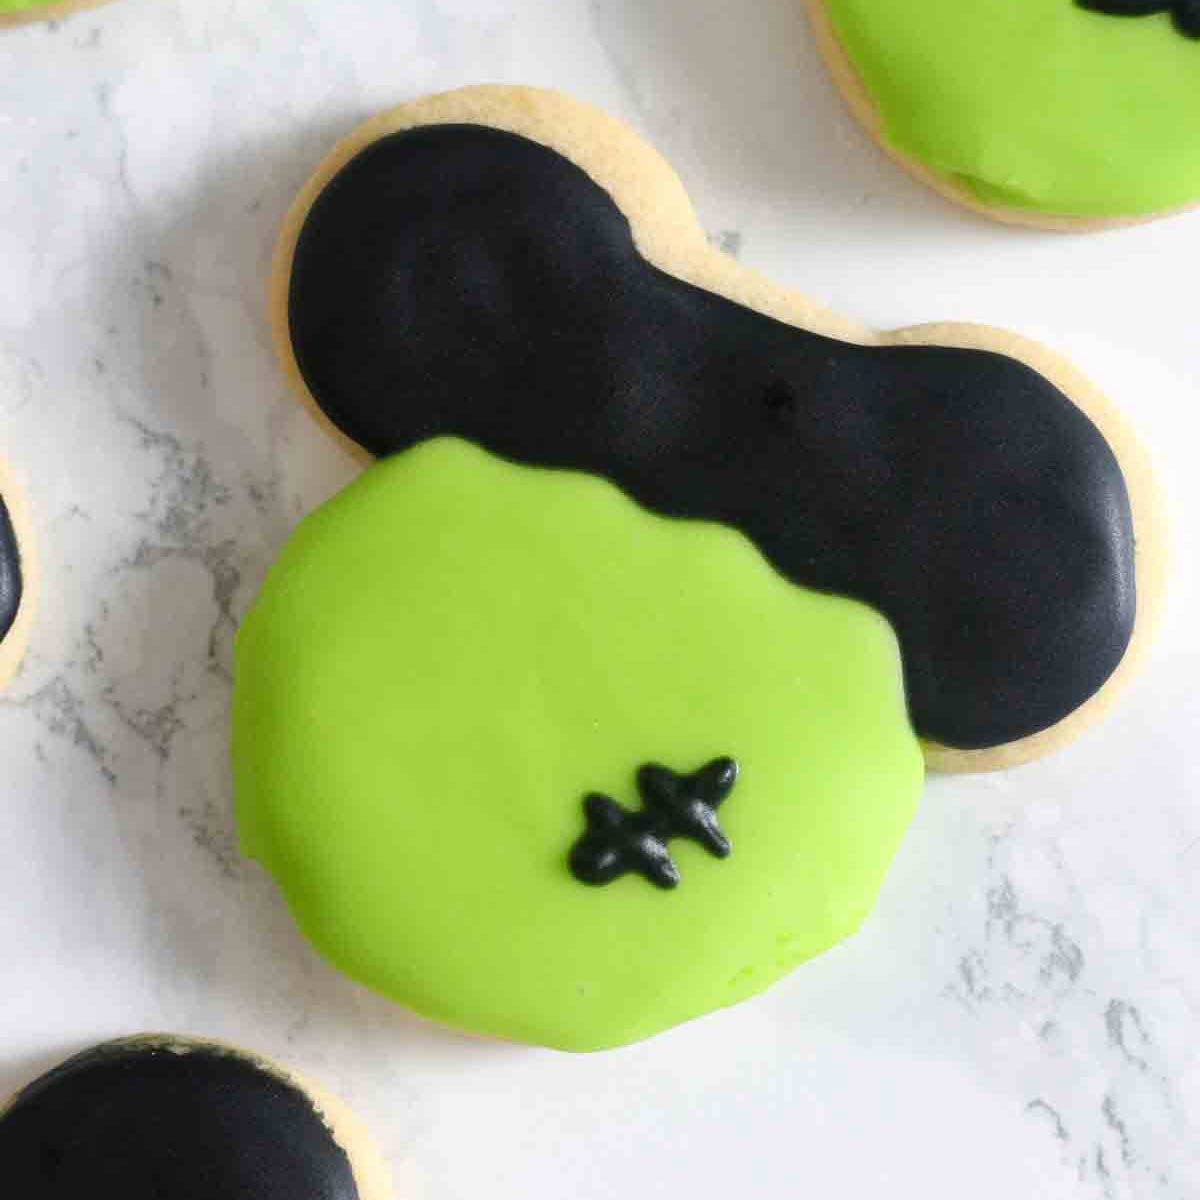
I'm back with my last spooky recipe of the year, these Disney Halloween Mickey cookies! They are soft cut-out cookies topped with green and black icing to resemble Frankenstein.
These were so fun to make and relatively easy too. They were eaten up quickly by my taste testers and I think they'd make a great addition to any Halloween event.
If you'd like to give this recipe a try at home, you can find everything you need to know in the post below, including ingredient notes, top tips, step-by-step images and more. If you're more experienced with cookie making and would prefer the quick, condensed version of the recipe, you can jump to the recipe card at the end of the page, which includes a short video too. Enjoy!
Here's what you'll need
- Butter: Use softened butter to make it easier to mix in with the sugar. You can soften your butter either by leaving it at room temperature for 60 minutes or by popping it in the microwave for 10 seconds, making sure not to melt it.
- Sugar: Caster sugar will give these sugar cookies a better mouthfeel so I recommend using that if you can. Otherwise, regular granulated white sugar will work fine.
- Vanilla extract: I like to use 2 teaspoons rather than 1 because personally, I think sugar cookies taste a little bland without the extra flavour.
- Egg: Adding 1 medium egg to the dough will help bind the ingredients together and add richness.
- Baking powder: This will help to give your cookies a light texture.
- Plain flour: AKA all-purpose flour. This is the best type of flour to use for sugar cookies because we don't want them to end up too cake-like.
- Salt: Just a small pinch, to enhance the flavours.
- Icing sugar: For the glacé icing. You can make royal icing if you prefer but I wanted to keep it simple.
- Milk: Or water, to adjust the consistency of the icing as needed.
- Food colouring: To create the Frankenstein design, you'll need black and green food colouring. I recommend using gel food colouring for more vibrant colours.
Kitchen Equipment
- Baking tray and baking paper: A lined large tray that will fit all 18 Halloween cookies on, or 2 smaller trays.
- Mixing bowls: A large bowl to make the cookie dough, plus two smaller bowls for the icing.
- Rolling pin: To roll the dough out for cutting.
- Mickey Mouse cookie cutter: I got my Disney cookie cutters in a set from Amazon and used the 3-inch one for this recipe.
- Utensils: A wooden spoon and a teaspoon.
- Piping bags: To pipe the icing onto the cookies. You can either cut a small piece off the ends or fit them with small writing nozzles.
How to make Halloween Mickey Mouse Cookies
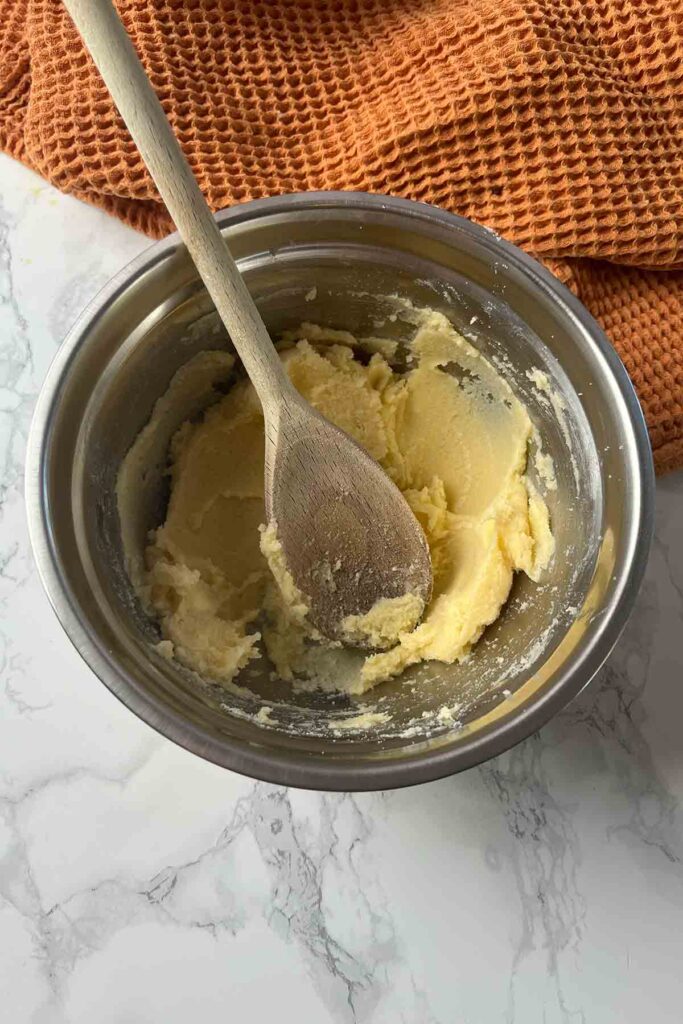
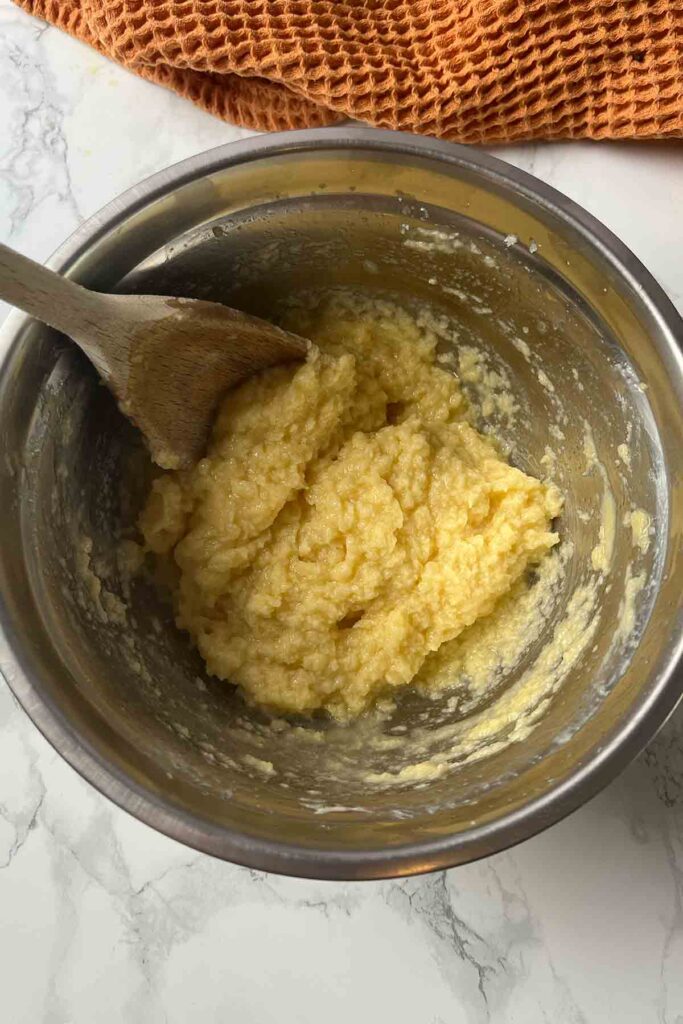
Step 1: In a large bowl, cream together 120g of softened butter and 120g of caster sugar. Once that's smooth, stir in 2 teaspoons of vanilla extract and 1 medium egg.
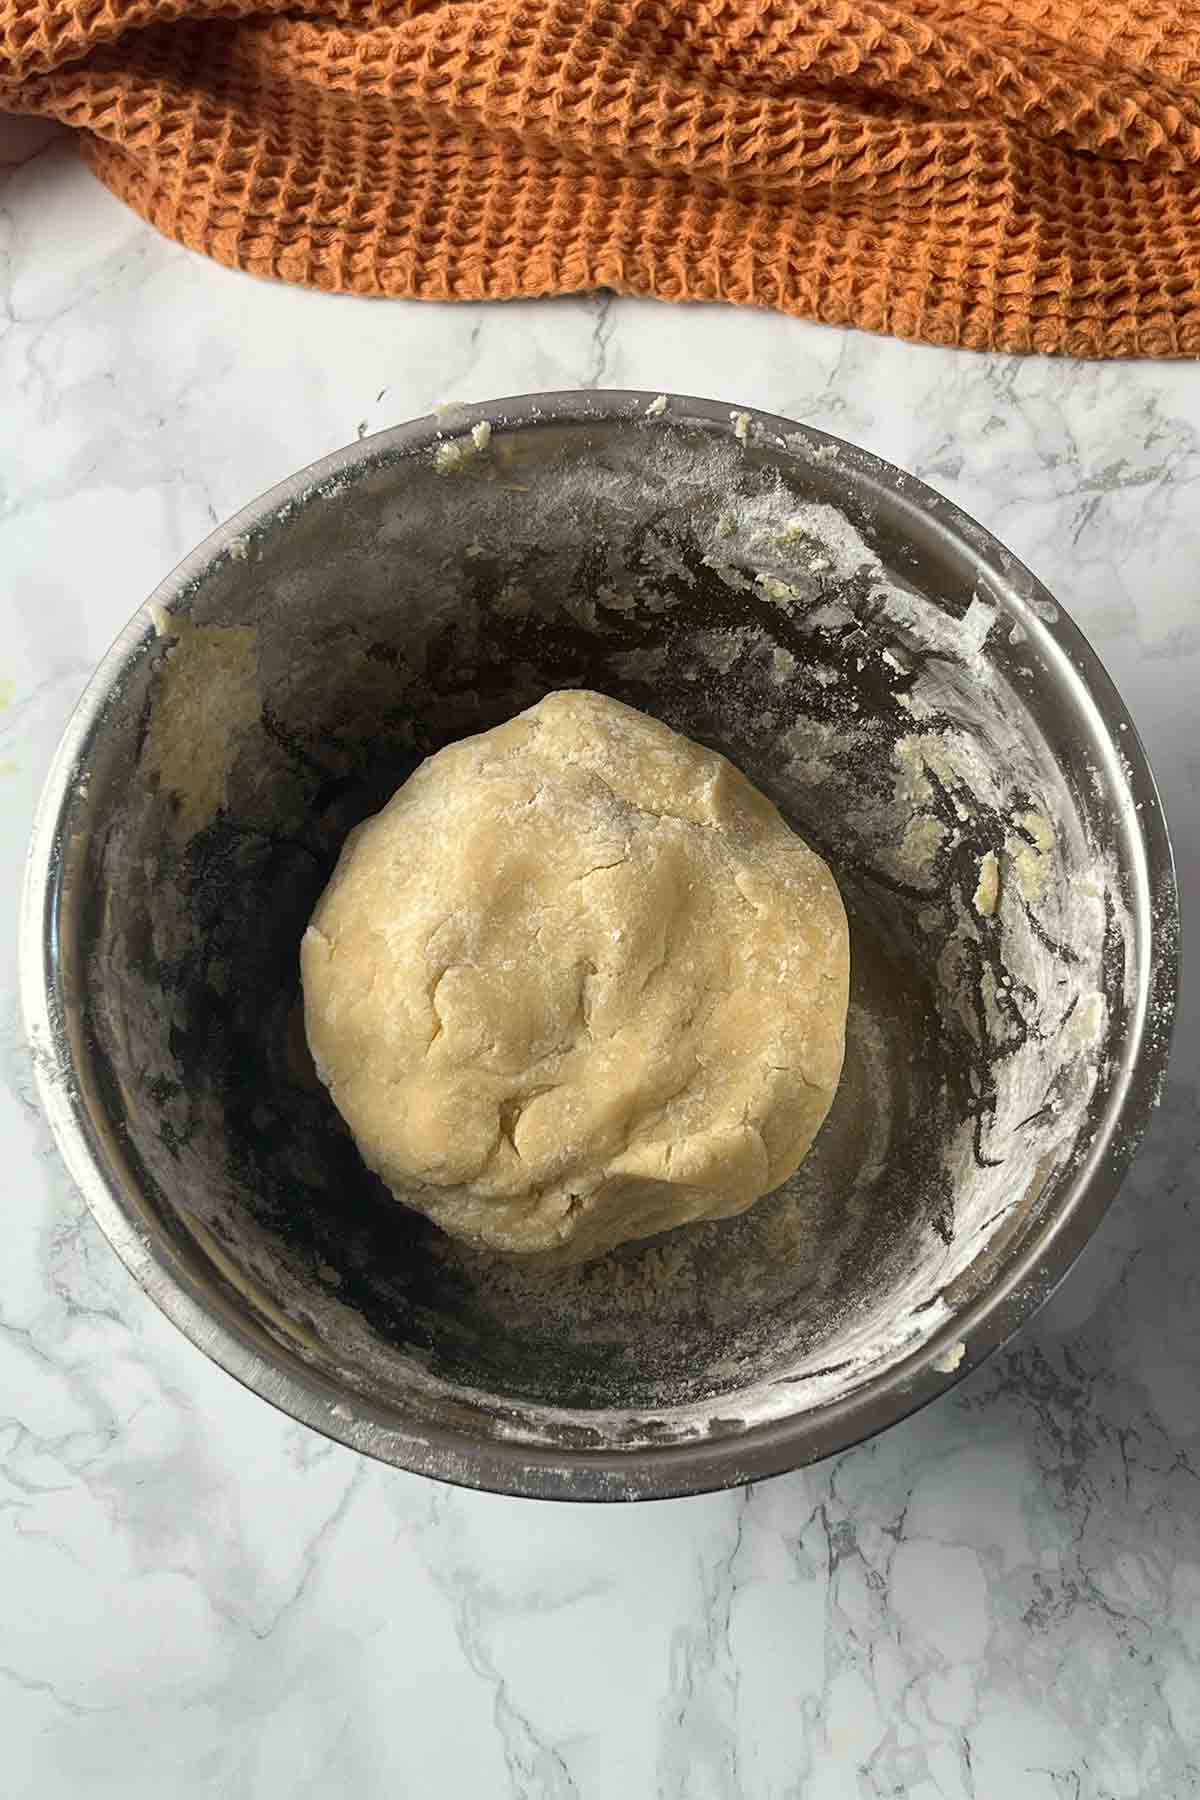
Step 2: Add 250g of plain flour, ½ teaspoon of baking powder and a pinch of salt to the bowl and mix well. When it starts to stick together, get your hands in there and press everything into a large ball of dough. If your dough is too sticky, add more flour and if it's too crumbly, add a small splash of milk.
Step 3: Roll the dough out on a floured surface until it's around ¼-inch thick. Then use a 3-inch Mickey Mouse cookie cutter to cut out your shapes. You should have enough dough to make 18 cookies.
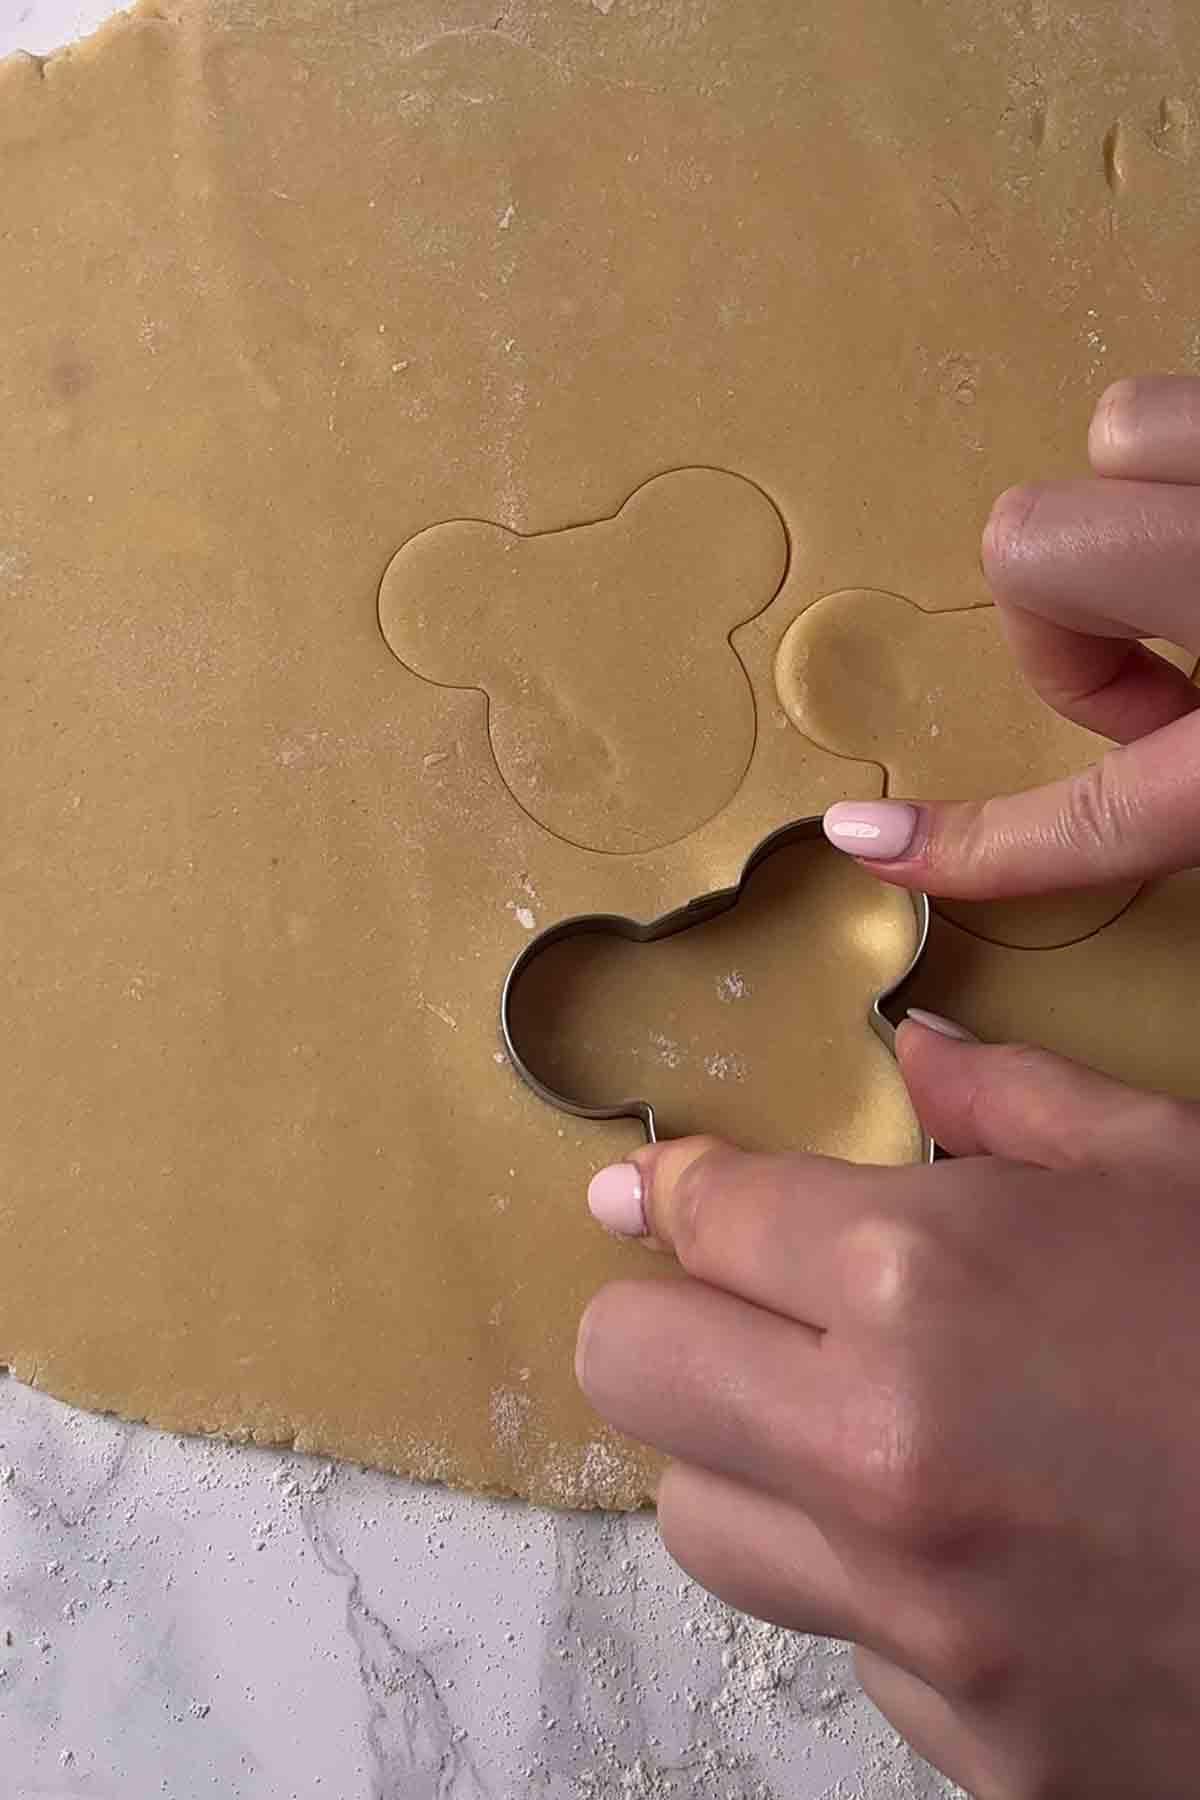
Step 4: Gently place your Mickey Halloween cookies onto a lined baking tray and pop them in the fridge for 30 minutes. This will chill the fat, helping the cookies to hold shape better while they're in the oven.
Step 5: While the cookies are chilling, preheat your oven to 180°C/350°F (or 160°C/325°F for fan and convection ovens).
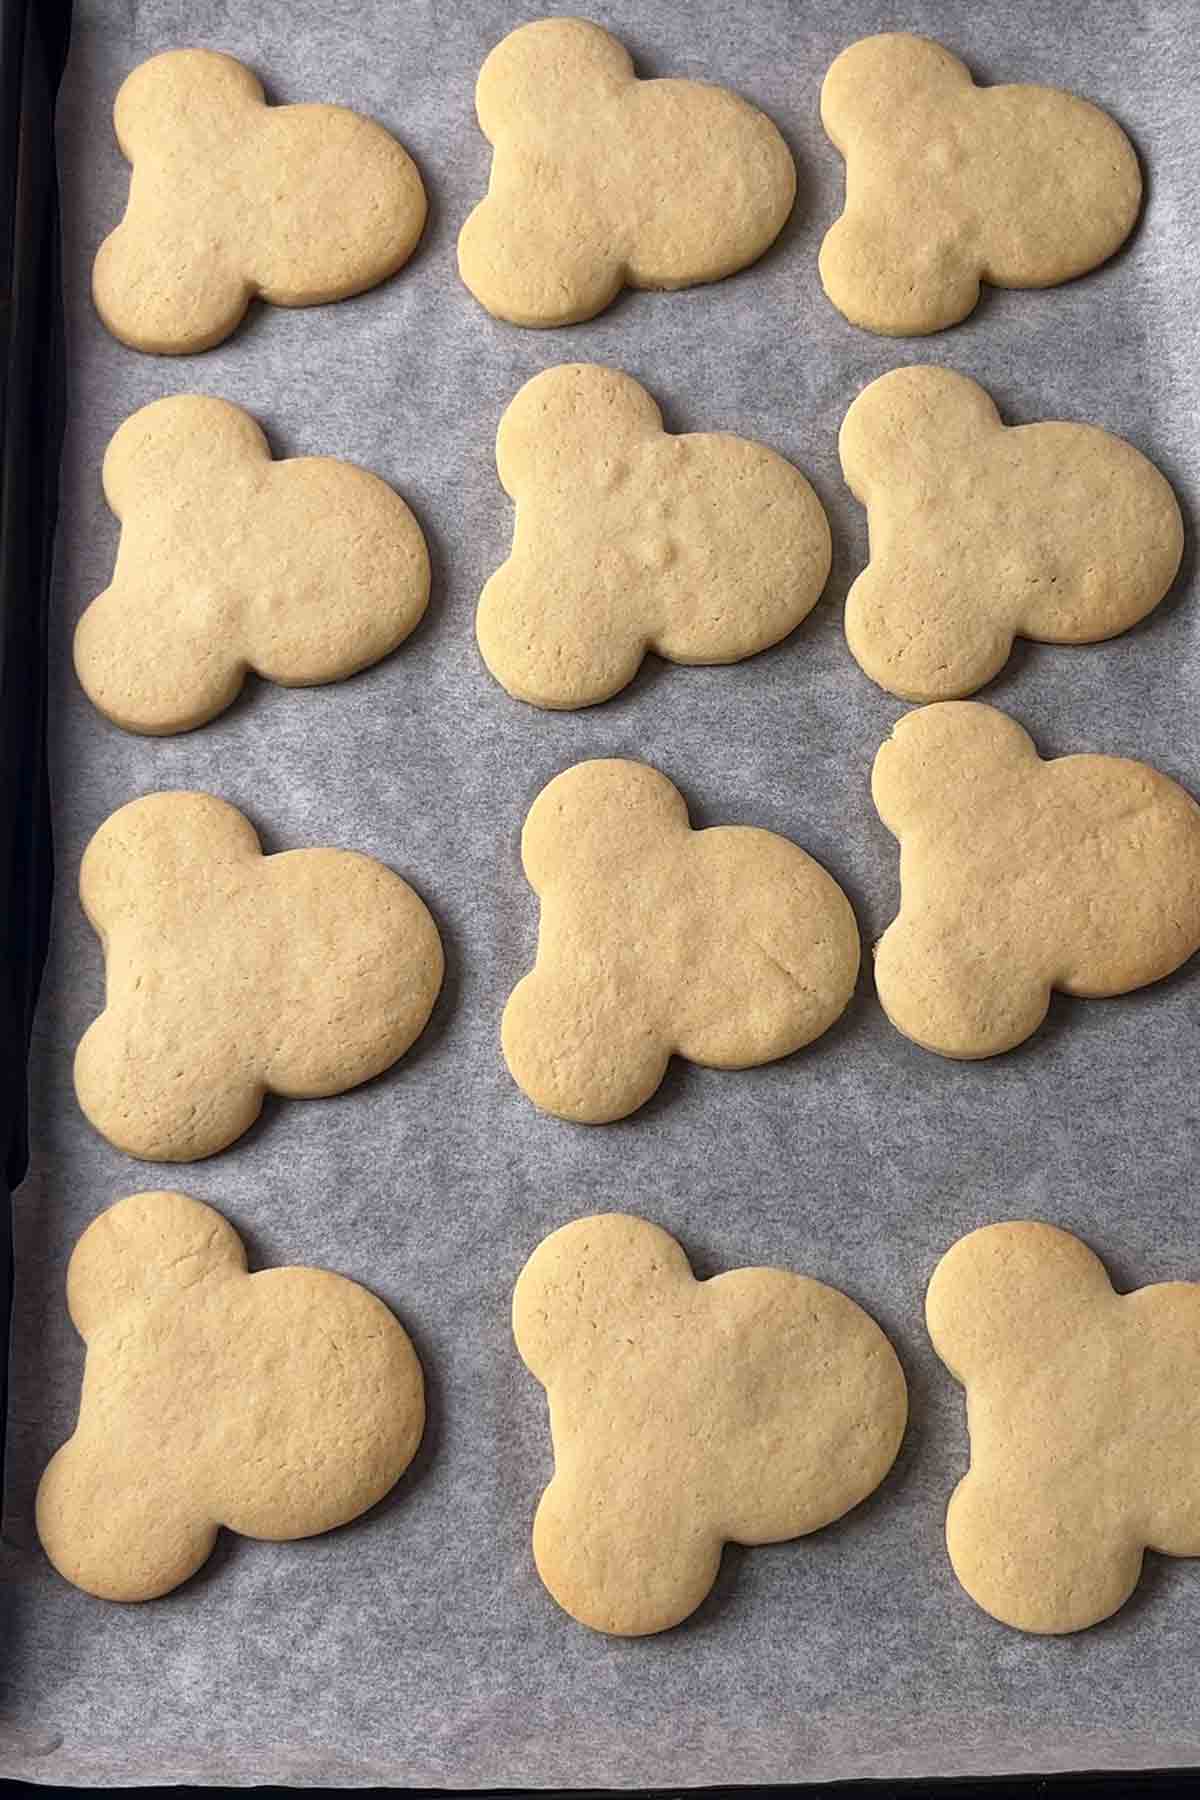
Step 6: Bake the cookies for 10-11 minutes. You'll know they're ready when they're firm to the touch around the edges. They'll also be a little golden brown around the edges underneath. Leave them on the tray until they're completely cool.
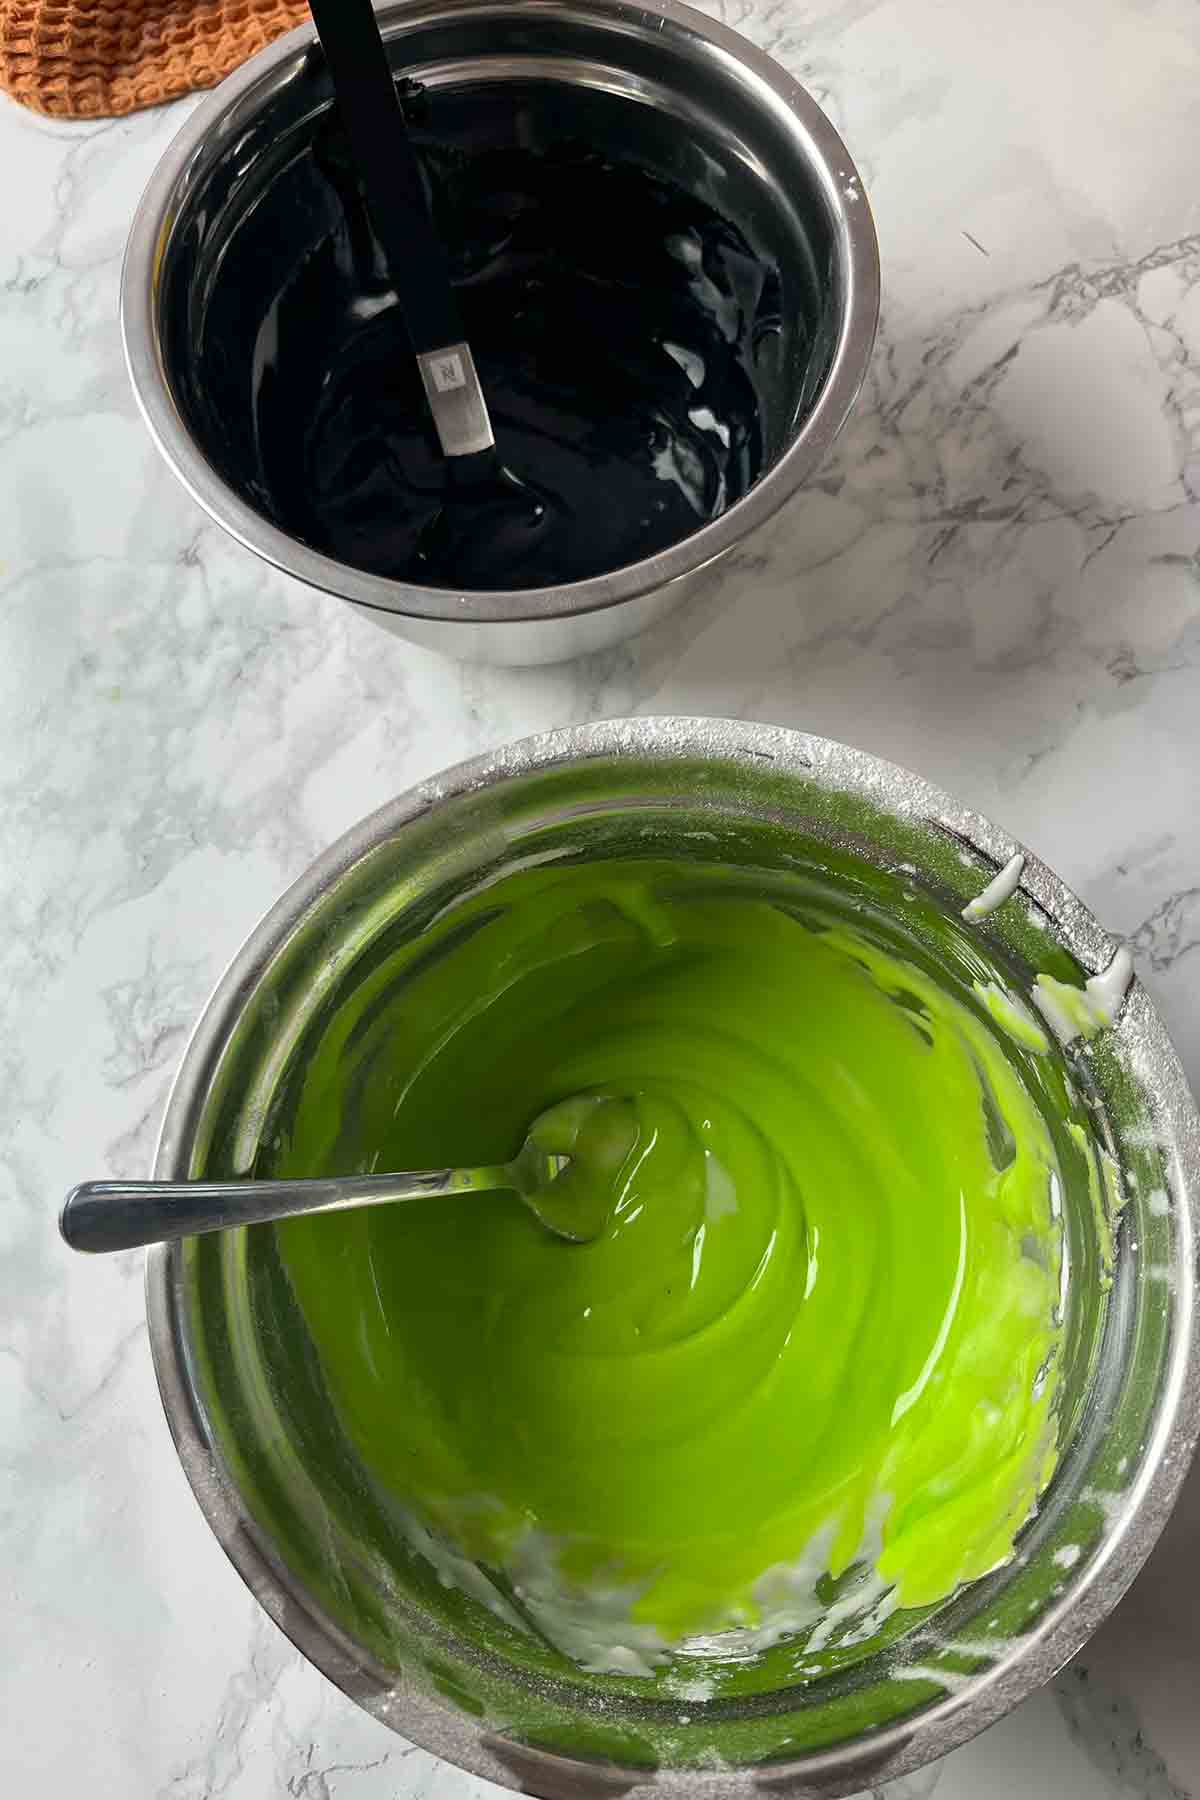
Step 7: Prepare the icing by mixing together 400g of icing sugar and 4 tablespoons of milk. Add more milk or icing sugar as needed until you get your desired consistency.
Step 8: Place ⅓ of the icing into a separate bowl and stir in some black food colouring. Colour the remaining ⅔ with green food colouring (I used lime green).
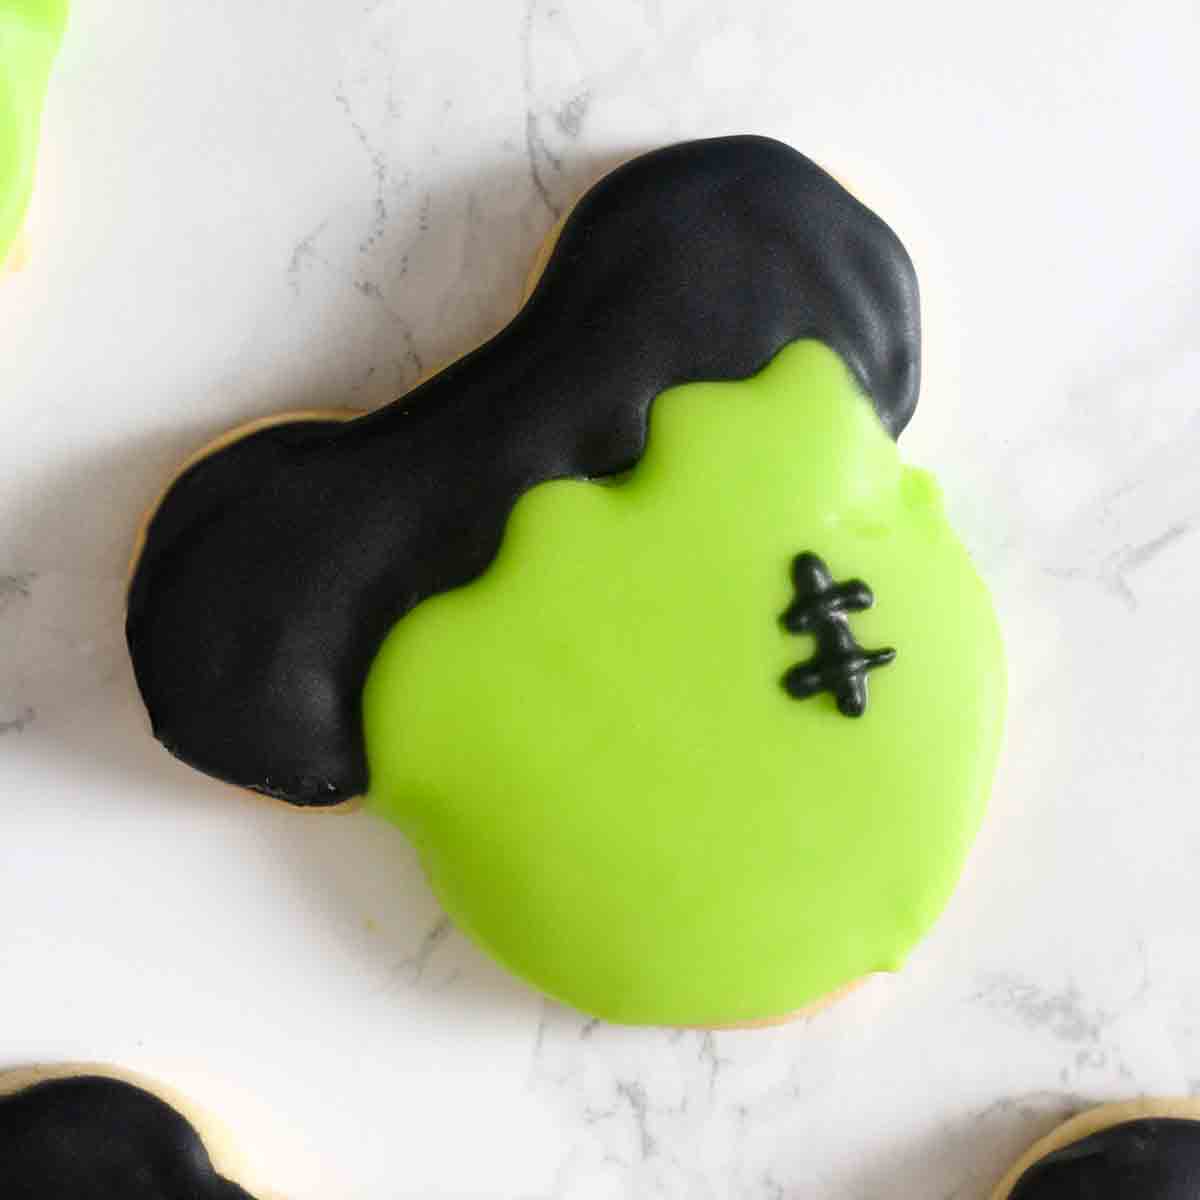
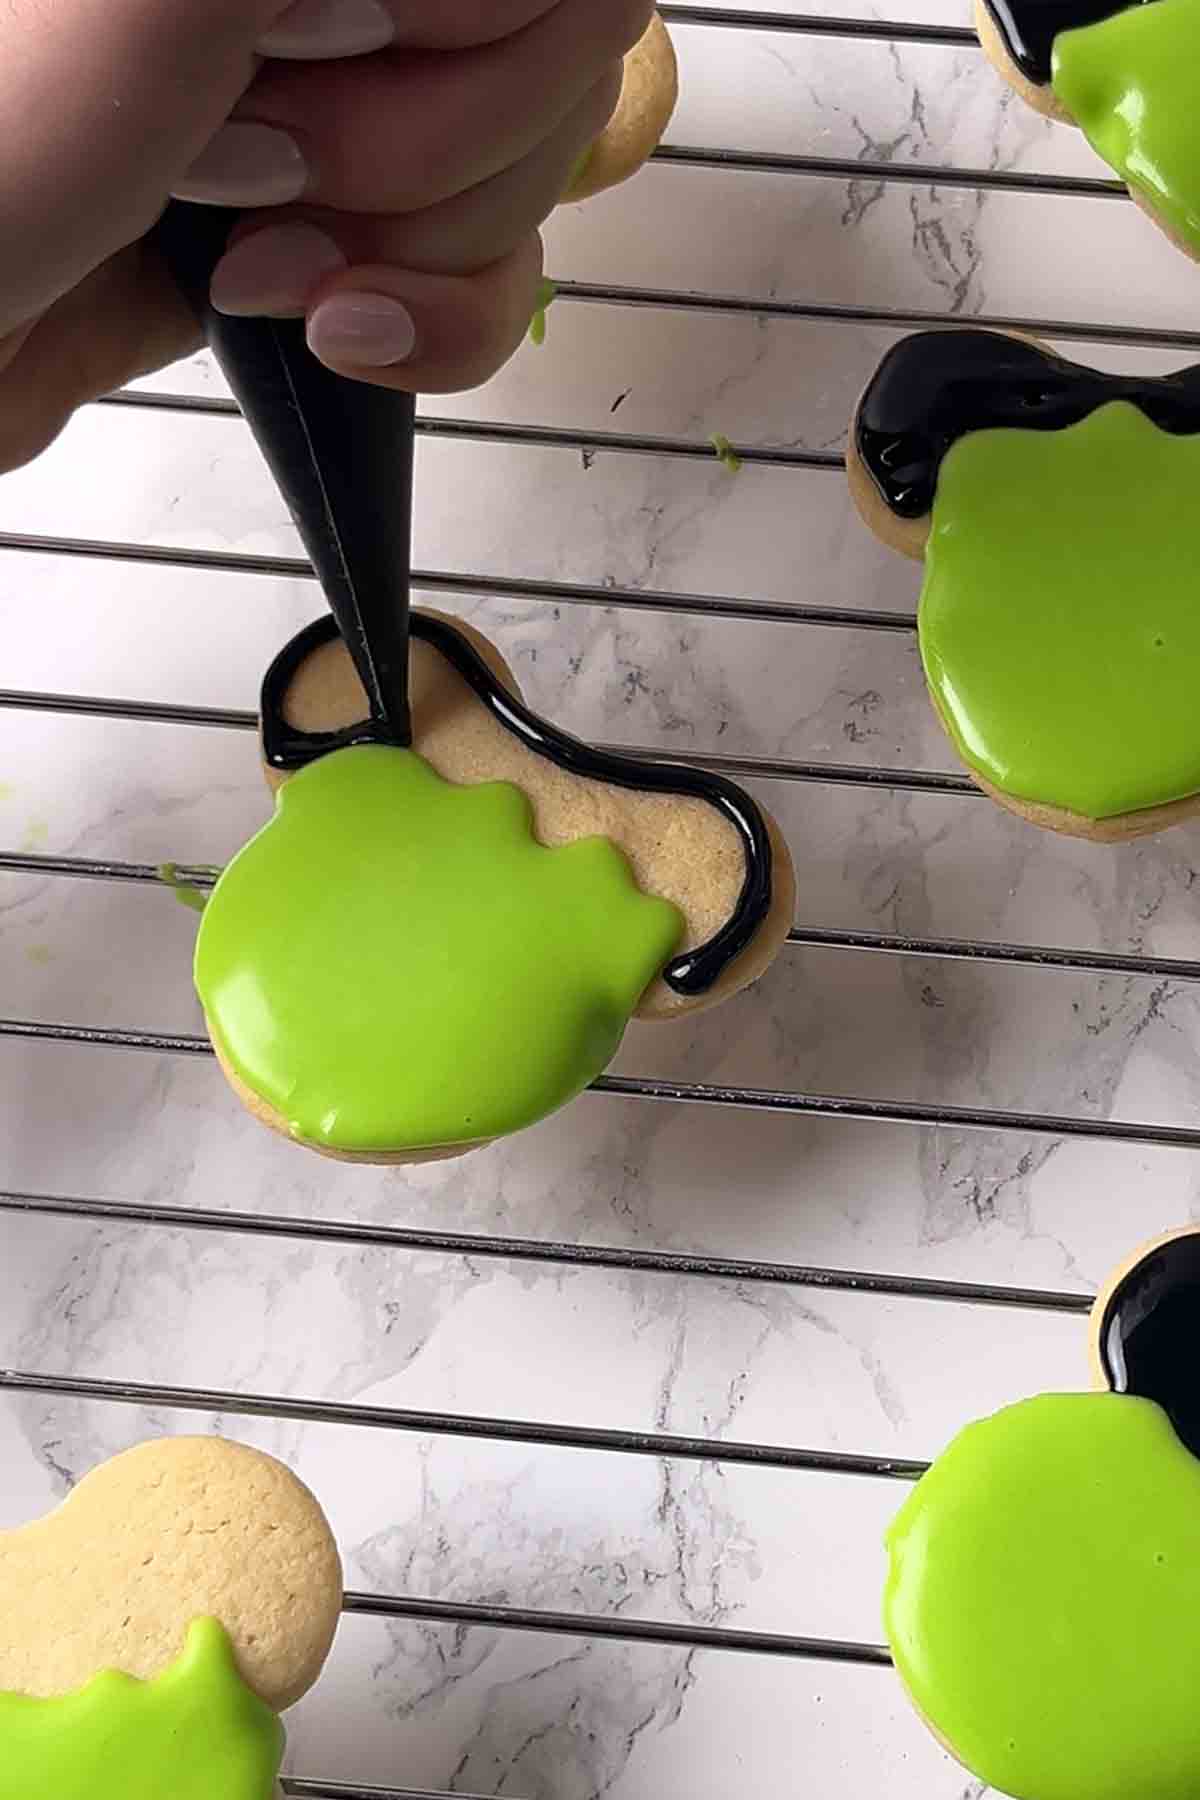
Step 9: Put the green icing into a piping bag and cut a very small hole off the tip. Cover the bottom half of the cookie with green icing, making a wavy pattern towards the top as pictured.

Step 10: Let the green icing set for 15 minutes or so then put the black icing into a piping bag. You may need to give it a quick stir if it has started to harden.
Step 11: Ice the rest of the cookie with the black icing and add small black stitches on top of the green icing.
Step 12: Allow the icing to fully harden then enjoy your cookies!
My top tips
- The baking time may change if you use a different size of Mickey Mouse cutter. Larger cookies will need a bit longer in the oven, while smaller cookies will bake faster. Just keep an eye on them while they're baking so they don't burn.
- You can check the cookies for doneness by gently flipping one of them over. When they're fully baked, they will be lightly golden brown around the edges underneath. There will also be some small cracks showing on the tops. Don't bake them until they're brown on top, as this will make them hard and crispy once they've cooled.
- Don't skip refrigeration! Letting your cookies chill for 30 minutes will help to prevent them from spreading and losing shape in the oven.
FAQs
You can keep these in an airtight container in the fridge for up to 5 days. You can probably squeeze an extra day or two out of them if you keep them in the fridge.
Yes, for up to 3 months. You can either put them in an airtight container or freeze them on a baking tray until solid then transfer them to a freezer bag. Let them thaw at room temperature for an hour or two before enjoying and do not refreeze.
You can make them look like pumpkins by making the top green and the bottom orange, like mummies by icing them white with white lines on top, or even like monsters by using different colours of icing and googly eyes. Feel free to get creative!
More Halloween treats:
- Black and orange pinwheel cookies
- Halloween shortbread
- Halloween rocky road
- Spooky chocolate bark
- Ghost chocolate strawberries
- Beetlejuice cupcakes
- Wicked cupcakes
I hope you like my Disney Halloween Mickey Mouse cookies. If you make them at home, please let me know how you get on by leaving a rating and comment below. Enjoy!
Halloween Mickey Mouse Cookies
Ingredients
- 120 g Butter, softened at room temperature (1 stick)
- 120 g Caster sugar (½ cup + 2 tablespoons)
- 2 Teaspoons Vanilla extract
- 1 Medium Egg
- 250 g All-purpose flour (2 cups)
- ½ Teaspoon Baking powder
- Pinch Salt
Icing:
- 400 g Icing sugar (3+¼ cups)
- 4 Tablespoons Milk
- Lime green gel food colouring
- Black gel food colouring
Instructions
- Line a large tray or two with baking paper.
- In a large bowl, beat the butter and sugar together until smooth. Then mix in the vanilla extract and the egg.
- Add in the flour, baking powder and salt. Mix well and when it starts to stick, use your hands to press everything together into a ball of dough. If it's too sticky, add more flour and if it's too dry, add a small splash of milk.
- Roll the dough out on a lightly floured surface until it's around ¼-inch thick.
- Use a 3-inch Mickey Mouse cookie cutter to cut out your cookies, re-rerolling leftover pieces of dough until it's all used up.
- Transfer the cookie shapes to your lined tray and refrigerate them for 30 minutes. This will help them to hold their shape in the oven.
- While the dough is chilling, preheat your oven to 180°C/350℉ (or 160°C/320℉ for fan or convection ovens).
- After the 30 minutes have passed, pop the cookies in the oven and bake for 10-11 minutes. They should be firm to the touch around the edges and slightly soft in the middle.
- Leave them on the tray to cool completely.
Icing:
- Mix the icing sugar and milk together. Add more milk or icing sugar as needed until you get your desired consistency.
- Transfer ⅓ of the icing to a separate bowl and stir the black food colouring in. Add the green food colouring to the other ⅔.
- Put the green icing into a piping bag and cut a very small hole off the end. Ice the bottom of the cookies, making a wavy pattern towards the ears as pictured.
- Let the green icing set for 15 minutes or so then add your black icing to a piping bag. You might need to give it a quick stir to make it smooth again.
- Pipe the black icing onto the top end of the cookies then add small black stitches on top of the green.
- Let the icing fully set then enjoy!
Video
Notes
- Store in an airtight container for up to 5 days.


Leave a Reply