
This no-bake chocolate mint slice is a classic Scottish traybake, made with a crunchy biscuit base, a melt-in-your-mouth peppermint fondant filling, and a chocolate topping. It looks simple but it's seriously SO GOOD that you'll want to make it again and again!

I'm slowly building up my collection of no-bake traybakes and wanted to add one of my favourites to the blog: this delicious chocolate mint slice! This is a super popular bakery treat here in Scotland and I loved them so much as a kid that I was practically raised on them, LOL.
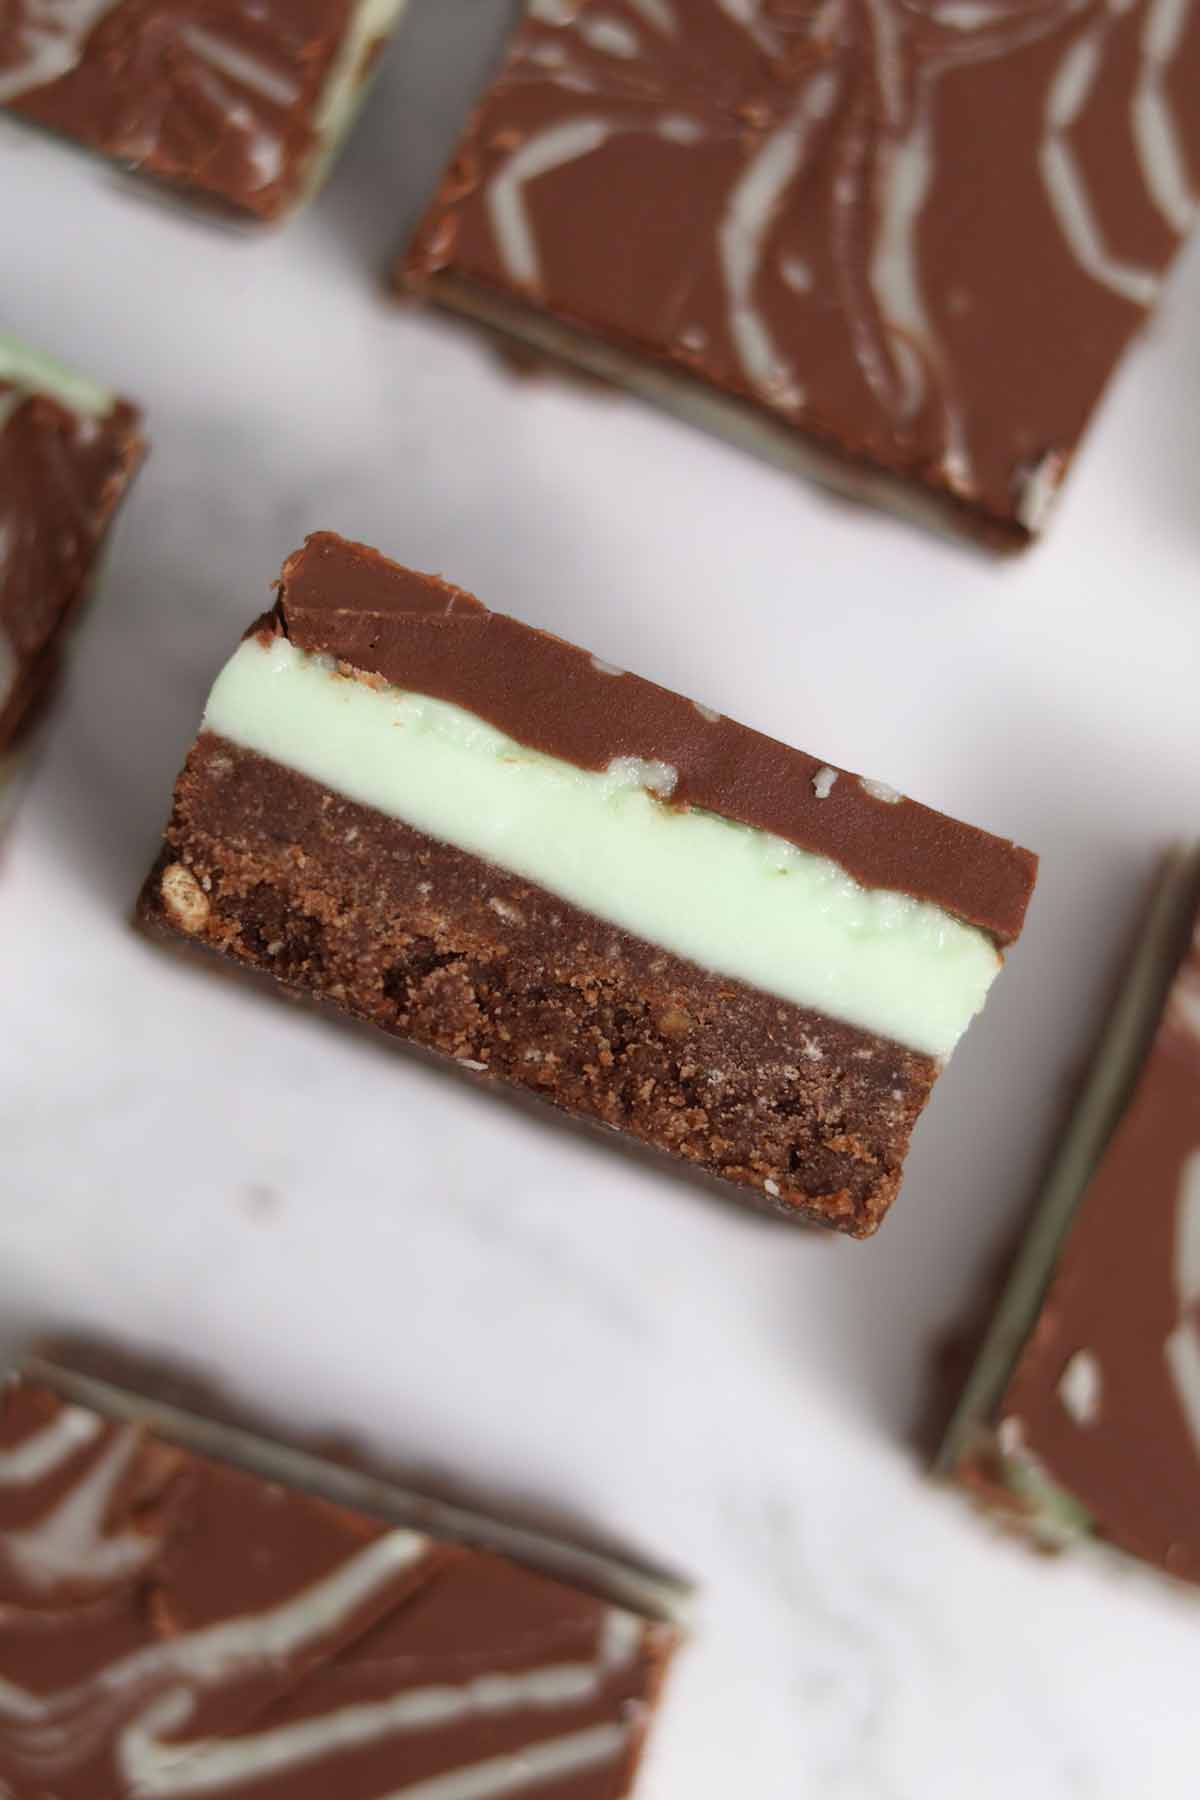
Peppermint slice consists of three simple but delicious layers. The first is a buttery, chocolatey digestive biscuit layer, the second is a thick, minty fondant layer, and the last is a simple layer of milk chocolate (or dark chocolate, depending on your preference). If you've never tried them before, prepare to be amazed!
Here's what you need
When you're ready to get started, grab the following ingredients:
- Digestive biscuits: The base of this traybake is similar to a no-bake cheesecake base and it's traditionally made with digestive biscuits.
- Butter: I prefer to use salted butter as it helps to cut through the sweetness a bit.
- Cocoa powder: To add chocolatey flavour to the base.
- Golden syrup: This, along with the melted butter, helps to bind the biscuit crumbs together while adding a bit more sweetness.
- Icing sugar: For the fondant mint filling.
- Peppermint extract: I used 2 teaspoons but feel free to add more or less according to your personal taste.
- Green food colouring: You need the smallest amount to create a light green colour. I recommend starting with a small dot then adding more as required until you get your desired shade of green.
- Chocolate: As I mentioned above, you can use milk or dark chocolate for the topping. I used milk chocolate as this is what my local bakery used to make their peppermint slice with when I was growing up!
Equipment
- 8x8-inch tin: I use this size of tin for most of my no-bake traybakes as it gives lovely thick slices while still allowing you to serve a small crowd. If you'd like to use a different size of tin for this recipe, use my cake pan converter to adjust the ingredient quantities accordingly.
- Baking paper: Leave some hanging over the edges for easy removal later.
- Saucepan or heatproof bowl: You can melt the ingredients over the stove or in the microwave, whatever you prefer.
- Mixing bowls: A large one for the biscuit base and one for the peppermint filling.
- Utensils: Two wooden spoons or spatulas for mixing, plus a teaspoon and a few tablespoons for measuring and spreading. I also used a toothpick to swirl some leftover icing into the chocolate topping.

How to make no-bake chocolate mint slice
Step 1: Line an 8x8-inch tin with baking paper, ready for your biscuit base to go into later. Set it aside for now.
Step 2: Blitz 350g of digestive biscuits into fine crumbs then pour them into a large bowl. Run your fingers through to make sure there are no big lumps left in there.
Step 3: Pour 150g melted butter into the bowl with the biscuit crumbs, along with 2 tablespoons of cocoa powder and 2 tablespoons of golden syrup. Mix well until all of the crumbs are coated, then press the mixture into your lined tin.


Step 4: Now let's make the filling! Add 350g of icing sugar to a bowl then stir in 2-3 tablespoons of water, a little bit at a time, until you have a very thick paste-like icing. Then stir in 2 teaspoons of peppermint extract and a very small amount of green gel food colouring.

Step 5: Spoon the peppermint mixture over the biscuit base and spread it out evenly. If it's too thick/sticky to spread, wet your spoon or fingers first to make it easier. I kept 2 tablespoons aside for the topping but this is optional.
Step 6: Melt 300g of chocolate then gently spread it over your peppermint layer. Swirl more icing into the melted chocolate if desired then pop the whole thing in the fridge for 4 hours to set.

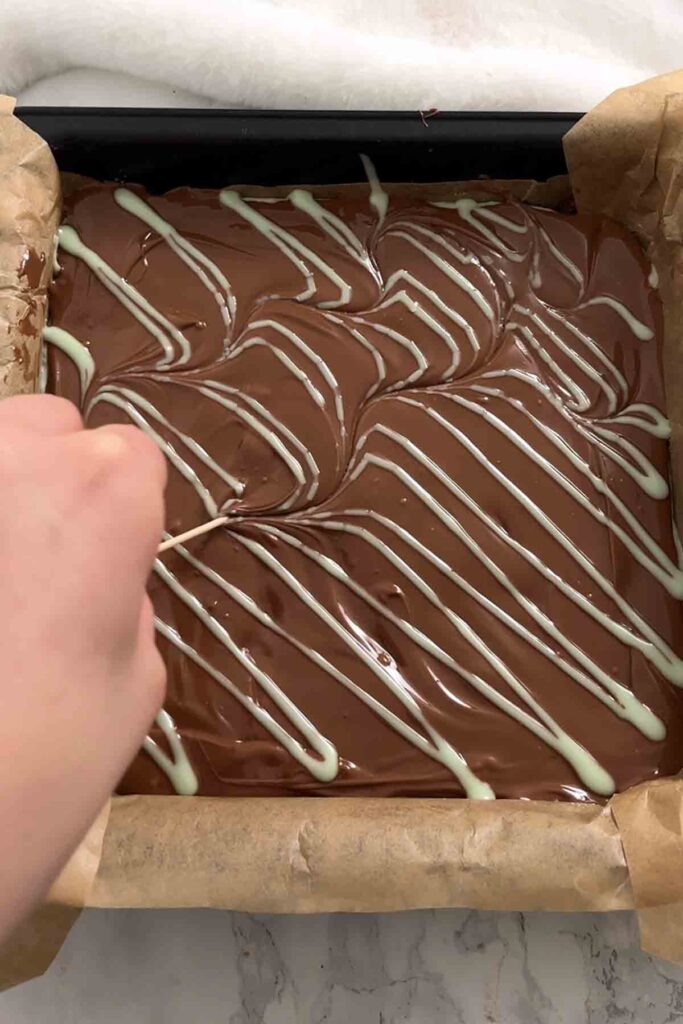
Step 7: Once set, remove your peppermint slice from the tin, cut it into squares using a warm knife and enjoy!
My top tips
- Use a wet spoon/fingers to spread the peppermint layer around. It's supposed to be super thick so that it holds its shape after setting, so avoid adding more water than necessary to the filling itself.
- For clean slices, use a warm knife to cut. You can warm your knife by running it under boiling water and drying it before each cut.
- I used an 8x8-inch tin for this recipe. If you're using a larger tin, make sure to increase the 'servings' slider in the recipe card so you don't end up with thin slices.
FAQs
Peppermint slice will last for up to 1 week if you keep it in an airtight container in the fridge. I don't recommend storing it at room temperature as the filling will soften as it warms up.
You sure can. Just pop your slices into airtight containers and freeze them for up to 3 months. Alternatively, freeze the entire slab on a baking tray until it's solid then wrap it tightly in clingfilm or tinfoil. Defrost overnight in the fridge and do not refreeze.
The chocolate is a lot firmer than the other layers of this traybake, so too much pressure will cause cracking. It's best to warm your knife up first, as this will slightly melt the chocolate and allow for a more gentle slice. As I mentioned above, you can warm your knife up by dipping it into boiling water (or running it under a very hot tap) then wiping it dry before each slice.
More mint chocolate treats
I hope you enjoy my Scottish chocolate mint slice! If you make it at home, please leave a comment and rating below to let me know what you think. Enjoy!

Chocolate Mint Slice (No-Bake)
Ingredients
Base
- 350 g Digestive biscuits
- 150 g Butter, melted
- 2 Tablespoons Cocoa powder
- 2 Tablespoons Golden syrup
Filling
- 350 g Icing sugar
- 2-3 Tablespoons Cold water
- 2 Teaspoons Peppermint extract
- Small amount Green gel food colouring (start with a drop then add more as required)
Topping
- 280 g Milk or dark chocolate
Instructions
Base
- Line an 8x8-inch tin with baking paper.
- Blitz the digestive biscuits into fine crumbs then pour them into a large bowl along with the melted butter, cocoa powder and golden syrup. Mix well until the biscuit crumbs are evenly coated.
- Spoon the mixture into your lined tin and press down into place.
Filling
- Add the icing sugar to a bowl then add the water in, a little bit at a time, until you have a very thick paste-like icing. Then stir in the peppermint extract and a very small amount of the food colouring.
- Spoon the filling over the biscuit base and spread it out evenly. You can lightly wet your spoon or fingers to help it stick in place.
Topping
- Melt your chocolate then carefully spread it over the mint filling.
- Refrigerate the whole traybake for 4 hours until set then use a warm knife to cut it into slices.
Video
Notes
- For decoration, set a small amount of the filling aside, add more water until it has the consistency of glace icing, then swirl it into the melted chocolate.
- If your filling is too runny, add more icing sugar. If it's too thick, add small drops of water until you can just spread it (it should be quite stiff).
- Store leftovers in an airtight container in the fridge for up to 1 week.


Bron
Trialled this tonight to see if it was Christmas-gift worthy.
Within minutes of slicing I had to physically wrestle the container out of my husband’s hands before he inhaled the entire batch in one go.
Minty, chocolatey, dangerously moreish — and ridiculously easy to make.
10/10, will absolutely be gifting (and remaking) this.
Chloe
Haha I love this! Thanks so much for your review, glad it was enjoyed 🙂
Paul King
Fantastic Recipe! Made these as a Christmas treat for work and everyone raved about them. Really simple to make! Will make again, and again and again
Chloe
Thanks Paul, so glad you liked them!