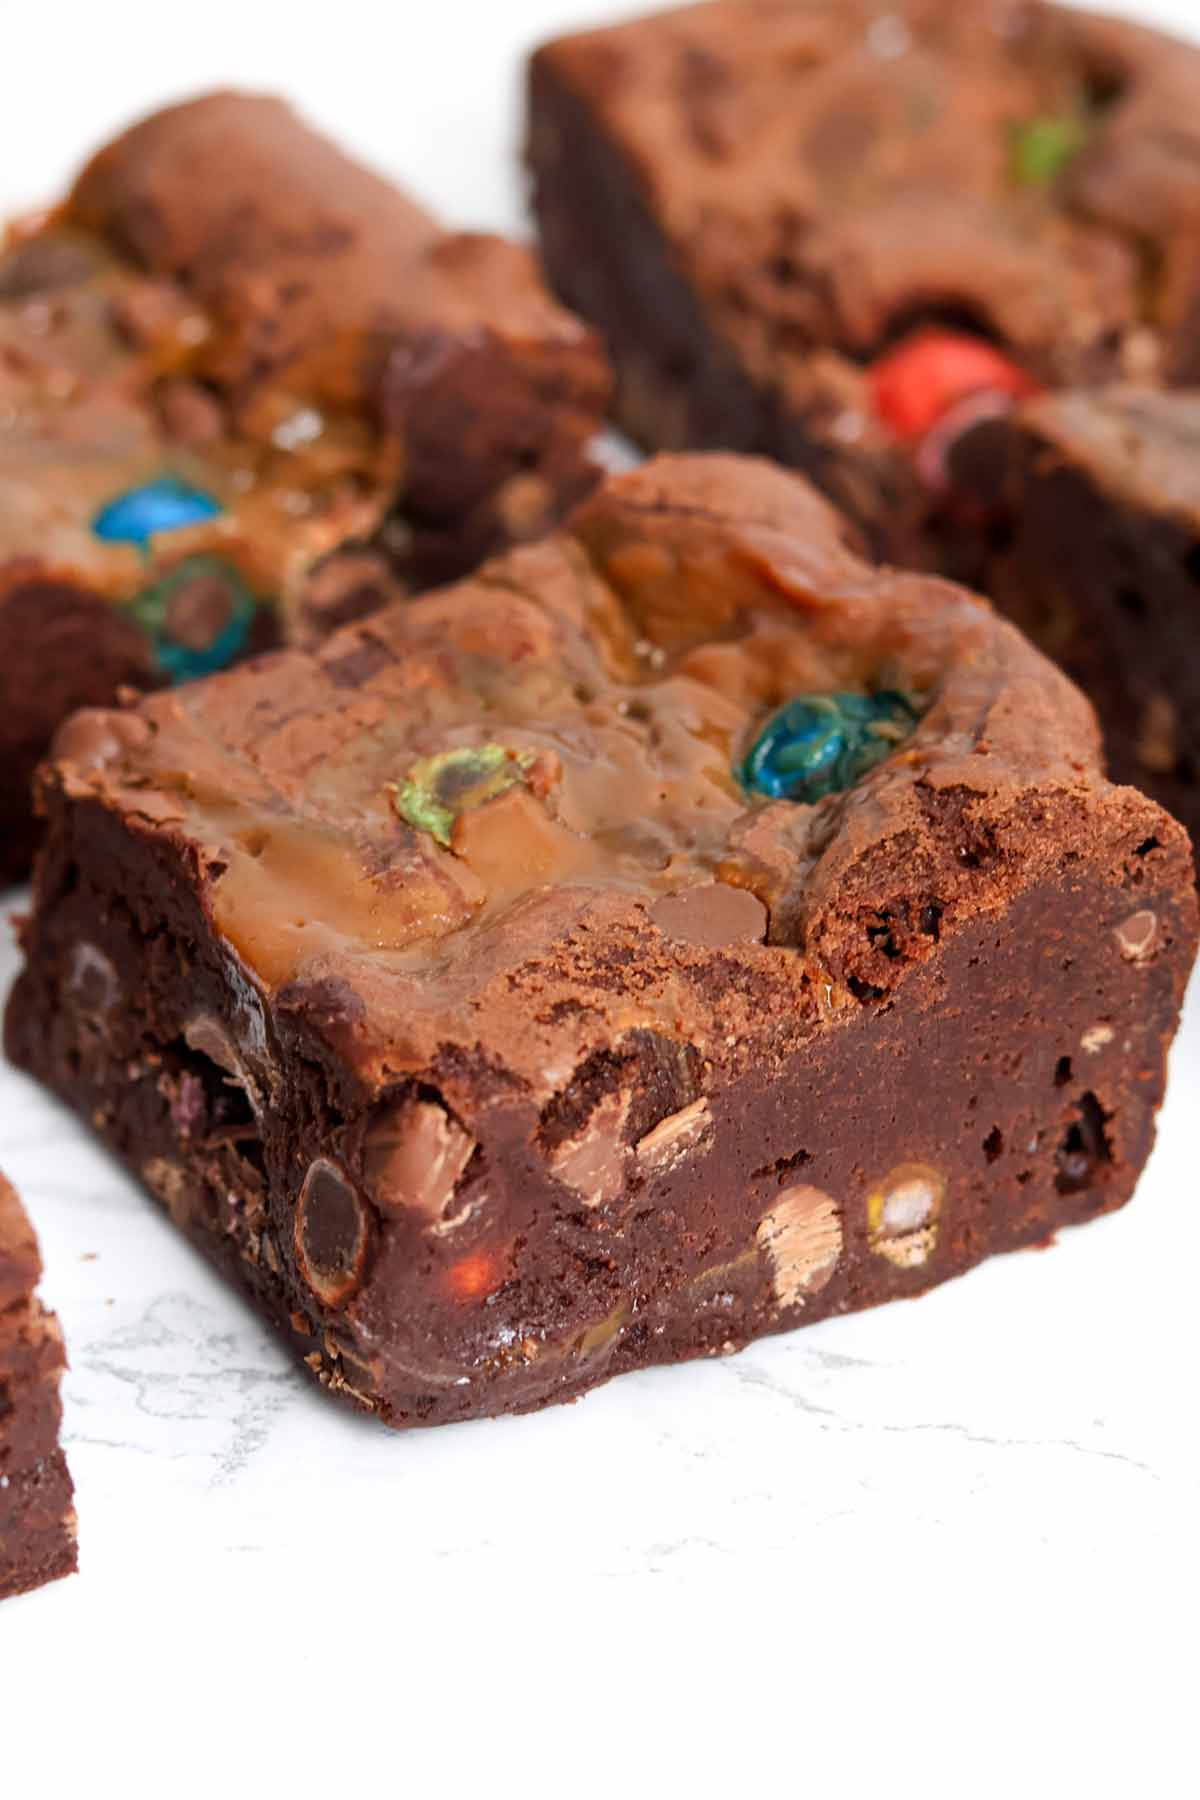
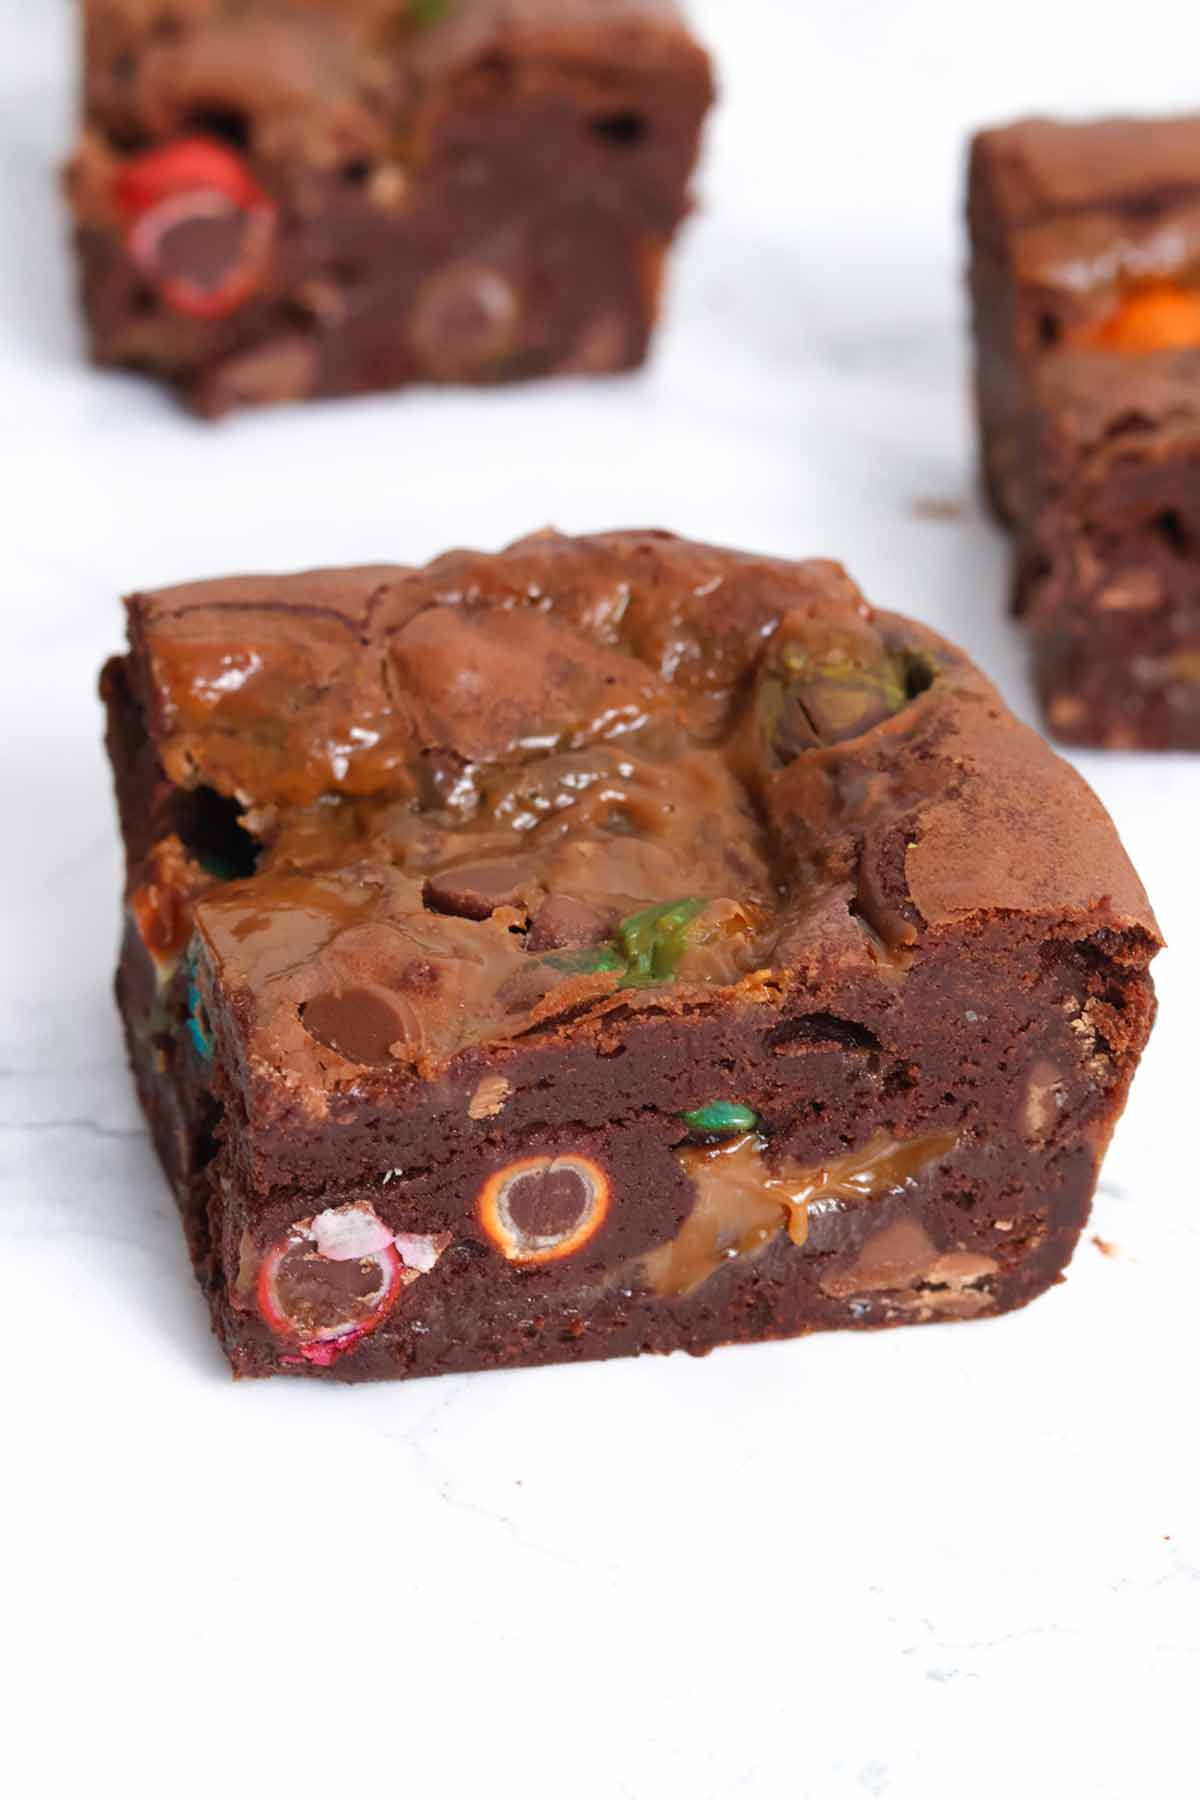
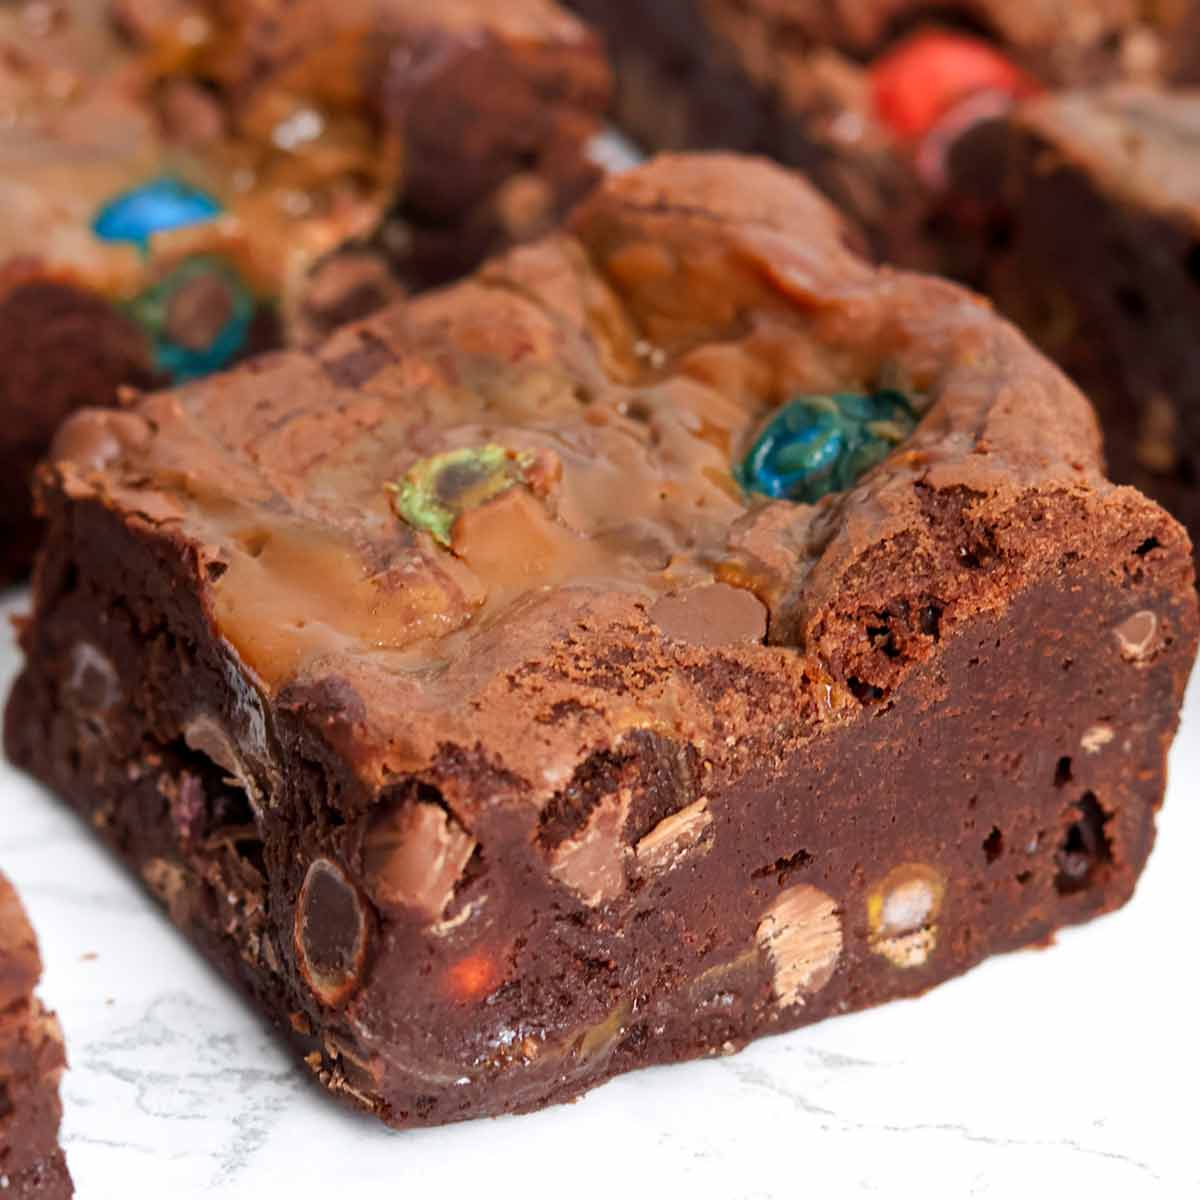
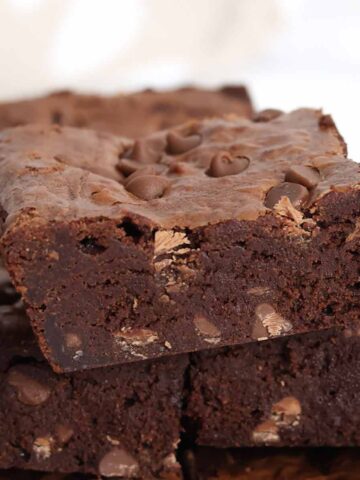
These salted caramel M&M brownies are the ULTIMATE sweet and salty dessert! They have a rich, fudgy texture and are packed with milk chocolate chips, chewy caramel M&Ms, and lots of salted caramel! A super indulgent treat that you'll want to make again and again!
You all know how much I love me some brownies (so much so that I created an entire brownie guide), and I'm so excited to be sharing my latest creation with you: Salted caramel M&M brownies!
I spotted these M&Ms in my local Asda recently and immediately began planning out a recipe. I am over the moon with how the brownies turned out, and I know I say this all the time, but they might just be my new favourite!
The sweet and salty combo is perfect, and the M&Ms have a lovely, chewy texture which pairs perfectly with the fudgy brownie. I can't wait for you to try them!
If you're ready to get started, keep reading for all my top brownie tips, notes and step-by-step instructions. Or, for the condensed version of the recipe, you can jump straight to the recipe card at the end of the post. Enjoy!
Let's get baking- grab your ingredients!
Here's everything you'll need to make these tasty brownies:
- Dark chocolate: 70% dark chocolate is the best chocolate for brownies in my opinion, and it's what I use almost every time. It'll give your brownies a rich, fudgy texture without making them too bitter.
- Butter: Make sure to use salted butter for this recipe to really enhance the caramel flavour.
- Caster sugar: This is just a finer version of regular granulated white sugar. I use it because it dissolves quickly into the eggs, which saves on whisking time and prevents oily brownies.
- Eggs: You'll need 3 medium eggs for this recipe.
- Flour: Always use plain (all-purpose) flour for a dense brownie texture. Adding self-raising flour or baking powder will produce cakey brownies.
- Cocoa powder: This intensifies the chocolate flavour without adding too much extra fat or sugar.
- Chocolate chips: I used milk chocolate but you can use semi-sweet or dark if you want to cut down the sweetness a little.
- Salted caramel M&Ms: Regular caramel M&Ms or even just the traditional kind will work fine too!
- Runny/spreadable caramel: Or dulce de leche, to mix into the brownie batter. I used a bit less than half a tin of Carnation caramel.
Equipment you'll need
- 8x8-inch tin: This is my go-to tin for brownies, which will ensure they're thick and perfectly baked. To adjust the recipe for other tin sizes, use my cake pan converter.
- Baking paper: For easy removal. Don't skip this step, as the brownies set pretty solid and are hard to remove from an unlined tin when they're cold.
- Electric whisk: For whisking the sugar into the eggs. A stand mixer will also work.
- Saucepan: For melting the chocolate and butter. You can also do this in the microwave using a heatproof bowl, but make sure to take it out and stir it every 20-30 seconds to prevent burning or splitting.
- Food scale: I recommend weighing your ingredients for best results, especially if you're a beginner baker.
- Toothpick: Or a butter knife, to swirl the caramel into the batter.

How to make salted caramel M&M brownies step-by-step
Step 1: Preheat your oven to 160°C (140°C if you're using a fan oven) and line an 8x8-inch tin with baking paper.
Step 2: Next, break up 200g of 70% dark chocolate and place it into a saucepan along with 180g of salted butter. Place the pan over low heat and stir gently until they're fully melted. Remove it from the heat and set aside to cool for 5 minutes.
Step 3: Add 3 medium eggs and 250g of caster sugar to a large bowl. Using an electric whisk or stand mixer, whisk them together for a few minutes until they become pale and voluminous.

Step 4: Pour the melted chocolate mixture into the bowl and gently fold it into the sugary egg mixture.

Step 5: Stir in 100g of plain flour and 1 tablespoon of cocoa powder. You should have a thick, glossy batter.
Step 6: Add 100g of milk chocolate chips and 200g of salted caramel M&Ms to the batter (you can keep some aside for the topping if you like).

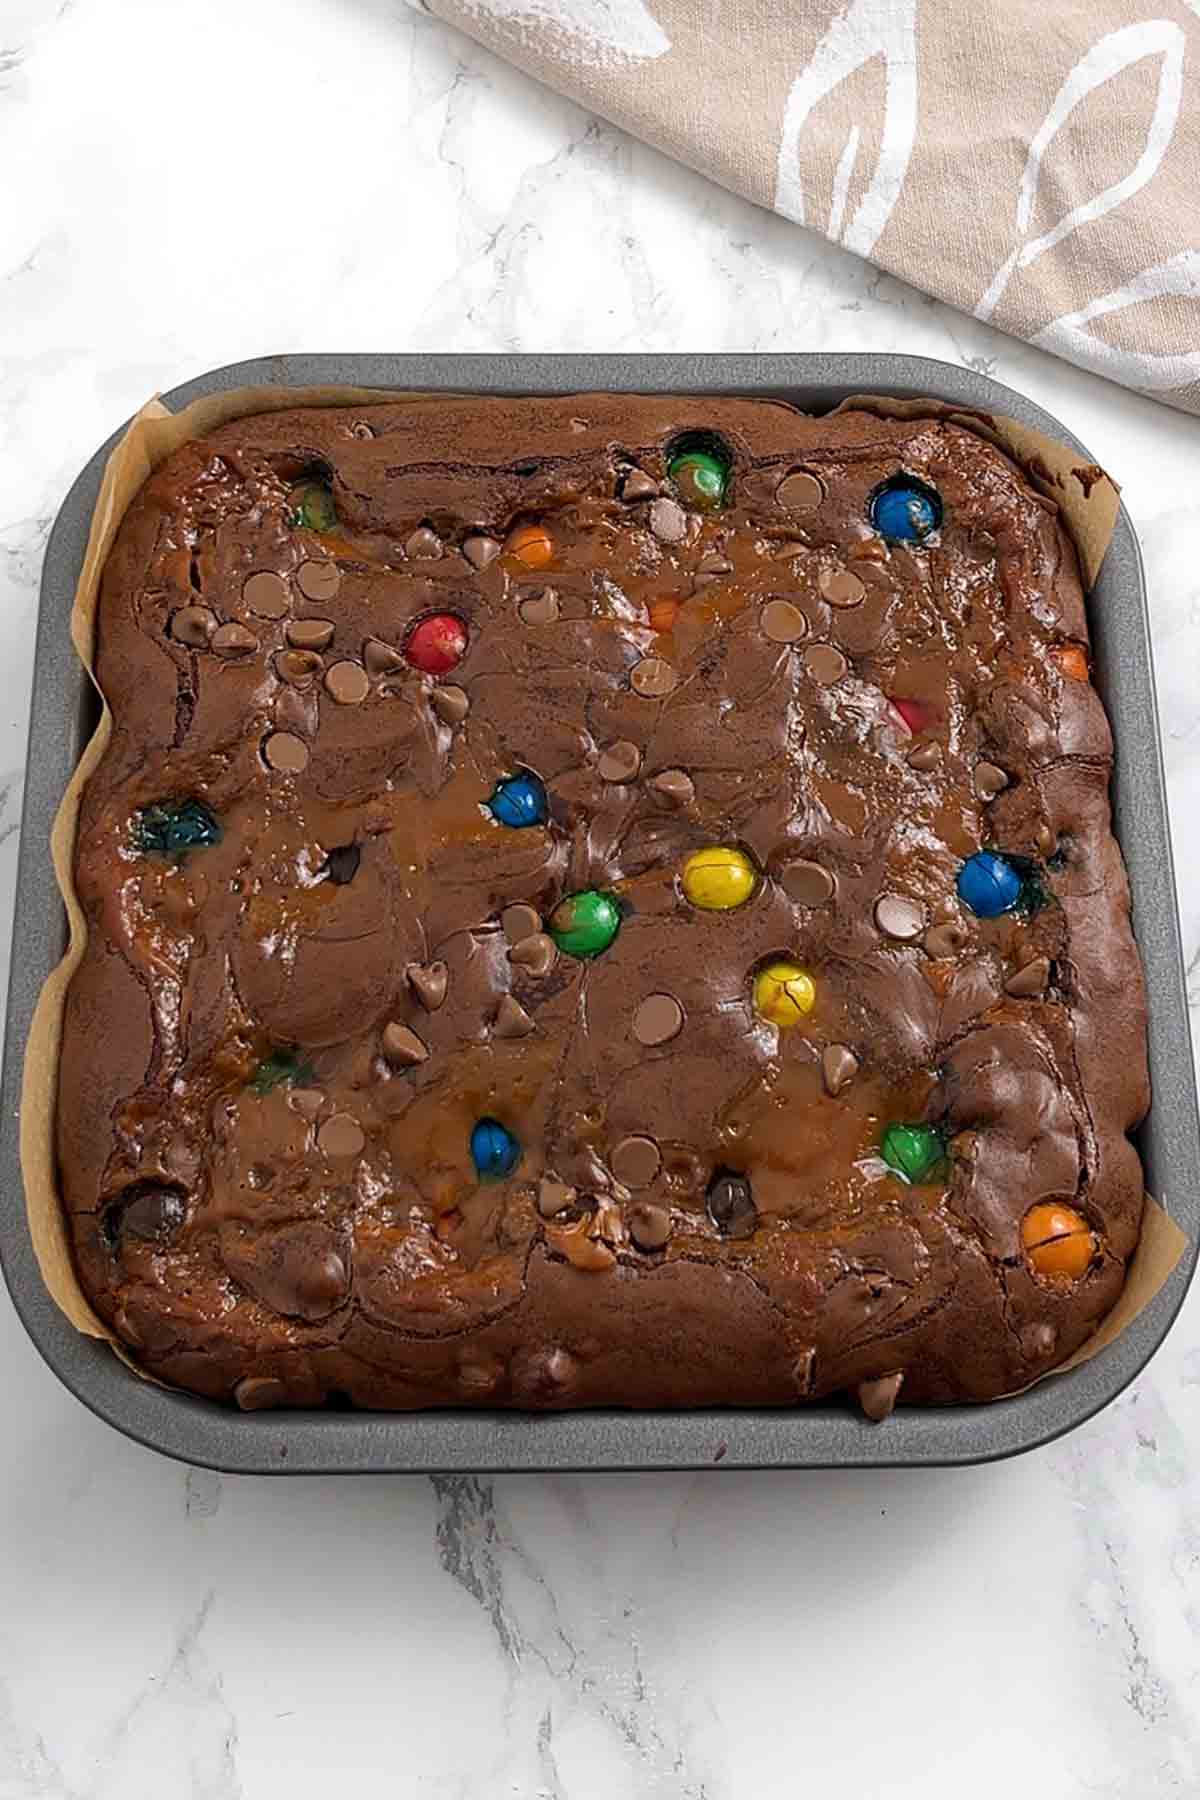
Step 7: Pour half of the brownie batter into your lined tin. Drizzle 3 tablespoons of salted caramel on top, then cover with the remaining brownie batter. Spread it out evenly to ensure it reaches the edges of the tin.
Step 8: Drizzle 3 more tablespoons of salted caramel on top then use a toothpick to swirl it into a marbled pattern. Top with more M&Ms and chocolate chips.


Step 9: Bake your brownie for 35-40 minutes, until it's risen with a shiny crust on top. Let it cool to room temperature in the tin then pop it into the fridge overnight to set.
Step 10: Remove the brownie from the tin, cut it into squares and enjoy!
My top brownie tips
- Don't add too much caramel on top as it'll prolong the baking time and prevent the brownies from setting firmly. 2-3 tablespoons is perfect.
- Take your brownies out of the oven when they still have a slight wobble in the centre. Don't let them bake all the way through or they'll end up too dry once cool.
- For clean brownie slices, dip your knife in boiling water then wipe it dry before cutting. This will prevent the brownie from sticking to the blade and looking uneven.
- If you're short on time, you can set the brownies in the freezer for about 2 hours instead of leaving them in the fridge overnight.
FAQs
This is likely because they are underbaked or simply need more time in the fridge. Bake the brownie until it has a shiny crust on top and is pulling away from the edges of the tin slightly. It should have a slight wobble in the middle but not too much. To get that fudgy texture, these brownies must also be chilled overnight, as this gives the fat time to solidify.
These will keep well for up to 1 week, as long as you store them in the fridge in an airtight container. I like to eat them straight from the fridge but if you prefer a softer texture, let them come to room temperature before serving.
Yes, these can be frozen for up to 3 months. Check out my brownie storage post for more tips.
Yes, you can switch the flour out for an equal amount of gluten-free self-raising flour blend. Make sure your blend contains xanthan gum (or add ¼ teaspoon separately) as this will help bind the rest of the ingredients together and prevent crumbly brownies. Also, double-check your other ingredients for potential cross-contamination risks.

More M&M desserts:
- Salted caramel M&M cookies
- 3-Ingredient M&M fudge
- Edible monster cookie dough
- M&M chocolate bark
- M&M cookie bars
I hope you like my salted caramel M&M brownies! If you make them at home, please leave a comment and rating below to let me know what you think. Enjoy!
Salted Caramel M&M Brownies
Ingredients
- 200 g 70% Dark chocolate (7oz)
- 180 g Salted butter (¾ cup)
- 250 g Caster sugar (1+¼ cups)
- 3 Medium Eggs
- 100 g Plain flour (¾ cup + 1 tablespoon)
- 1 Tablespoon Cocoa powder
- 100 g Milk chocolate chips (⅔ cup)
- 200 g Salted caramel M&Ms (7oz)
- 6 Tablespoons Caramel, mixed with ½ teaspoon sea salt
Instructions
- Preheat your oven to 160°C/320°F (or 140°C/285°F for fan and convection ovens). Line an 8x8-inch tin with baking paper.
- Melt the dark chocolate and the butter together over low heat on the stove then set aside to cool for around 5 minutes.
- Add the sugar, eggs and vanilla extract to a large bowl. Using an electric whisk, whisk it all together for a few minutes until it becomes pale and has doubled in volume.
- Fold the melted butter/chocolate mixture into the whisked egg/sugar mixture. Then add the flour and the cocoa powder. Mix gently until well combined.
- Fold in the chocolate chips and most of the M&Ms, setting a few aside for topping if desired.
- Spoon half of the brownie mixture into your lined tin and spread it out evenly. Add 3 tablespoons of salted caramel on top then cover with the rest of the brownie mixture.
- Drizzle 3 more tablespoons of salted caramel on top of the brownie mixture and use a toothpick to swirl it around into a marbled pattern. Top with a few more M&Ms and chocolate chips.
- Bake for around 35-40 minutes until the brownies have risen and are pulling away from the tin slightly. There should be a very slight wobble in the middle.
- Leave them in the tin until cool then transfer them to the fridge overnight to set.
- Once set, remove them from the tin, cut into squares and enjoy!
Video
Notes
- Store in an airtight container in the refrigerator for up to 1 week.


Sheila Sharkey
These are delicious and really enjoyed. Next time l make them, I would cut them into smaller pieces. A little too sweet for my taste. I'll still make them for Christmas 🎄 treats for neighbours
Chloe
Lovely! Thanks Sheila 🙂