This Valentine's pink chocolate bark is super easy to make with just a few simple ingredients. It's a cute, no-bake dessert decorated with pink sprinkles and candy hearts.

If you've been looking for a quick and easy Valentine's holiday treat for work, school or edible gifting, this pink chocolate bark is just the thing. There's no need to spend hours in the kitchen when you can whip this up in just a few minutes!
There are only 3 basic ingredients and the amount of toppings you add is up to you. You can add candy Valentine's hearts, heart-shaped sprinkles, red sweets, white chocolate chips or anything else that you like.
You could even add peppermint extract or peppermint oil to make a delicious peppermint bark for Valentine's Day.
Why is it called bark?
It's believed that chocolate bark gets its name from the way it looks. Since it's traditionally made with chopped nuts and milk chocolate, its rough, rustic appearance does kind of resemble the bark of a tree if you look closely enough. Although I'm not sure how many pink trees there are out in the wild, so perhaps this particular recipe would be more suitably named 'Valentine's Pink Chocolate Bar' or something similar. LOL.

Ingredients
Here's what you'll need to make this chocolate heart bark for Valentine's Day.
- Milk chocolate bars: Or dark chocolate, whatever floats your boat! Any type of chocolate works for this recipe- you can even use chocolate chips.
- White chocolate: The white chocolate will go on the top of your Valentine bark, and we'll add food colouring to make it pink.
- Pink food colouring: I recommend using a gel or paste food colouring as the liquid ones don't usually mix very well with white chocolate. If you prefer, you can use pink candy melts instead of colouring the white chocolate.
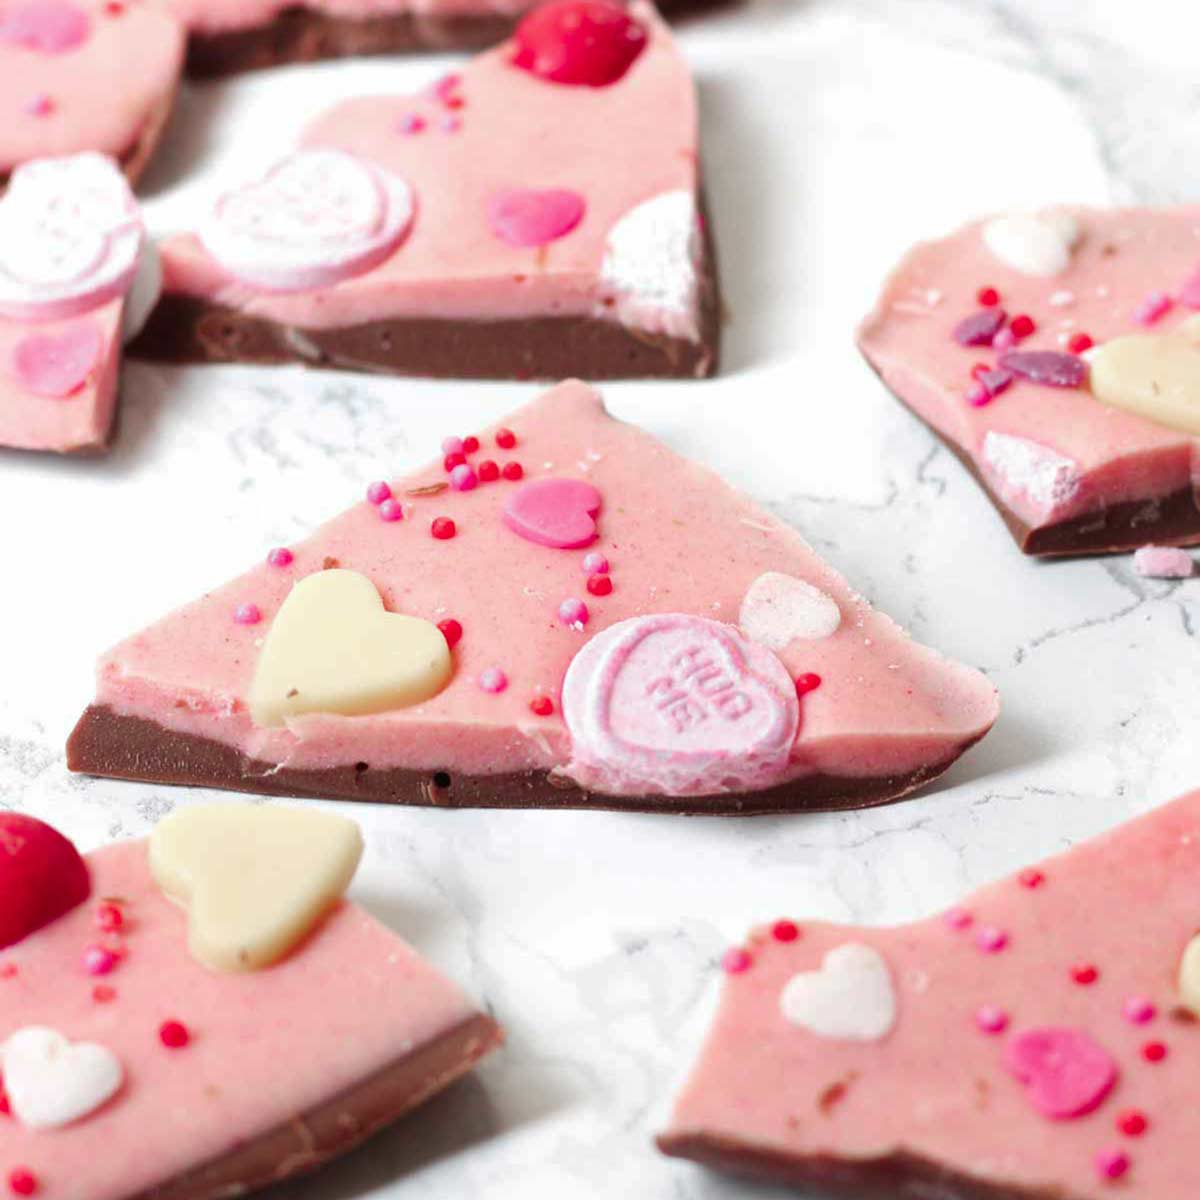
- Your choice of toppings: I used white chocolate hearts, white and pink heart-shaped sprinkles, Love Hearts (or Conversation Hearts if you're in the US) and red Skittles on mine. Feel free to get creative!
Equipment
- 8x8-inch tin: I like to use this size because the sides of the tin ensure the bark stays nice and thick. Flat baking trays will work fine but the chocolate will spread out more and therefore be a little thinner.
- Baking paper: To prevent sticking and make removal super easy.
- Heatproof bowls: Or a saucepan, for melting the two types of chocolate.
- Utensils: A spoon or spatula for mixing, a toothpick or small spoon for adding the food colouring, and a sharp knife for cutting the bark.
How to make Valentine's Day Pink Chocolate Bark
There's not much to it, but here's a step-by-step tutorial...


Step 1: First, line an 8x8-inch tin with baking paper. Set it aside for now.
Step 2: Melt 200g of milk, dark or semi-sweet chocolate in a microwave-safe bowl, stirring every 30 seconds or so to prevent burning. Alternatively, melt it in a saucepan over low heat on the stove.
Step 3: Pour the melted chocolate into your lined tin and use a spoon or spatula to spread it out evenly. Pop it in the freezer for 5-10 minutes until firm. Freezing the bark before adding the next layer of chocolate will prevent the layers from bleeding into one another.
Step 4: Melt the white chocolate and stir in some pink gel food colouring. It's best to start with a small amount of colouring and add more if you need it. If you're using pink candy melts, melt them in the microwave or in a saucepan.
Step 5: Pour the pink chocolate over the first layer of chocolate in the tin and spread it out evenly. While the chocolate's still wet, add your toppings of choice.
Step 6: Let the bark sit out at room temperature for 2 hours to set.
Step 7: Once set, remove the bark from the tin using the baking paper and cut or snap it up into rough chunks.
Top tips
- If you want to get a super vibrant pink colour, I recommend adding about ¼ teaspoon of oil at the same time as the food colouring to prevent the chocolate from seizing. Any neutral-flavoured oil will work.
- Using a tin with large sides will prevent the bark from spreading out too much and becoming too thin.
- Setting the chocolate bark in the fridge can cause it to 'bloom', which means little white specks will appear all over the surface. Letting it set at room temperature will prevent this.

More topping ideas
As I mentioned earlier in the post, I topped my bark with chocolate Valentine's hearts, sprinkles and other red and pink candy. Here are some other ideas:
- Freeze-dried strawberry or raspberry pieces
- Edible pink glitter
- Mini pink marshmallows
- Pink Skittles
- Other pink or red candies such as Smarties or M&Ms.
- Pink cereal such as Fruit Loops
FAQs
Store this in an airtight container in the fridge or in a cool, dry place such as a kitchen cupboard. It'll last for up to 3 weeks if stored correctly.
Yes, you can freeze chocolate bark for up to 3 months. You can either wrap the whole slab tightly in clingfilm or you can freeze individual pieces in ziplock bags or airtight containers. When you're ready to eat it, thaw it in the fridge for a few hours or let it sit out at room temperature.
Yes, it's super easy to make this recipe vegan. Simply use dairy-free chocolate and vegan food colouring, and use toppings made without animal products. Some ideas are Skittles, vegan mini marshmallows and Love Heart sweets.
The great thing about bark is that it's supposed to look rustic. You can cut it with a knife if you want it to look neater, or simply just break it up using your hands. You can make the shards as big or as small as you like, depending on your preference.

More Valentine's Day treats:
- Valentine's rocky road
- Valentine's Day traybake cake
- Pink Valentine's fudge
- Valentine's Day fairy cakes
That's all for now. I hope you like my pink chocolate bark recipe. If you find this post helpful, please give it a share using the share buttons on this page. Enjoy!
Pink Chocolate Valentine's Day Bark
Ingredients
- 200 g Milk or dark chocolate (7oz)
- 200 g White chocolate (7oz)
- Pink gel food colouring
- A variety of Valentine's candy toppings
Instructions
- Line an 8x8-inch tin with baking paper.
- Melt the milk/dark chocolate and spread it evenly into the bottom of your lined tin.
- Freeze for 10 minutes to help the chocolate set quickly.
- Melt the white chocolate and stir in a small amount of pink food colouring. Spread this evenly over the first layer of chocolate in the tin.
- Sprinkle your candy toppings over the pink chocolate while it's still wet.
- Let the chocolate sit out at room temperature for 2 hours or until the chocolate has fully hardened.
- Remove the bark from the tin using the baking paper and cut or break it up into rough chunks.
Video
Notes
- Store in an airtight container for up to 3 weeks.


Leave a Reply