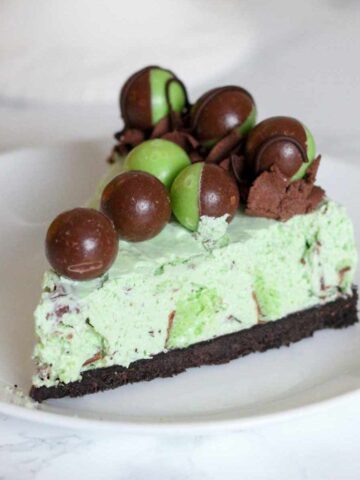
This Smarties cheesecake is a quick and easy dessert that's great for both kids and adults. It's made with simple ingredients and there's no baking required!

If you're looking for an easy, no-bake dessert for your next birthday or gathering, this no-bake Smartie cheesecake is just the thing! It's rich and creamy, packed with Nestle chocolate Smarties.
Below you'll find detailed ingredients, step-by-step instructions and top tips. If you prefer to skip straight to the condensed version of the recipe, you'll find it in the recipe card at the end of this post. And if you like the cheesecake, make sure to check out my Smarties cupcakes, Smarties brownies & Smartie fudge. Enjoy!
Ingredients
- Digestive biscuits: I like using digestive biscuits for my no-bake cheesecake base because they're not too sweet and the flavour is quite neutral. It allows the flavours in the filling to shine through a bit more.
- Butter: Butter is needed to help the base stick together, and adds a rich flavour and texture. Margarine will leave your base a bit soggy so it's best to use real butter for this one.
- Cream cheese: You can use any cream cheese you like as long as it's full-fat. Low-fat alternatives won't work as well and may not allow the cheesecake to set fully. Cheaper full-fat brands do work with this recipe (I've tested quite a few) but I like to use Philadelphia for the best flavour and texture.
- Vanilla extract: Just a teaspoon, for some extra flavour.
- Icing sugar: Icing sugar will help to make the cheesecake filling a little sweeter, enhancing the sweetness of the chocolate Smarties. I find around 75g to be the perfect amount. Icing sugar is also known as confectioner's sugar or powdered sugar in countries outside of the UK.
- Double Cream: Again, make sure to use full-fat. Single cream and low fat double cream alternatives will not whip up enough for the cheesecake filling to set.
- Nestle Smarties: The star of the show! I used around 1+½ sharing bags (105g each) of Smarties for this recipe, putting some in the filling and the rest on top for decoration.
Equipment
- Springform cake tin: You'll need a cake tin with a removable base to get the Smartie cheesecake out in one piece. I used a 9-inch springform tin which I found was the perfect size to get a nice thick slice.
- Food processor or blender: To blitz the biscuits into fine crumbs. You can do this using the end of a heavy rolling pin if you prefer but it'll take a bit more effort.
- Utensils and mixing bowl: A large mixing bowl, a wooden spoon, a butter knife or palette knife, and a sharp knife to cut the cheesecake into slices.
- Electric whisk: The cheesecake filling needs to be whipped up until thick and I recommend using an electric whisk to do this. You can also use a stand mixer if you have one on hand. I don't recommend doing this by hand unless you have a lot of time and arm strength!

How to make Smarties cheesecake
Step 1: Crush 300g of digestive biscuits into fine crumbs using a food processor or high-powered blender, ensuring there are no lumps.
Step 2: Melt 150g of butter and mix into the biscuit crumbs until evenly coated. Press the biscuit mixture into the bottom of a 9-inch springform tin. Set it aside for now, while you prepare your filling.

Step 3: To a large bowl, add 500g of full-fat cream cheese, 75g of icing sugar and 1 teaspoon of vanilla extract. Mix until combined.
Step 4: Add 200ml of double cream to the bowl then use an electric whisk to whip it up until thick. Chop 125g of Smarties into chunks then gently fold them into the cheesecake filling.

Step 5: Spread the filling evenly over the biscuit base in the tin then place your Smarties cheesecake in the fridge for 8 hours to set.
Step 6: Once it has set, remove the cheesecake from the tin. Loosen the base by running round it with a butter knife or palette knife then carefully transfer it to a wire rack or plate.
Step 7: Just before serving, prepare your topping by whipping 180ml double cream and 2 tablespoons of icing sugar together until thick. Pipe this around the edges of the cheesecake and top with extra Smarties. If you're feeling extra fancy, you can also drizzle some melted milk chocolate over the top.

Step 8: Cut into slices and enjoy!
Top tips
- Use a springform tin to make it as easy as possible to remove the cheesecake later on. It's best to turn the base upside down before you begin so that the 'lip' is facing down the way.
- Use full-fat ingredients, which ensure the cheesecake sets properly. Low-fat substitutes will not work if you want to be able to cut the cheesecake into slices.
- Chop the Smarties before adding them to the filling. This will make it easier to cut into once the cheesecake has set, plus it will minimize the amount of colour that bleeds from the Smarties.
FAQ
This cheesecake will keep well for up to 3 days if you store it in an airtight container in the fridge. I recommend adding the topping immediately before serving to keep it looking fresh!
You sure can. To freeze your Smartie cheesecake, pop slices into an airtight container and freeze for up to 1 month. When you're ready to defrost it, let it sit out at room temperature for a few hours until thawed, or put it in the fridge overnight. Do not refreeze.
This may be due to not whipping the filling for long enough or using low-fat cream cheese and/or cream. It can also be because you didn't leave it in the fridge for long enough- around 8 hours should be the minimum.

More cheesecake recipes
I hope you like this no-bake Smarties cheesecake recipe. If you find this post useful, please share it with a friend using the share buttons on this page. And if you make the cheesecake at home, leave a comment below to let me know how it goes. Enjoy!

No-Bake Smarties Cheesecake
Ingredients
- 300 g Digestive biscuits
- 150 g Butter, melted
- 500 g Full-fat cream cheese
- 75 g Icing sugar
- 1 Teaspoon Vanilla extract
- 200 ml Double cream
- 125 g Nestle Smarties (roughly chopped)
Topping:
- 180 ml Double cream
- 2 Tablespoons Icing sugar
- Handful Nestle Smarties
Instructions
- Crush the digestives into fine crumbs using a food processor or high-powered blender, ensuring there are no lumps.
- Add the melted butter to a bowl with the digestive crumbs and mix well. Press this mixture into the base of a 9-inch springform tin.
- In a large bowl, mix together the cream cheese, icing sugar and vanilla extract.
- Add the double cream and use an electric whisk or stand mixer to whip everything up until thick. Fold in the chopped Smarties.
- Spoon the filling over the biscuit base in the tin and spread it out evenly. Pop the cheesecake in the fridge for 8 hours to set.
- Once set, gently run a butter knife around the edges of the cheesecake before unclipping the springform tin. Use a palette knife or butter knife to loosen the base then carefully transfer the cheesecake to a cake stand or large plate.
Topping:
- Whip the double cream and icing sugar together until thick. Pipe it around the edges of the cheesecake and top with extra Smarties.
Video
Notes
- Store any leftovers in an airtight container in the fridge for up to 3 days.


Leave a Reply