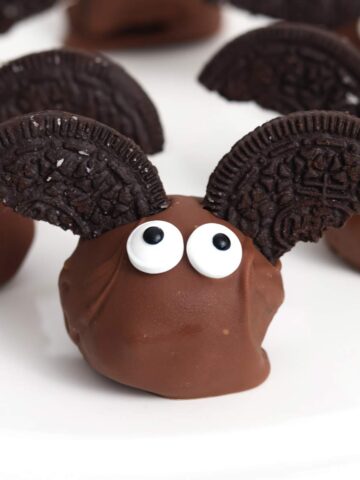
These brownie pops are the perfect bite-sized treats for birthday parties or any other special occasion. With just a few simple ingredients and a little patience, you can transform plain old brownies into a cute, fun dessert that's sure to be popular with kids and adults!
I am utterly obsessed with how delicious these brownie pops are! They're a fun alternative to regular brownies and just the right serving size for a delicious sweet treat that's not too sickly.
If you've never made cake pops before, don't worry. They are so much easier than they look, and you don't even need to use sticks if you don't want to. You can just make brownie balls instead!
In the post below, you'll find all of my top tricks and tips to get this recipe right. I hope you find it helpful but if you're a more experienced baker, feel free to skip to the recipe card at the end of the post. Enjoy!
Ingredient Notes
- Brownie mix: A pre-made mix is a handy shortcut for this recipe but you can use homemade brownies if you prefer (just make sure to omit any chocolate chips). I used a 415g box of Betty Crocker's chocolate fudge brownie mix, but any brownie box mix of around that size will do. The key is to get a fudgy consistency so that it's easy to mould into balls.
- Oil/butter, milk/water, and eggs: These are typically what you'll need to prepare box brownies. Follow the package instructions to see what you need for your specific mix.
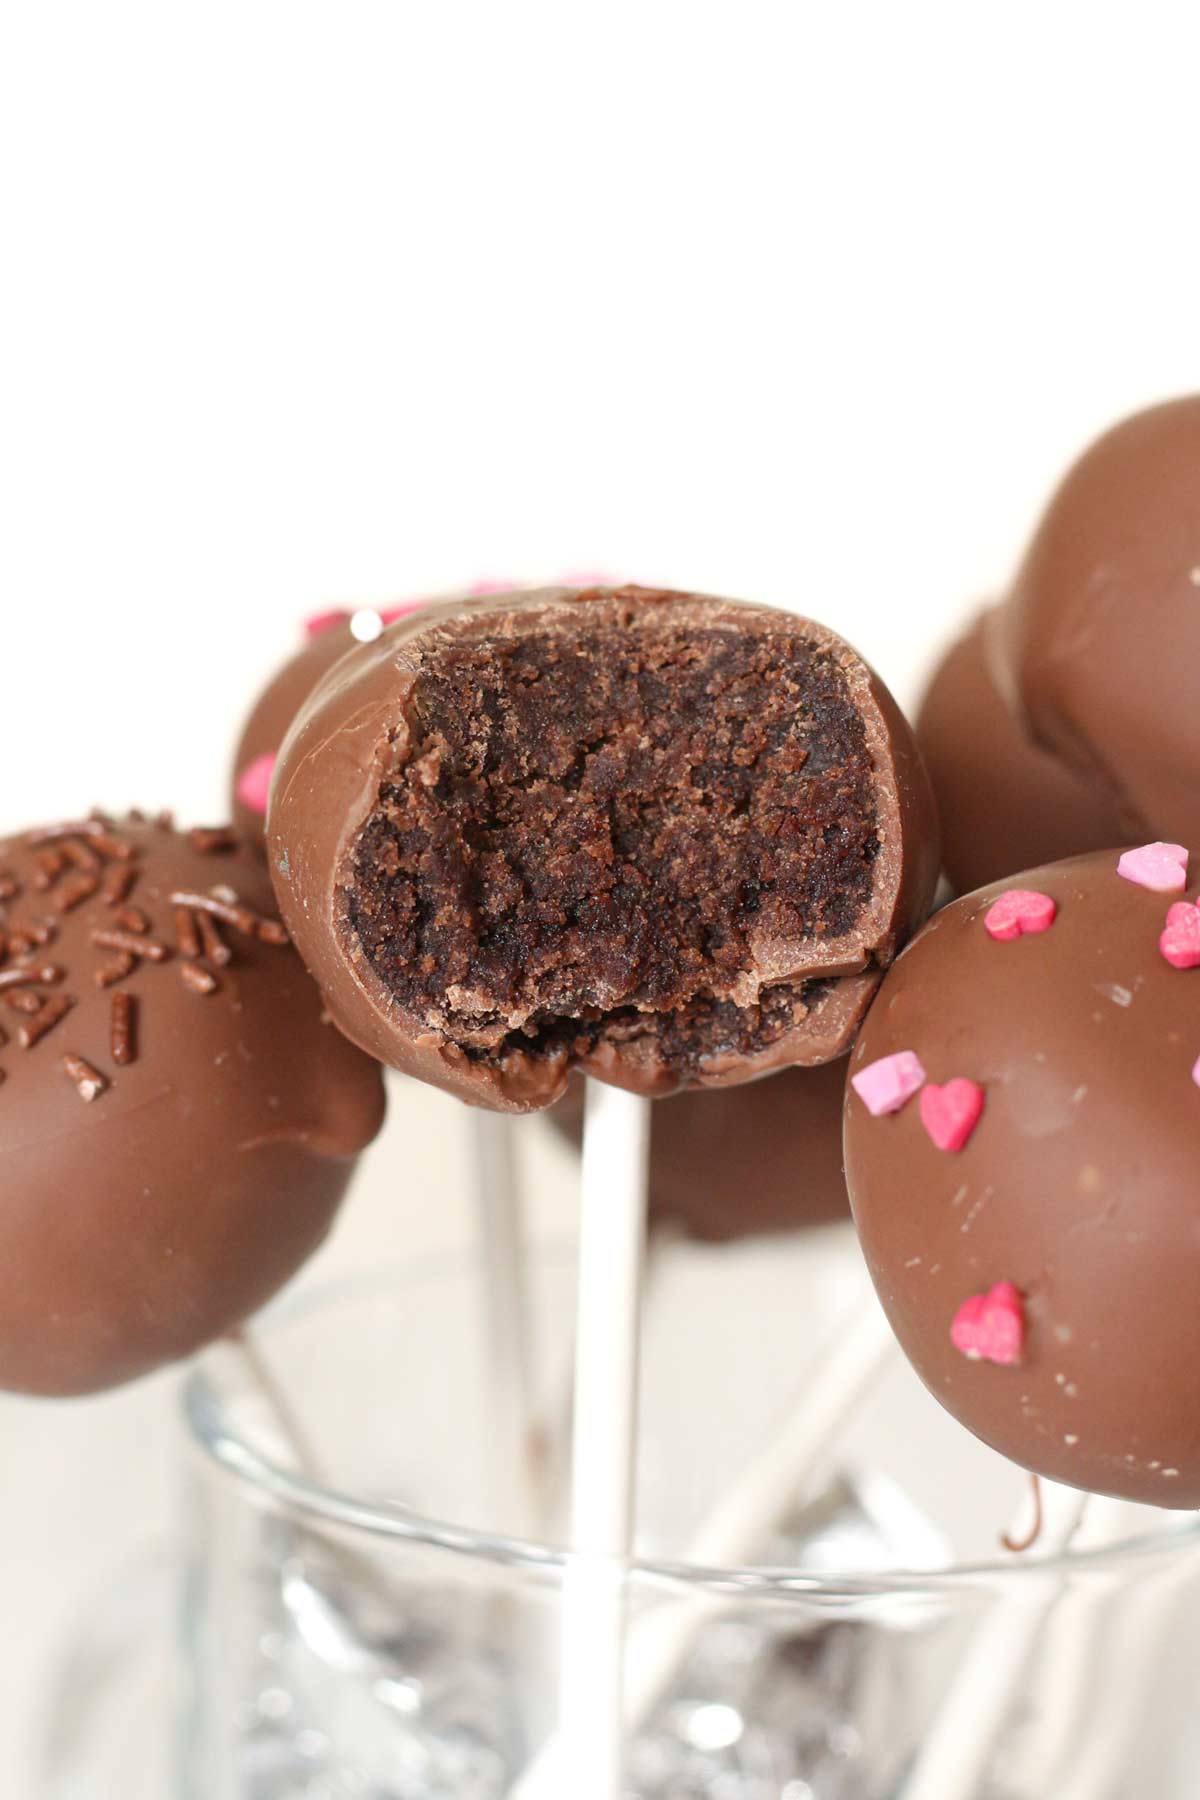
- Milk chocolate: I prefer milk chocolate for coating my brownie cake pops, but this can be switched out for dark or white chocolate.
- Oil: A bit of oil helps thin out the melted chocolate, making it easier to coat the brownie balls. It also gives the chocolate coating a nice shine. I'd recommend a neutral oil such as vegetable or sunflower rather than oils with stronger flavours such as coconut and olive oil.
- Sprinkles: Sprinkles add a fun pop of colour and a bit of crunch. I used a mixture of rainbow hundreds and thousands, chocolate vermicelli, and red and pink hearts. Some non-sprinkle topping options include crushed nuts, freeze-dried strawberry pieces and chocolate shavings.
Equipment
- Baking trays: An 8x8 one for baking the brownies (or whichever size your box mix recommends) and a large flat one for refrigerating the pops later.
- Baking paper: To prevent sticking. When baking brownies, I usually leave a bit hanging over the edges which makes it easier to remove them after baking.
- Bowl: A large mixing bowl for making the brownie batter plus a smaller heatproof one for melting the chocolate coating. You can use a saucepan over the stove to melt the chocolate if you prefer.
- Cake pop sticks: Or lollipop sticks. I got mine from Hobbycraft. If you can't find any, don't worry, you can make this recipe without them and just enjoy them as delicious brownie balls instead.
- Cake pop holder: This is for holding the pops upright while the coating sets, and will help prevent flat-topped brownie pops. You can use an official cake pop holder but if you're on a budget, I recommend a styrofoam block which is what I used. You can find these in most craft stores.
- Utensils: A wooden spoon for mixing the batter and a fork for mashing the brownies. You'll also need a tablespoon to scoop the mixture out and roll it into balls.

How to make chocolate brownie cake pops
Step 1: Line your tin and preheat your oven as per your box brownie mix instructions.
Step 2: Add the mix to a large bowl and add the additional ingredients required such as eggs, oil and milk. If you're using Betty Crocker's fudge brownie mix, I highly recommend using the butter and eggs option.
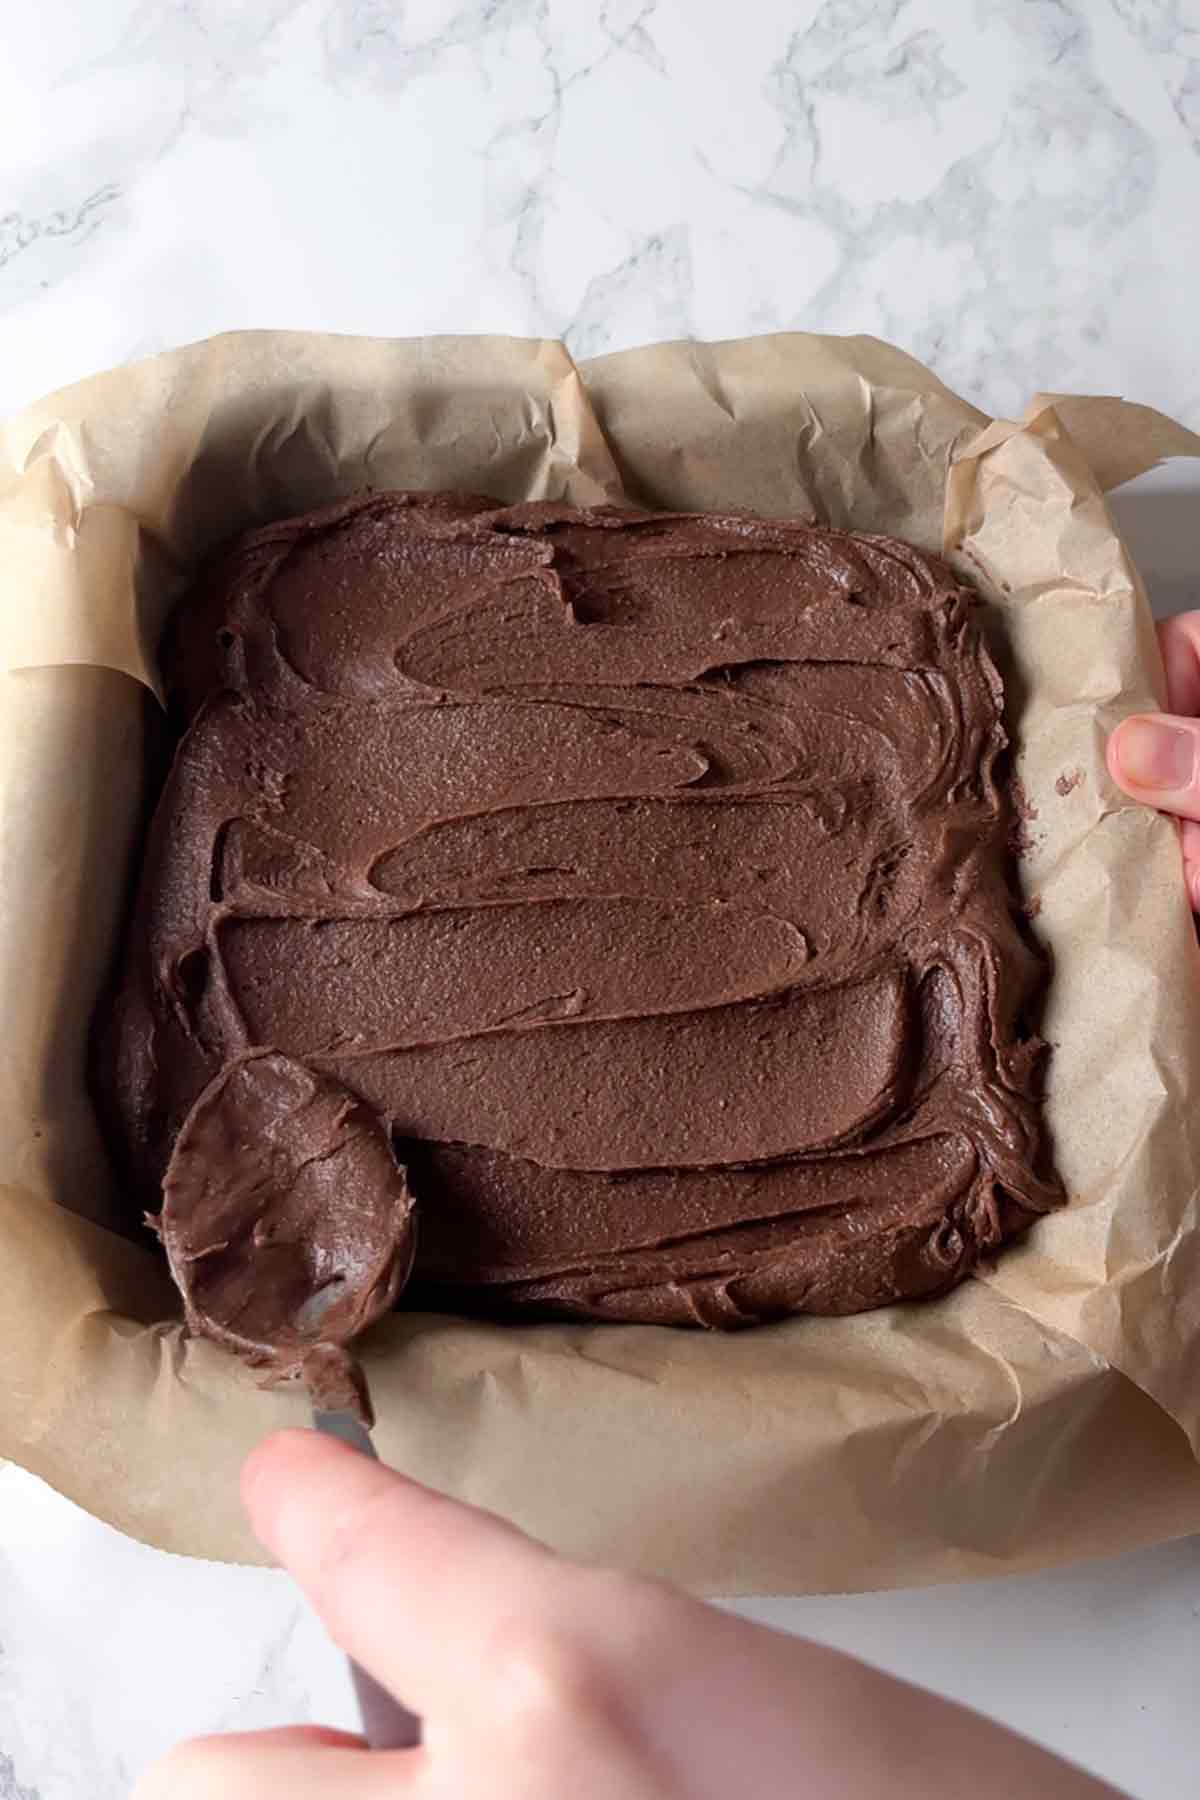
Step 3: Transfer the batter to your tin and bake for the recommended time on the box. Be careful not to overbake them as this can make the mixture difficult to roll into balls.
Step 4: Let the baked brownie sit out at room temperature for 30 minutes to cool down then put it into a large bowl. Use a fork to mash it into a smooth paste.

Step 5: Place the bowl of brownie mix into the fridge for 1 hour. This will allow it to firm up a little and make it easier to roll into balls. Don't try to roll it immediately as the balls will be too greasy and will lose their shape.
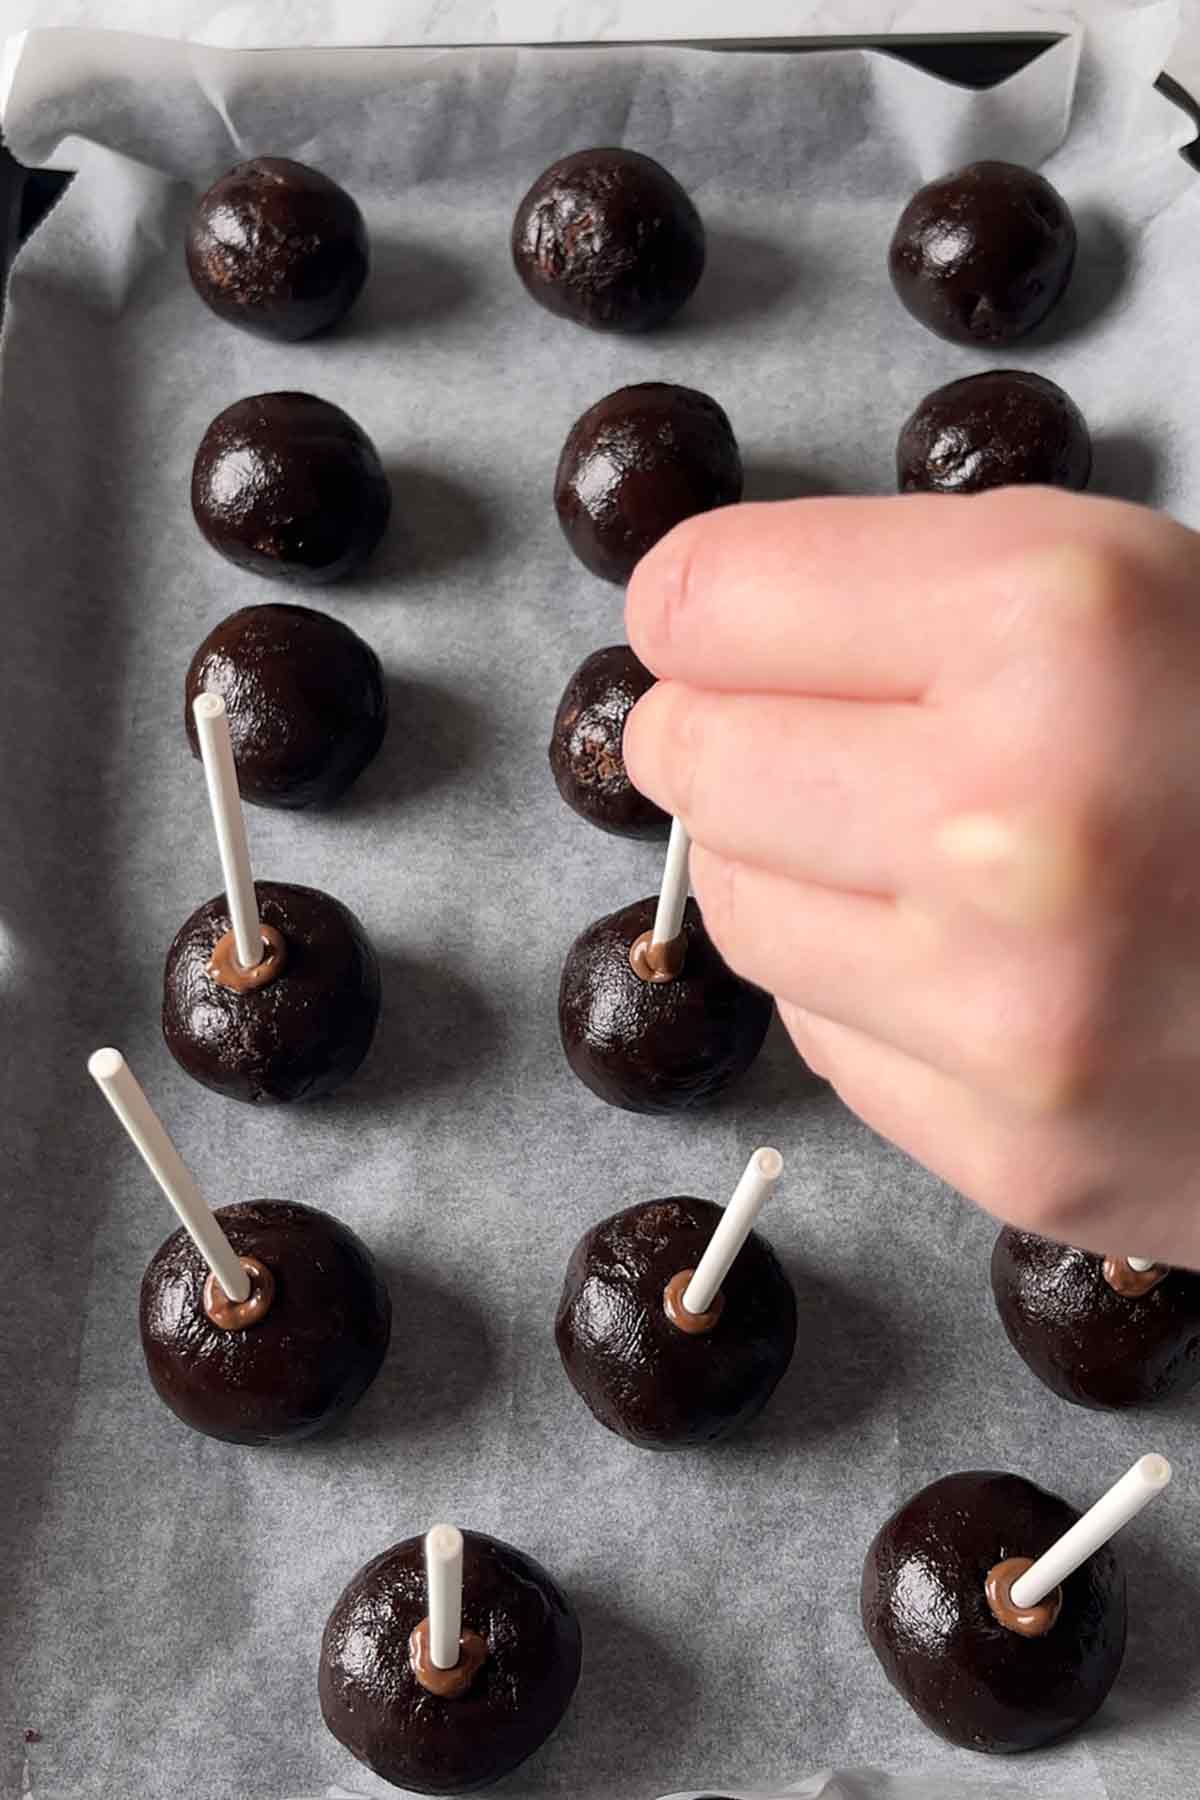
Step 6: After chilling, scoop 1 tablespoon of the brownie mixture out and roll it into a ball. Place onto a lined baking tray then repeat until all of the mixture is used up. You'll be able to get 16-18 balls out of a 415g brownie mix.
Step 7: Melt 30g of milk chocolate. Dip one end of the cake pop sticks into the chocolate then immediately into the brownie balls. Then pop them in the fridge for at least 2 hours. Allowing the chocolate enough time to harden will prevent the brownies from slipping off the sticks when you coat them.
Step 8: In a heatproof bowl, melt 300g of milk chocolate in the microwave with 1 teaspoon of oil. Make sure to take the chocolate out of the microwave and stir it every 30 seconds to prevent burning.
Step 9: Dip the brownie pops into the melted chocolate, gently tapping on the sides of the bowl to get rid of any excess. Then place it into your cake pop holder or styrofoam block. Top with sprinkles before moving on to the next one as the chocolate will start to set quite quickly.


Step 10: Let the pops sit at room temperature until the chocolate has hardened then enjoy!
Top Tips
- For a richer flavour, use melted butter in your box brownies instead of oil.
- For colourful brownie cake pops, use white chocolate for the coating and add your favourite gel food colouring. Don't forget to add the oil too, as white chocolate can seize quite easily.
- If your brownie mixture is too dry to form balls, add a tablespoon of milk or melted butter at a time until it reaches the right consistency. If it's too sticky, pop it in the fridge for an extra 30-60 minutes.
- Package them up in small cellophane bags to make an adorable edible gift.
FAQ
Absolutely. I used box brownies to make the recipe easier but homemade brownies would take these to the next level! Make sure to remove any chocolate chips from the recipe as this will make it difficult to roll the mixture into balls. You'll also need a bit more chocolate for the coating as you'll get more pops out of a homemade recipe.
As I mentioned earlier in the post, a styrofoam block is a super cheap alternative and it works perfectly to hold them in place. I got mine for £2 from Hobbycraft. You can also use an upside-down egg carton. If you don't mind your pops having flatter tops, you can just let them set on a lined baking tray after coating.
When stored in an airtight container in the fridge, these will keep well for up to a week. You can also freeze them for up to a month- defrost them in the fridge and do not refreeze.

I hope you like these brownie cake pops. If you make them at home, please let me know what you think by leaving a rating and comment below. Enjoy!

Chocolate Brownie Pops
Ingredients
- 415 g Box Betty Crocker fudge brownie mix or similar (14.6oz)
- Ingredients to prepare brownies as per box instructions* (usually butter, milk/water and eggs)
- 18 Cake pop sticks
- 330 g Milk chocolate (11.5oz)
- 1 Teaspoon Vegetable oil
- 2-3 Tablespoons Cake sprinkles
- Cake pop holder or styrofoam block
Instructions
- Prepare your brownies as per box instructions. Leave to cool for about 30 minutes at room temperature.
- Transfer the brownie slab to a large bowl then use a fork to mash it up until soft. Place it in the fridge for 1 hour to allow it to firm up.
- Take 1 tablespoon of the 'dough', roll it into a ball then place onto a lined baking tray. Repeat until you have 16-18 balls.
- Melt 30g (1oz) of the chocolate. Dip the end of your cake pop sticks into the melted chocolate then insert them into your brownie balls.
- Refrigerate the pops for 2 hours. This will allow the chocolate to harden and prevent the brownie balls from slipping off the sticks when you coat them.
- Melt the remaining 300g of chocolate with the vegetable oil then dip each brownie pop in to coat it fully. Gently tap them on the sides of the bowl to get rid of any excess.
- Place them upright in your cake pop holder or styrofoam block then add the sprinkles. The chocolate will set quite quickly so I recommend adding the sprinkles as you go rather than waiting until all the pops are coated.
- Leave them to set at room temperature for about 2 hours then enjoy!
Video
Notes
- *I recommend using melted butter instead of oil as it'll make the mixture easier to roll into firm balls, plus it tastes better.
- If you use a larger box mix, you'll need more chocolate for the coating.
- Store covered in the fridge for up to 1 week.
Leave a Reply