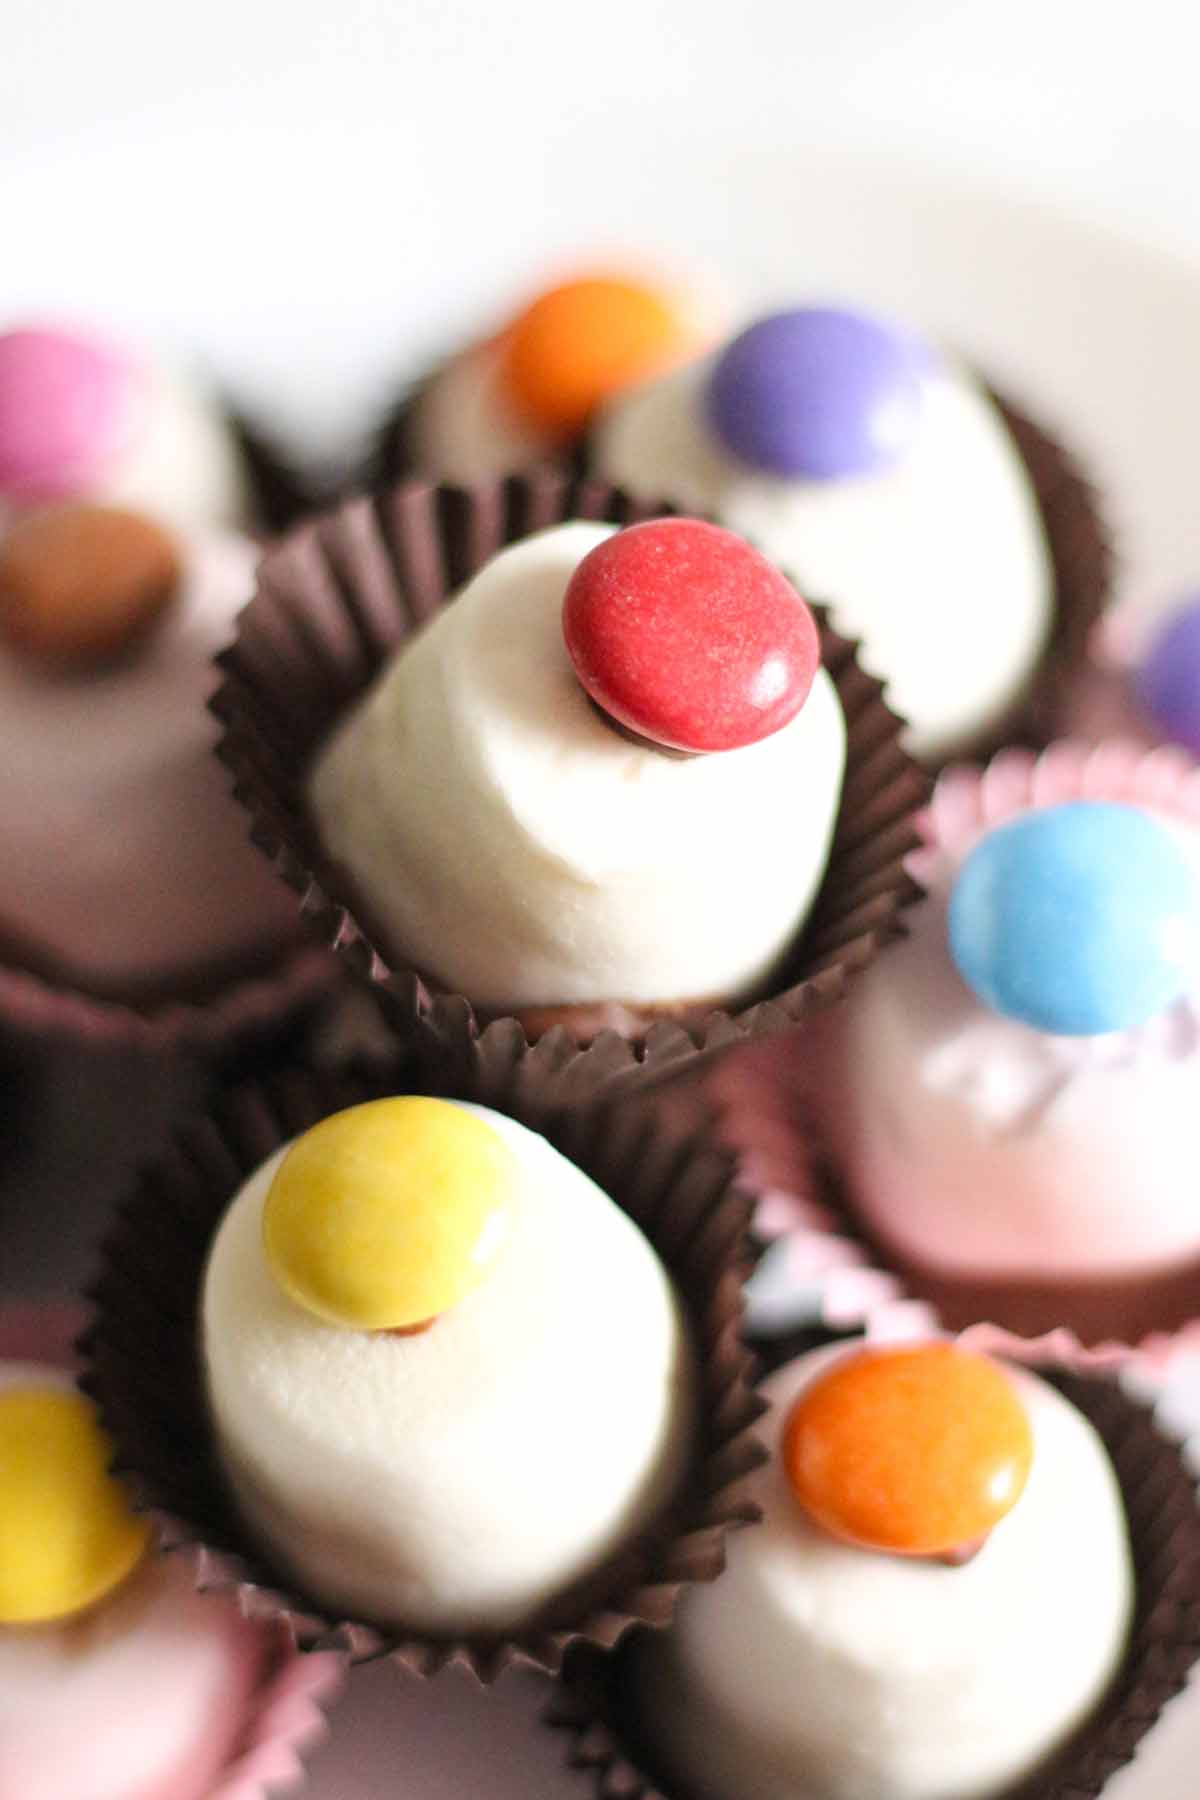
These marshmallow top hats are a classic kids' party treat in Scotland. They are small marshmallow cakes made with milk chocolate and topped with colourful Smarties. They're super easy to make and sure to be a crowd-pleaser!
If you went to any kids' party in Scotland during the 90s, chances are you remember these marshmallow top hats. They were super popular back in the day and I think it's about time to bring them back!
These cute marshmallow cakes (also known as top hat buns) can be prepared in about 10 minutes and there's no baking required. They're so easy that even kids can help make them. They make the cutest addition to any party, afternoon tea or school lunchbox.
This is a relatively simple recipe but for those who prefer more in-depth instructions, keep on reading for my top tips, step-by-step images and more. If you want the quick, straight-to-the-point recipe, you can find this in the recipe card at the end of the post. Enjoy!
Ingredients
There's really not much to these treats because they're made with only 3 ingredients, but here's what you'll need:
- Milk chocolate: Milk chocolate is what top hats are traditionally made with but you can use any kind of chocolate that you like- even white or dark. I personally like Galaxy chocolate or Milka.
- Marshmallows: This recipe calls for 15 regular-sized marshmallows but you can increase or reduce the recipe as needed to suit your party size. You can use white or pink marshmallows, or a mix of both like I did.
- Smarties: You just can't have top hats without some Smarties! These candy-coated chocolates are stuck onto the marshmallows using melted chocolate.
Equipment
- Heatproof bowl: You'll need to make sure your bowl is heatproof for melting the chocolate because it may crack or melt otherwise. You can also melt it in a saucepan if you prefer.
- Wooden or metal spoon: For mixing the chocolate while it melts.
- Petit four cases: These are basically just really tiny cake cases and they're just the right size for marshmallows to fit in snugly. You can find them in the baking aisle in most supermarkets or hobby shops.
- Piping bag: This is not essential but I find it really handy for getting the chocolate into the cases neatly. Alternatively, you can do it old school and use a teaspoon.
- Tray or board: Or even a plate! Just any flat surface that you can move around when you're putting the top hats into the fridge.
How to make marshmallow top hats
Step 1: Place 15 Petit Four cases onto a tray or board, ready to add the chocolate. This will make it easier to transfer them to the fridge when the chocolate is wet.
Step 2: Break 200g of milk chocolate into segments and place it into a heatproof bowl. Melt it in the microwave, stirring every 20 seconds or so until smooth. Alternatively, you can place the bowl over a small saucepan of simmering water over low heat to create a double boiler.
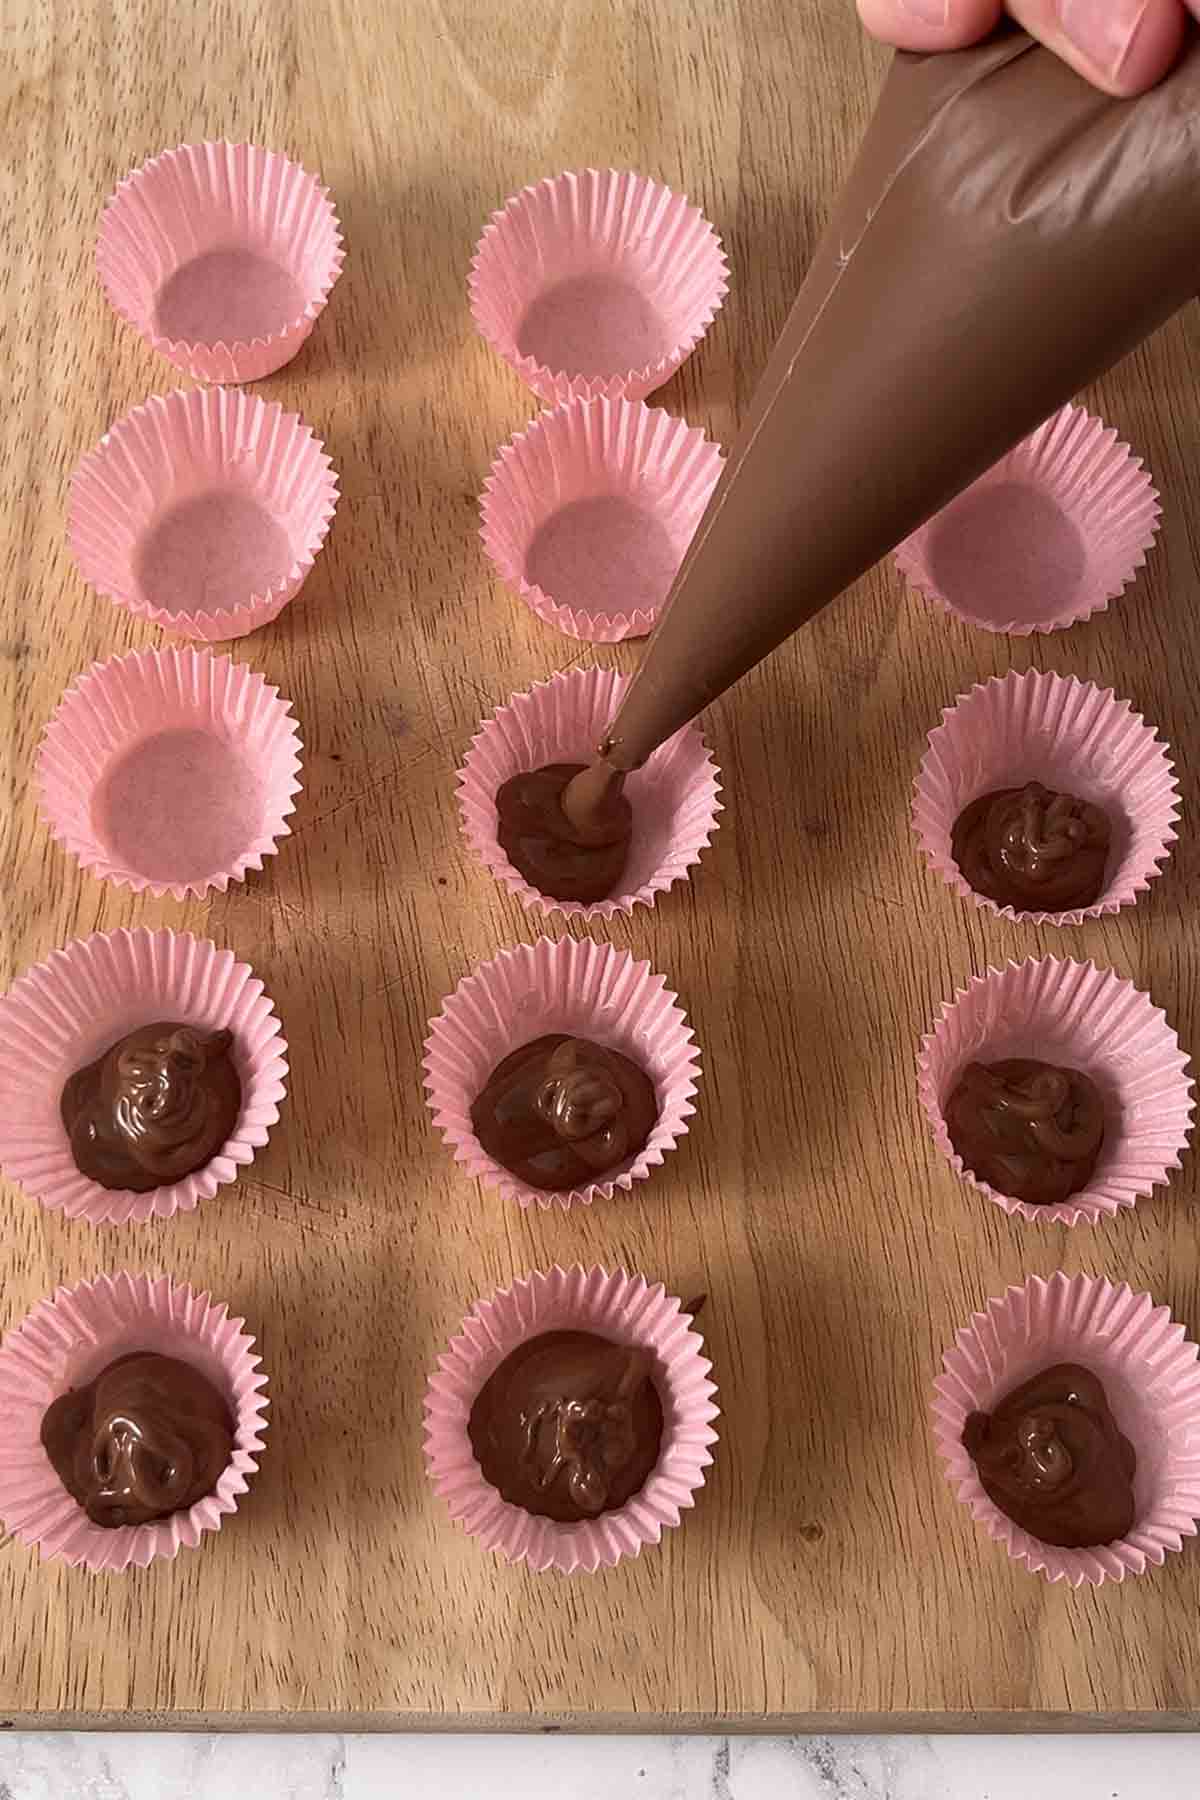
Step 3: Put a little bit of melted chocolate into each Petit Four case using a teaspoon or piping bag. Around 1 teaspoon's worth of chocolate for each one is perfect.
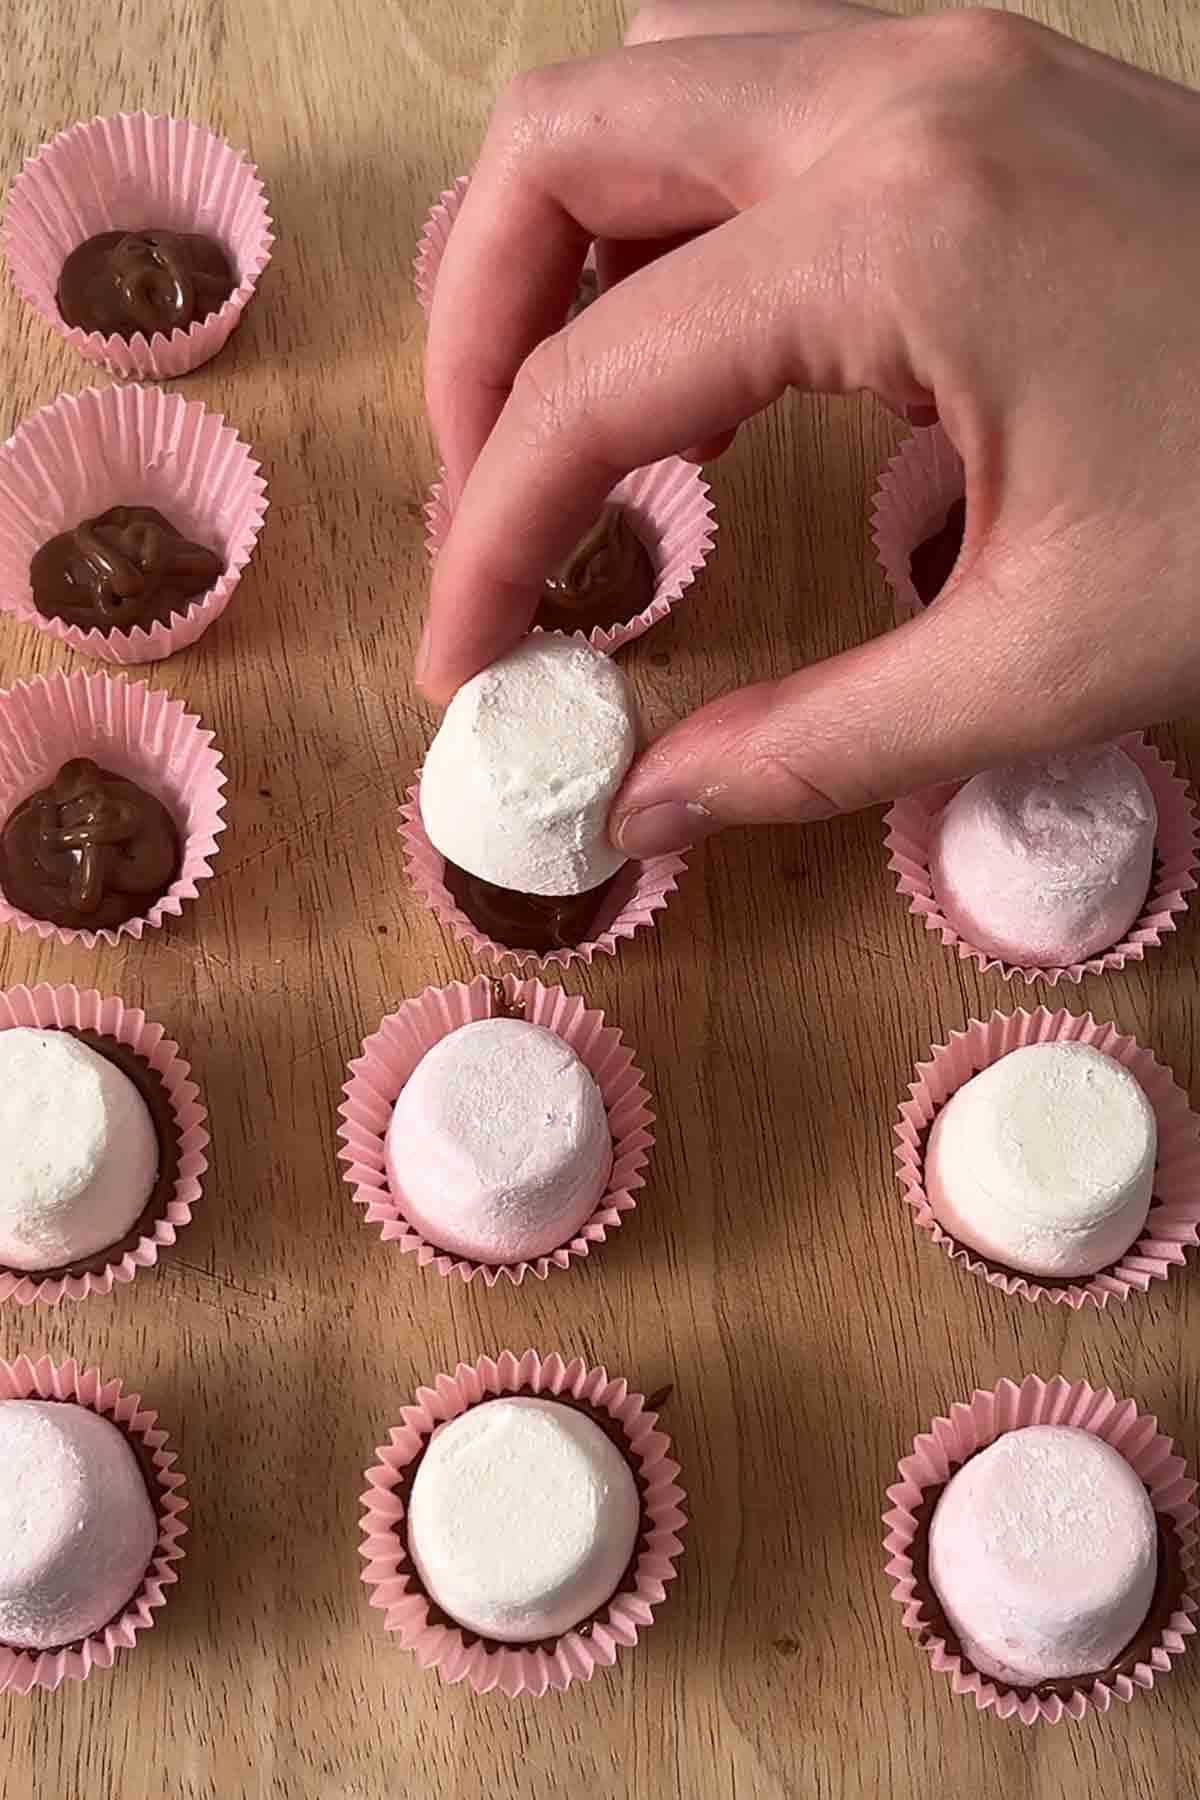
Step 4: Place a marshmallow on top of the melted chocolate in each case. Make sure to put the widest end at the bottom.
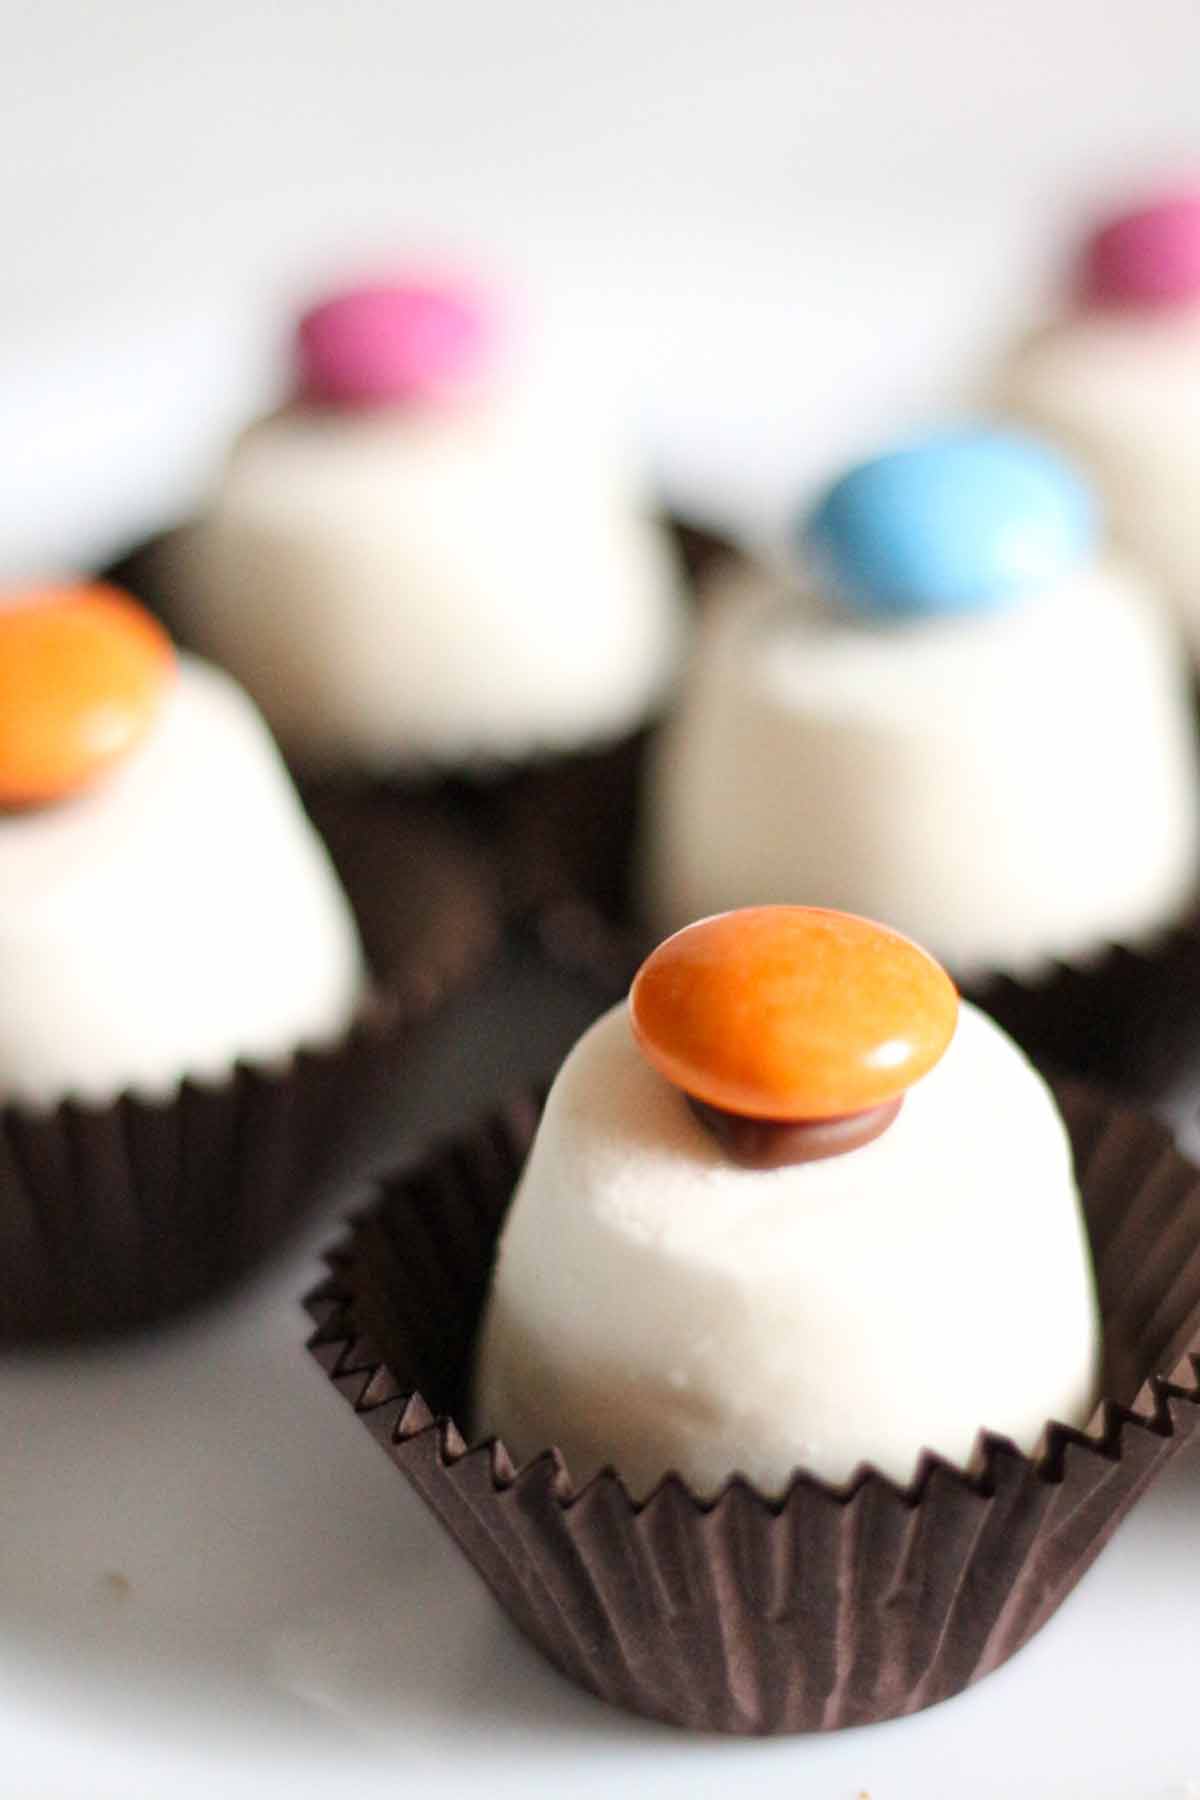
Step 5: Spoon or pipe a small blob of chocolate onto the top of each marshmallow then use that as a "glue" to stick on your Smarties.

Step 6: Place them in the fridge or let them sit at room temperature until the chocolate has hardened fully. Then all that's left to do is enjoy!
Top tips
- Melt the chocolate slowly to prevent burning. If you're using the microwave, make sure to take it out and give it a stir every 20 seconds or so. You can also use a double boiler, which will melt it nice and slowly.
- To minimise mess, use a piping bag to pipe the chocolate into the cases and stick the Smarties on top. If you're making these with kids though, it's kind of the law that you HAVE to make a mess with marshmallow top hats- it's all part of the fun!
- For a larger version, use jumbo marshmallows and put the melted chocolate into cupcake cases instead.
- Although milk chocolate is the traditional way, it can be swapped for equal amounts of white, dark or semi-sweet chocolate.
FAQs
Since these are made with regular chocolate and marshmallows, they will last for up to 2 weeks so they can be prepared well in advance. Keep them in an airtight container at room temperature for the best texture.
Yes, they can be frozen for up to 2 months. To do so, just pop them into airtight containers or ziplock bags. When you're ready to defrost them, place them on a plate and let them sit out at room temperature for an hour or so, or put them in the fridge overnight. Once defrosted, do not refreeze.
Chocolate top hats have approximately 98 calories per serving (1 top hat). The rest of the nutritional information can be found in the recipe card just below. Please note that these figures are estimated and will vary depending on which brands and how much chocolate you use for each one.
Smarties can be replaced with any other colourful sweets such as Skittles, Dolly Mixtures or Jelly Tots. You can even just skip them completely and have just a blob of milk chocolate on top.

More old school party treats:
- Marshmallow Rice Krispie Cakes
- Chocolate Cornflake Cakes
- White Chocolate Rice Krispie Cakes
- Golden Syrup Cornflake Cakes
- Chocolate Fairy Cakes
- Chocolate Chip Fairy Cakes
I hope you like these marshmallow top hats! If you make them at home, please leave a comment and rating to let me know what you think. Enjoy!

Marshmallow Top Hats
Ingredients
- 200 g Milk chocolate (7oz)
- 15 Marshmallows
- 15 Chocolate Smarties
Instructions
- Place 15 Petit Four cases onto a baking tray, board or plate.
- Break the chocolate into pieces and melt it in a heatproof bowl.
- Pipe or spoon some chocolate into each Petit Four case. Around 1 teaspoon of chocolate per case is perfect.
- Add a marshmallow to each case, pressing gently to help it stick to the melted chocolate.
- Pipe or spoon a small blob of chocolate onto each marshmallow and use it to stick on the Smarties.
- Place in the fridge for around 1 hour or until the chocolate has fully hardened.
Video
Notes
- Store in an airtight container for up to 2 weeks.
Leave a Reply